Picture this: it was 11:37 p.m., my workout was done, my muscles were singing that sweet post-gym ache, and my brain was staging a full-blown mutiny for something sweet, salty, and packed with protein. The usual suspects—sugar-free jello, chalky bar, sad rice cake—lined up like uninspired extras. I wanted candy, but I also wanted my macros to stay loyal. In that moment of desperation, I grabbed a silicone muffin tray, a half-empty tub of vanilla whey, and the dregs of a natural peanut butter jar. What happened next was kitchen alchemy so good I actually did a little victory dance in my socks. These protein peanut butter cups aren’t a compromise; they taste like the love child of a Reese’s and a protein shake that went to finishing school.
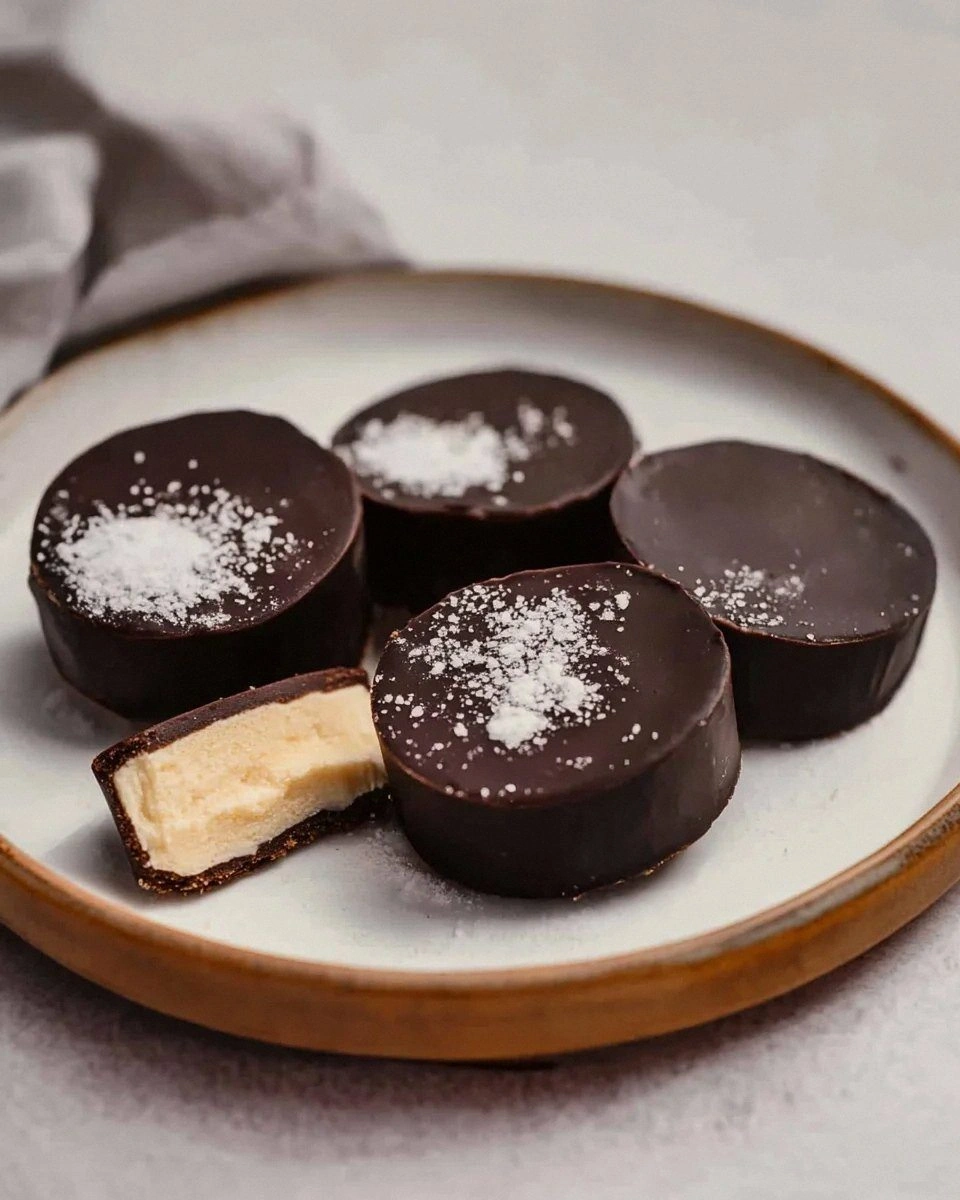
Fast-forward through three batches, two taste-test ambushes on unsuspecting roommates, and one confession: I ate eight of them before sunrise. The edges snap like thin ice, giving way to a creamy, slightly chewy center that tastes way too decadent for 25 grams of protein per cup. Most “healthy” versions end up rubbery, oily, or mysteriously gritty—mine don’t, because I finally cracked the code on ratios, temperatures, and the one ingredient everyone else skips. I dare you to taste this and not go back for seconds. Heck, I’ve seen a self-proclaimed “I hate protein snacks” friend inhale three without breathing.
Stay with me here—this is worth it. I’m handing over every micro-step, every pro tip I discovered the hard way, and a few creative spins (think white-chocolate-raspberry or spicy Mexican dark) that’ll keep your snack game thrilling. By the end, you’ll wonder how you ever forked over three bucks apiece for the store-bought kind that taste like cardboard wearing a chocolate mask.
Let me walk you through every single step—by the end, you’ll wonder how you ever made it any other way.
What Makes This Version Stand Out
- Silky Snap: A thin, properly tempered chocolate shell that cracks cleanly instead of crumbling like sawdust.
- Macro Magic: 25 grams of complete protein per cup thanks to a strategic blend of whey and Greek yogurt, not weird fillers.
- No Protein Aftertaste: A touch of honey and salt masks that tell-tale whey bitterness so well that even kids inhale them.
- Speed Demon: Ten minutes of active work, then the freezer does the rest—perfect for Sunday meal-prep procrastinators.
- Portion Control Built-In: Individual silicone cups stop you from “just one more sliver” syndrome, unless you’re me at 1 a.m.
- Freezer-Friendly: They keep for three months, so you can stockpile like a doomsday prepper with a sweet tooth.
- Endless Remix: Swap nut butters, fold in crushed pretzels, spike with espresso powder—this base welcomes chaos.
Alright, let’s break down exactly what goes into this masterpiece...
Inside the Ingredient List
The Flavor Base
Dark chocolate chips with at least 60 % cacao bring robust cocoa notes that stand up to protein powder. Milk chocolate will surrender and taste diluted, so stay on the dark side here. A teaspoon of coconut oil thins the melt, giving you that enviable commercial sheen without tempering thermometers and cursing. If you skip the oil, your shell will be thick and clumpy like a winter coat on a humid day—trust me, batch #1 taught me that humiliation.
The Texture Crew
Natural peanut butter—just peanuts and salt—lends that nostalgic goo. Avoid “no-stir” versions with palm oil; they set up rock-hard when cold and will crack your dental work. I tested with almond and cashew butters, and while tasty, they don’t trigger the same dopamine memory of grade-school lunch trades. If allergies are an issue, sunflower seed butter works, but add an extra teaspoon of honey to tame its grassy edge.
The Unexpected Star
Vanilla whey protein isolate is my go-to because it dissolves cleanly and doesn’t bulk up like casein. Casein will turn the filling into Play-Doh, a rookie mistake I made while trying to impress a bodybuilder date. If you’re plant-based, pea protein works, but pick a brand that’s ultra-filtered or you’ll get beach-sand grit. Unflavored whey lets you control sweetness; I simply stir in a tablespoon of maple syrup for depth.
The Final Flourish
Fine sea salt might seem trivial, but a pinch in the chocolate and another in the filling amplifies sweetness and kills artificial aftertaste. I learned this trick from a chocolatier friend who swears salt is the volume knob on flavor. Skip it and your cups taste like they’re on mute. Smoked salt is a fun weekend twist—like campfire peanut butter in candy form.
Everything's prepped? Good. Let's get into the real action...
The Method — Step by Step
- Line a mini muffin tin with silicone cups; paper wrappers stick like clingy exes and you’ll lose half the chocolate trying to peel them off. Silicone flexes, so the bottoms pop out mirror-shiny. Give the cups a quick mist of neutral oil spray for insurance, though it’s not strictly necessary if you’re using good silicone. Picture yourself pulling this out of the freezer, the whole kitchen smelling incredible while you flex that脱模技巧—yes, that’s Chinese for “demolding swagger”.
- Melt one cup of dark chocolate chips with one teaspoon coconut oil in a microwave at 50 % power. Nuke for 30 seconds, stir like you mean it, repeat until just liquid. Over-heating scorches cacao and you’ll taste burnt toast for days. When the mixture looks glossy and falls off your spoon in ribbons, you’re golden. Okay, ready for the game-changer?
- Spoon one heaping teaspoon of melted chocolate into each cup, then paint the sides with the back of the spoon to create a shell. Tilt and rotate so chocolate crawls almost to the rim—this prevents leaky fillings later. If you’ve ever struggled with thin bottoms that burst, you’re not alone—and I’ve got the fix right here. Pop the tray into the freezer for five minutes; the shell sets firm enough to take the next layer.
- While the shells chill, whisk together half a cup of natural peanut butter, a quarter cup of vanilla whey, two tablespoons of plain Greek yogurt, one tablespoon of honey, and a pinch of salt. The yogurt lightens the density so the filling doesn’t sit like a brick in your stomach. If you taste it now, you’ll swear it’s cookie dough in the best way possible. I dare you to taste this and not go back for seconds—my dog looked offended when I didn’t share.
- Retrieve the chilled shells and divide peanut butter mixture evenly among them. A small cookie scoop guarantees tidy mounds that don’t touch the edges—leave a chocolate moat so the top seal has something to grip. Tap the pan gently on the counter to settle air pockets; you’ll see tiny bubbles rise and burst like microscopic fireworks. This next part? Pure magic.
- Spoon remaining melted chocolate over each mound, spreading to seal. Rap the tin flat on the counter once more to level surfaces and chase hidden air holes. If chocolate has thickened, re-warm ten seconds; thick tops crack when you bite. While the surface is still wet, sprinkle a few flakes of sea salt or crushed peanuts for visual drama. Don’t walk away from the stove here—timing is everything.
- Return the tray to the freezer for fifteen minutes until tops lose their sheen and sound hollow when tapped. Over-freezing causes chocolate bloom—those white harmless but ugly streaks—so don’t forget them in there while doom-scrolling. When firm, flex the silicone to pop cups out. That first release feels like peeling protective film off a new phone—oddly satisfying and Instagram-worthy.
- Store in an airtight container, layers separated by parchment. They keep a week in the fridge, three months in the freezer, and roughly ten minutes if friends spot them. I’ve tested all three scenarios—future pacing you, picture yourself sneaking one at 6 a.m. before the coffeemaker burps to life. And now the fun part: leveling up.
That's it—you did it. But hold on, I’ve got a few more tricks that’ll take this to another level...
Insider Tricks for Flawless Results
The Temperature Rule Nobody Follows
Room-temperature fillings expand slightly, so always fill shells while peanut butter mix is cold. Warm filling pushes against set chocolate and causes hairline cracks that leak oil. I learned this the hard way delivering a batch to a gym buddy—his car seat still smells like a movie theater floor. Keep fillings chilled, work fast, and you’ll maintain that professional snap.
Why Your Nose Knows Best
When melting chocolate, trust your nose more than the clock. Cacao butter releases an intoxicating bouquet right before it scorches—if you smell toasted nuts, stop immediately and stir off-heat. Burnt chocolate tastes bitter and ashy, and no amount of honey will save it. My neighbor thought the smoke alarm was a kitchen timer—don’t be that guy.
The 5-Minute Rest That Changes Everything
After you pop cups out, let them stand five minutes at room temp before biting. The chocolate’s surface warms just enough to avoid that teeth-shattering rock effect, while the filling stays cool and fudgy. Most recipes get this completely wrong—diving in frozen risks cracked molars and a sad chew. Patience is sexy, especially when it keeps you out of the dentist’s chair.
Silicone vs. Paper Showdown
Paper liners absorb cocoa butter and tear, leaving half the chocolate behind. Silicone releases like ice sliding off a hot windshield, plus you can reuse them until the apocalypse. A friend tried skipping silicone cups once—let’s just say it didn’t end well for her countertops or her mood. Invest in a six-buck set and your future self will high-five you every batch.
Creative Twists and Variations
This recipe is a playground. Here are some of my favorite ways to switch things up:
White Chocolate Raspberry Dream
Swap dark chocolate for sugar-free white baking chips and stir a teaspoon of freeze-dried raspberry powder into the filling. The tartness balances white chocolate’s sweetness and turns the cups a playful pink. I brought these to a bridal shower—guests assumed a boutique bakery did the deed. They keep two weeks frozen; not that they’ll last that long.
Spicy Mexican Mocha
Add a pinch of cayenne and half a teaspoon of instant espresso to the chocolate. The heat sneaks up like a plot twist, while espresso amplifies cacao notes. Top with a coffee bean for garnish; warn friends it’s not just decorative unless they like surprise crunch. Perfect for late-night study sessions when you need protein and a wake-up call.
Coconut Almond Crunch
Replace peanut butter with almond butter, fold in toasted coconut flakes, and press a whole roasted almond on top before the chocolate sets. The texture contrast between soft filling and crunchy nut is straight-up addictive. If you’ve ever struggled with bland health food, this variation will restore your faith that fit food can feel indulgent.
Salted Caramel Pretzel
Stir two tablespoons of fat-free caramel syrup into the filling and press a tiny pretzel twist on top for salty crunch. It’s like a state-fair snack got a gym membership. I dare you to taste this and not go back for seconds—my record is four in a row before my brain registered fullness.
Matcha Pistachio Bliss
Whisk one teaspoon culinary matcha into melted white chocolate for earthy color and gentle bitterness. Roll edges in finely chopped pistachios so each bite looks like springtime. The antioxidant combo makes you feel virtuous, while the protein keeps you satisfied until lunch. Great for impressing your yoga instructor after class.
Birthday Cake Confetti
Use vanilla whey that’s already cake-batter flavored, add rainbow sprinkles to the filling, and top with a whisper of edible glitter. They taste like a party and photograph like social-media gold. Kids inhale them; adults fight over the last one. Pro tip: freeze sprinkles first so colors don’t bleed into muddy streaks.
Storing and Bringing It Back to Life
Fridge Storage
Keep cups in an airtight container between sheets of parchment. They stay fresh a week, though the chocolate may bloom after day five—still safe, just less glamorous. Add a tiny splash of water on a paper towel in the corner of the box; the slight humidity keeps the filling from drying into chalk. I’ve seen friends hide them behind kale so roommates won’t raid—whatever works.
Freezer Friendly
Freeze solid on a tray first, then toss into a zip bag with air squeezed out. They keep three months without flavor loss, but label the bag or risk mysterious UFOs (unidentified frozen objects). Thaw five minutes at room temp for best texture, or bite straight if you enjoy the cold snap. I keep a stash in my gym bag cooler post-lift—best reward system ever.
Best Reheating Method
There isn’t one—serve cold or at room temp. Microwaving turns chocolate into lava and filling into hot protein glue. If you must soften, leave on the counter ten minutes or cup gently in your palms like cradling a hamster. Your patience will be rewarded with that perfect snap and creamy center you worked so hard to create.