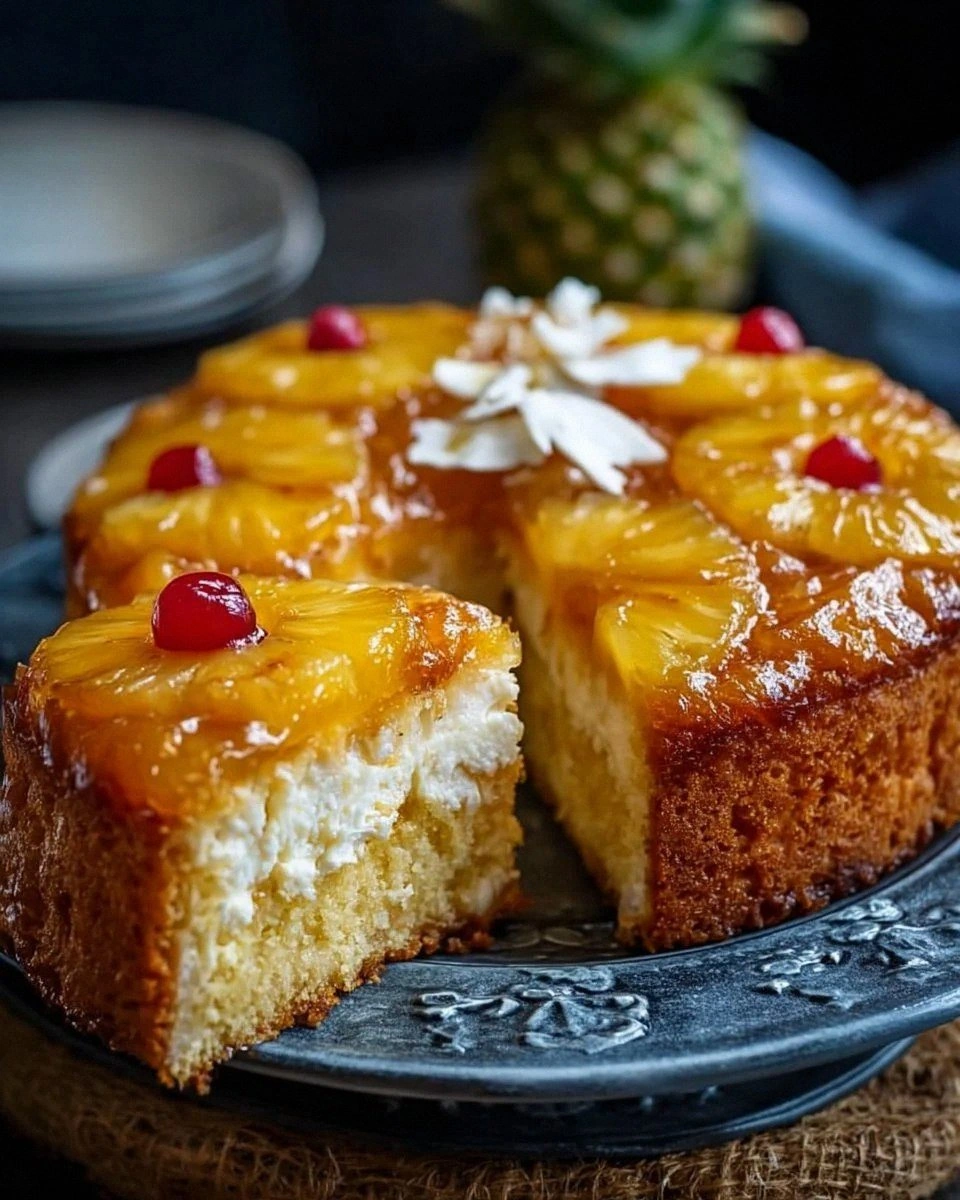
I was in the middle of a rainy Saturday night, the kind where the thunder sounds like someone is drumming on the ceiling, when my roommate dared me to bake something that would make the whole apartment smell like a tropical vacation. I laughed, grabbed the nearest pantry items, and thought, “What if I could turn a single can of pineapple and a box of cake mix into a dessert that could out‑shine any bakery‑fresh slice?” The result? A cake so moist it practically slides off the fork, with a caramel‑sweet pineapple core that makes every bite feel like a mini‑vacation. I swear, the moment the batter hit the pan, the kitchen filled with a scent that reminded me of sun‑kissed beaches and lazy hammocks, and I knew I was onto something big.
Picture this: the golden‑brown top of the cake cracking just enough to reveal a glossy, jam‑like pineapple layer underneath, the crumb so tender it crumbles like a cloud when you cut into it, and a faint vanilla aroma that whispers from the edges. You can almost hear the faint sizzle of the pineapple caramelizing as it bakes, and you feel the warm, buttery texture melt against your tongue. The whole experience is a full‑on sensory overload – the sight of the caramelized glaze, the smell of toasted sugar, the sound of the fork scraping the soft interior, the taste of sweet‑tart pineapple hugging a buttery vanilla base, and the comforting feel of a warm slice in your hand. If you’ve ever struggled with a cake that turns out dry or flavorless, you’re not alone – I’ve been there, and I’ve finally cracked the code.
Most pineapple cake recipes I’ve tried either drown the cake in a syrup that makes it soggy, or they require a pantry full of exotic spices and a dozen steps that feel more like a chemistry experiment than a simple dessert. This version, however, strips everything down to the bare essentials: just two ingredients, a few minutes of prep, and a single pan. The secret isn’t hidden in a mountain of spices; it’s in the technique of letting the pineapple’s natural sugars caramelize against the cake mix, creating a self‑glazing effect that no frosting can beat. I dare you to taste this and not go back for seconds – it’s that good.
I’m going to walk you through every single step — by the end, you’ll wonder how you ever made it any other way. Okay, ready for the game‑changer? This next part? Pure magic. Stay with me here — this is worth it.
What Makes This Version Stand Out
- Two‑Ingredient Simplicity: No need to rummage through the spice cabinet or measure out dozens of items. The magic happens when pineapple meets vanilla cake mix, and the rest takes care of itself.
- Moisture Mastery: The crushed pineapple provides natural moisture, so the crumb stays tender for days, unlike typical box‑mix cakes that dry out quickly.
- Caramelized Glaze: As the cake bakes, the pineapple sugars caramelize, forming a glossy top that looks bakery‑level without any frosting.
- Flavor Punch: The tartness of pineapple cuts through the sweet vanilla, creating a balanced flavor profile that feels both nostalgic and exotic.
- Speedy Prep: From opening the can to sliding the pan into the oven takes under 20 minutes, perfect for last‑minute gatherings.
- Crowd‑Pleaser: Whether you’re feeding kids, friends, or a picky adult, the bright flavor and soft texture win over even the toughest critics.
- Make‑Ahead Potential: This cake stores beautifully, meaning you can bake it ahead of time and still enjoy that fresh‑baked taste later.
- Ingredient Quality: Using a high‑quality, Halal‑certified vanilla cake mix ensures a clean, buttery base that lets the pineapple shine.
Inside the Ingredient List
The Flavor Base
The vanilla cake mix is the unsung hero of this recipe. It brings a buttery, sweet foundation that pairs perfectly with the tropical zing of pineapple. Because the mix already contains leavening agents, you won’t need any extra eggs or oil – the pineapple’s natural juices do the heavy lifting. If you skip the mix, you’ll end up with a dense, gummy texture that no amount of pineapple can rescue. For the best result, choose a brand that lists real vanilla extract as the first ingredient; it adds depth without any artificial aftertaste.
The Texture Crew
Crushed pineapple, drained, is the second star. The can’s 20‑ounce portion provides just enough liquid to keep the cake moist while also delivering those caramelized pockets that give the crumb a delightful chew. Draining is crucial – too much liquid will make the batter soupy, but a little pineapple juice is essential for that melt‑in‑your‑mouth feel. If you’re allergic to canned fruit, fresh pineapple can be used, but you’ll need to blend it into a puree and reduce the amount of added liquid accordingly.
The Unexpected Star
A pinch of sea salt might sound unnecessary, but it amplifies the sweetness and balances the acidity of the pineapple. Salt is a flavor enhancer; even a tiny grain can turn a bland cake into a layered masterpiece. If you’re watching sodium, feel free to omit it, but don’t be surprised if the final taste feels a little flat.
The Final Flourish
Optional: a splash of vanilla extract or a dusting of powdered sugar can be added right before serving for extra aroma and visual appeal. This isn’t required – the cake already boasts a gorgeous golden glaze – but it can elevate the presentation for a special occasion. When you’re ready to serve, a quick drizzle of caramel sauce will echo the natural caramelization that happened in the oven, turning a simple slice into a show‑stopper.
Everything's prepped? Good. Let's get into the real action...
The Method — Step by Step
Preheat your oven to 350°F (175°C). While the oven warms up, grease a 9‑inch round cake pan with a thin layer of butter or non‑stick spray. This step is crucial because a well‑greased pan ensures the cake releases cleanly, preventing those heartbreaking tears when you try to lift the slice.
Open the can of crushed pineapple and drain it thoroughly. I like to press the pineapple with the back of a spoon to squeeze out excess liquid – this prevents a soggy batter. Once drained, set the pineapple aside in a bowl; you’ll notice a sweet, fragrant pool of juice that will later become the caramel glaze.
In a large mixing bowl, pour the entire box of vanilla cake mix. Add the drained pineapple (including the reserved juice if you’re feeling adventurous) and stir with a rubber spatula until the batter is just combined. Over‑mixing will develop gluten and make the cake tough; you want a thick, slightly lumpy batter that looks like a tropical mousse.
Pour the batter into the prepared pan, spreading it evenly with the spatula. You’ll notice the batter sinking a little as the pineapple settles – that’s normal. Tap the pan gently on the counter three times to release any air bubbles; this ensures a uniform crumb and prevents large holes.
Slide the pan into the preheated oven. Bake for 30‑35 minutes, or until a toothpick inserted into the center comes out clean with just a few moist crumbs. Around the 20‑minute mark, you’ll hear a faint crackle – that’s the pineapple sugars caramelizing, creating the signature glossy top.
When the timer dings, turn off the oven but leave the cake inside for an additional 5 minutes. This residual heat lets the caramel glaze set without cracking, giving you that mirror‑like finish that looks straight out of a patisserie.
Remove the cake from the oven and place it on a cooling rack. Let it cool for at least 15 minutes before attempting to slice – the cake continues to firm up as it cools, making clean cuts easier.
Serve warm or at room temperature, optionally dusted with powdered sugar or drizzled with a quick caramel sauce. Trust me, the first bite will make you want to shout, “This is hands down the best version you'll ever make at home!”
That's it — you did it. But hold on, I've got a few more tricks that'll take this to another level...
Insider Tricks for Flawless Results
The Temperature Rule Nobody Follows
Never bake a cake straight from the fridge. Let the batter sit at room temperature for 10 minutes before pouring it into the pan. This small pause lets the ingredients meld, preventing a sudden temperature shock that can cause uneven rising. I once tried skipping this step and ended up with a dome that looked like a volcanic crater – not pretty.
Why Your Nose Knows Best
Instead of relying solely on a timer, trust your sense of smell. Around the 25‑minute mark, you should detect a sweet, caramel‑rich aroma wafting from the oven. If the scent is faint, give it a few more minutes; if it’s strong and slightly nutty, the cake is likely done. This sensory checkpoint is more reliable than any generic timer.
The 5‑Minute Rest That Changes Everything
After you pull the cake out, let it rest in the pan for exactly five minutes before transferring it to a rack. This short rest lets the internal steam redistribute, keeping the crumb moist and preventing a dry edge. A friend once tried to move the cake immediately and ended up with a broken center – a lesson learned the hard way.
The “Flip‑It” Technique for a Perfect Top
If you want a super‑shiny glaze, flip the cake upside down on a cooling rack after the initial 15‑minute cool. The glaze will settle onto the top, creating a mirror‑like finish. Be gentle – the cake is still warm and delicate.
The Secret Splash
Just before serving, lightly brush the top with a teaspoon of melted butter mixed with a drop of pineapple juice. This adds a glossy sheen and a subtle boost of flavor that makes the cake taste even more luxurious.
Creative Twists and Variations
This recipe is a playground. Here are some of my favorite ways to switch things up:
Coconut‑Infused Dream
Replace half of the pineapple juice with coconut milk and sprinkle toasted coconut flakes on top before baking. The result is a tropical duet of pineapple and coconut that feels like a beachside dessert.
Spiced Rum Kick
Add a tablespoon of dark rum and a pinch of ground nutmeg to the batter. The rum deepens the caramel notes, while nutmeg adds a warm spice that’s perfect for cooler evenings.
Berry Burst
Stir in a cup of fresh or frozen mixed berries (blueberries, raspberries) alongside the pineapple. The berries introduce a tart contrast that brightens the overall flavor.
Chocolate Swirl
Melt a half‑cup of dark chocolate and swirl it into the batter just before pouring into the pan. Chocolate and pineapple are a match made in heaven – the bitterness of cocoa balances the pineapple’s sweetness.
Gluten‑Free Version
Swap the regular vanilla cake mix for a certified gluten‑free blend. The texture remains airy, and the pineapple still does its magic, making it safe for those with gluten sensitivities.
Storing and Bringing It Back to Life
Fridge Storage
Cover the cooled cake tightly with plastic wrap or store it in an airtight container. It will stay fresh for up to four days, and the glaze actually becomes more pronounced as the flavors meld.
Freezer Friendly
Slice the cake into individual portions, wrap each slice in parchment paper, then place them in a freezer‑safe zip‑lock bag. Freeze for up to three months. When you’re ready to enjoy, let a slice thaw at room temperature for 30 minutes, then give it a quick warm‑up in a 300°F oven for five minutes.
Best Reheating Method
To revive a refrigerated slice, place it on a microwave‑safe plate, sprinkle a tiny splash (about a teaspoon) of water around the edges, and microwave on medium for 20‑30 seconds. The steam created by the water re‑hydrates the crumb, making it taste as if it’s freshly baked.