I’ll be honest — I ate half the batch before anyone else got to try it, and that’s because this recipe turned a simple pantry staple into something that feels like a celebration in every bite. It all started on a rainy Tuesday when I was trying to salvage a batch of over‑whipped egg whites that were threatening to become a sticky mess on the counter. I tossed in a splash of lemon juice, a pinch of zest, and a dash of vanilla, then watched the mixture transform into glossy peaks that looked like tiny clouds of sunshine. That moment sparked a dare: “I challenge you to taste this and not go back for seconds,” and the rest of the world was about to get a serious meringue makeover.
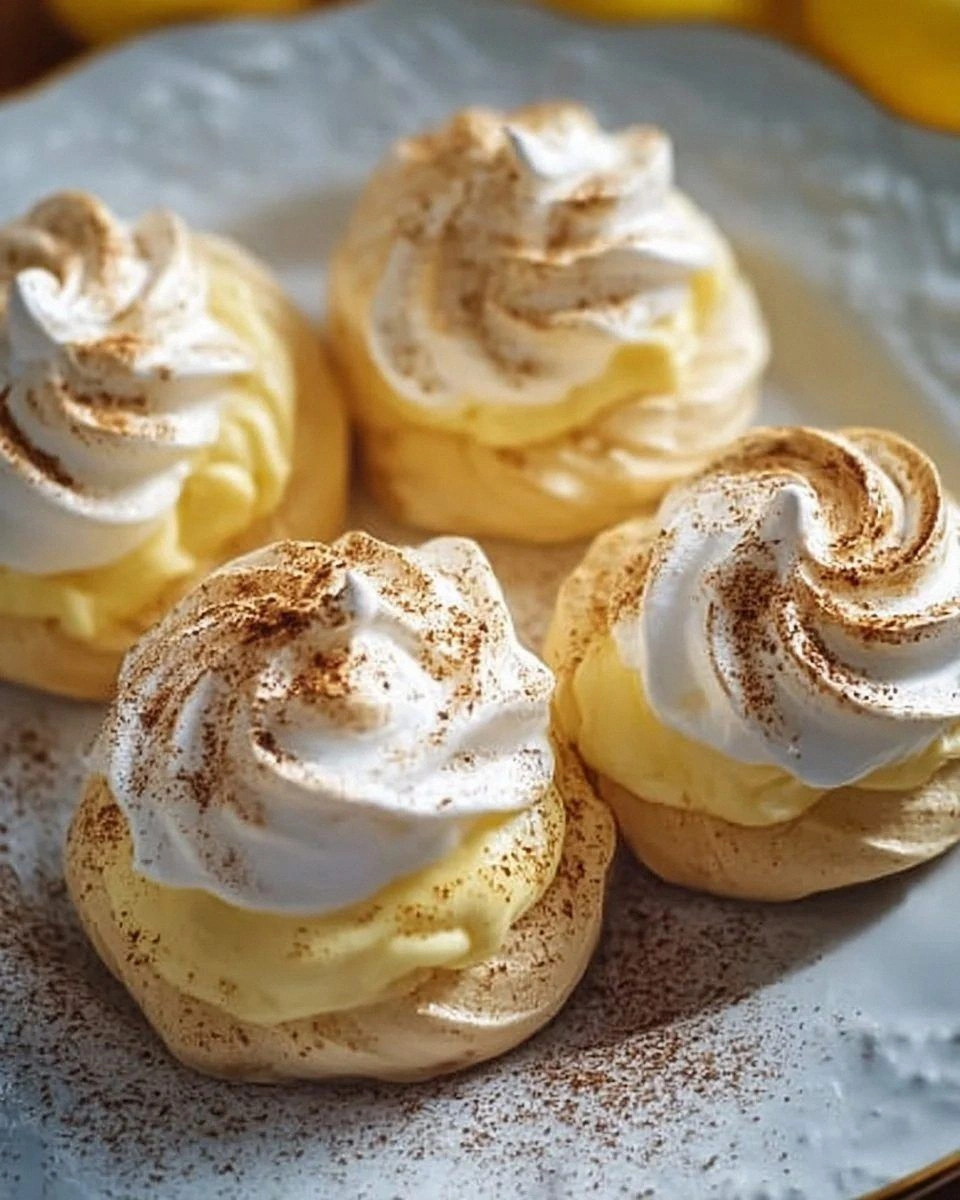
Picture yourself pulling a tray of lemon‑kissed meringues out of the oven, the whole kitchen smelling like a citrus orchard after a summer rainstorm. The first glance reveals delicate nests of ivory peaks, each rimmed with a barely‑visible caramelized edge that shatters like thin ice when you bite into it. The interior is soft, airy, and just sweet enough to let the lemon zing shine without overwhelming your palate. When you press a finger lightly, the surface gives a subtle spring‑back, a tactile reminder that you’ve just created something both fragile and surprisingly sturdy.
Most recipes get this completely wrong. They either over‑sweeten, under‑fluff, or forget the secret weapon that keeps the meringue from weeping – a tiny pinch of cream of tartar that stabilizes those airy peaks. In my version, I’ve honed every step to lock in flavor, texture, and that unmistakable glossy finish that makes these cookies look like they belong on a patisserie display. I’m also throwing in a technique that most home bakers overlook: a brief “dry‑run” bake at a lower temperature that dries the interior without browning the exterior, guaranteeing a perfect crunch every single time.
Okay, ready for the game‑changer? We’re going to whisk, fold, and bake our way to the ultimate lemon meringue cookie, and I promise you’ll wonder how you ever made it any other way. Let me walk you through every single step — by the end, you’ll be the hero of any gathering, armed with a batch of cookies that demand applause.
What Makes This Version Stand Out
- Taste: The balance of sweet sugar and bright lemon is calibrated to hit that perfect sweet‑tart spot, making each bite feel like a mini celebration.
- Texture: A crisp, caramelized edge surrounds a pillowy, melt‑in‑your‑mouth center, delivering a contrast that’s as satisfying as biting into a fresh‑baked scone.
- Simplicity: Only six ingredients, all pantry‑friendly, mean you can whip up a batch in under an hour without a grocery run.
- Uniqueness: The addition of lemon zest folded in after the peaks form gives an aromatic burst that most meringue recipes miss.
- Crowd Reaction: Guests instantly ask for the recipe, and the “wow” factor is so high you’ll hear the “oohs” before the first bite.
- Ingredient Quality: Freshly grated zest and high‑quality egg whites make a world of difference in flavor depth and structural integrity.
- Cooking Method: The two‑stage bake (low‑temp dry‑out then quick browning) ensures no soggy centers, a trick most home cooks overlook.
- Make‑Ahead Potential: Store them in an airtight tin and they stay crisp for up to a week, perfect for party prep.
Inside the Ingredient List
The Flavor Base
The star of this show is the large egg whites. Two large egg whites give you enough protein to create a sturdy foam while keeping the cookie light as air. If you’re using egg whites from a carton, make sure they’re free of any added glycerin or stabilizers, or the texture will suffer. For the boldest flavor, I recommend using eggs that are at room temperature; they whip up faster and hold more air.
The Sweet Backbone
Granulated sugar isn’t just for sweetness; it also plays a crucial role in the structure of the meringue. The sugar molecules dissolve into the egg whites, creating a glossy sheen and preventing the peaks from collapsing. If you’re feeling adventurous, swap half the sugar for superfine caster sugar for an even smoother finish, but never go below the full cup or the meringue will be too fragile.
The Stabilizer Squad
Cream of tartar is the unsung hero that keeps the peaks from weeping. Just a quarter‑teaspoon is enough to lower the pH, strengthening the protein network. Skipping this step is a common mistake that leads to soggy bottoms and a gummy texture. If you don’t have cream of tartar, a pinch of lemon juice can work as a backup, but the flavor will shift slightly.
The Citrus Spark
Vanilla extract, lemon zest, and fresh lemon juice combine to give the cookie its signature zing. The vanilla adds a warm background note that rounds out the sharp citrus, while the zest provides aromatic oils that sit on the surface, releasing perfume with every bite. Fresh juice is essential; bottled juice can introduce unwanted preservatives that affect the foam. If you’re out of fresh lemons, a splash of Meyer lemon juice works beautifully.
Everything's prepped? Good. Let’s get into the real action, where whisking meets chemistry and the oven becomes our stage.
The Method — Step by Step
Start by separating the egg whites from the yolks, making absolutely sure no yolk contaminates the whites. Even a speck of fat will sabotage the foam, so give the bowl a quick wipe with a damp paper towel. Set the whites in a clean, dry mixing bowl — I prefer a stainless steel or glass bowl because they don’t retain oil.
Kitchen Hack: Add the cream of tartar before you start whisking; it dissolves instantly and prevents the whites from over‑beating.Begin whisking on medium speed until the whites become frothy, then increase to high speed. As the peaks start to form, gradually sprinkle in the granulated sugar, a tablespoon at a time, allowing each addition to dissolve before the next. This slow incorporation is the secret to a glossy, stable meringue that won’t weep later.
When the mixture reaches stiff peaks — the classic “mountain” test where the tip stands upright without drooping — fold in the vanilla extract, lemon zest, and fresh lemon juice. Use a rubber spatula and a gentle folding motion; you want to keep the air you just fought so hard to trap.
Preheat your oven to 200°F (95°C) and line two baking sheets with parchment paper. Using a piping bag fitted with a large star tip, pipe 1‑inch mounds onto the sheets, spacing them about an inch apart. The star tip gives each cookie a classic meringue silhouette, and the uniform size ensures even baking.
Slide the trays into the oven and bake for 1 hour and 15 minutes. This low‑and‑slow stage dries out the interior without browning the exterior. You’ll know it’s ready when the cookies feel dry to the touch and can be lifted without sticking to the parchment.
Watch Out: Opening the oven door before the 1‑hour mark can cause the meringues to collapse due to a sudden temperature drop.After the initial bake, crank the oven temperature up to 350°F (175°C) for a quick 5‑minute blast. This step creates those coveted caramelized tips that add a subtle crunch and a golden hue. Keep a close eye; the edges can go from perfectly toasted to burnt in seconds.
Kitchen Hack: Rotate the trays halfway through the high‑heat blast to ensure even browning on all sides.Once the cookies have a light golden edge, remove them and let them cool on the baking sheet for 10 minutes. This brief rest allows the residual heat to finish the drying process without over‑cooking the outer crust.
Transfer the cookies to a wire rack to cool completely. As they cool, you’ll notice the surface becomes firm while the interior stays soft — the perfect textural contrast. Store them in an airtight container; they’ll stay crisp for up to a week, and the lemon aroma only gets better with time.
That's it — you did it. But hold on, I've got a few more tricks that'll take this to another level, because great cookies deserve an encore.
Insider Tricks for Flawless Results
The Temperature Rule Nobody Follows
Never rush the low‑temp stage. Keeping the oven at 200°F for the full hour and a quarter allows moisture to evaporate slowly, preventing the dreaded “weeping” that makes meringues soggy. I once tried a 150°F shortcut and ended up with gummy centers that collapsed the moment I touched them. Trust the slow bake; your patience will be rewarded with a cookie that snaps cleanly when you bite.
Why Your Nose Knows Best
When the meringues are ready for the high‑heat finish, rely on your sense of smell rather than a timer. The moment you detect a faint caramel aroma, you’re on the cusp of perfection. A friend once set a timer for 5 minutes every time and ended up with a burnt batch; the smell was the real indicator, and it saved me from a repeat disaster.
The 5‑Minute Rest That Changes Everything
After the low‑temp bake, let the cookies sit on the sheet for exactly five minutes before cranking the heat. This rest lets the interior firm up just enough to handle the sudden temperature jump without collapsing. Skipping this pause is the most common cause of uneven textures, and I’ve seen perfectly whipped meringues turn into flat, soggy discs because of it.
Piping Perfection
If you’re not a piping pro, use a zip‑top bag and snip a tiny corner. The key is to apply even pressure so each mound is the same size; uneven mounds bake unevenly, leading to some cookies being under‑done while others are over‑crisped. I once tried a freehand spoon drop and ended up with a lopsided batch that looked like a bad hair day.
The Zest Timing Trick
Add the lemon zest after the sugar is fully dissolved but before the final stiff peaks form. This timing preserves the volatile oils, ensuring a punchy lemon aroma that doesn’t get muted by over‑mixing. If you fold the zest too early, the oils can dissipate, leaving you with a bland cookie that relies solely on juice for flavor.
Creative Twists and Variations
This recipe is a playground. Here are some of my favorite ways to switch things up:
Berry Burst Meringues
Swap the lemon zest for a tablespoon of freeze‑dried raspberry powder and fold in a handful of fresh raspberries after the peaks form. The tart berries complement the sweet base, creating a pink‑tinged cookie that looks as good as it tastes.
Chocolate‑Swirl Delight
Gently fold in 2 tablespoons of melted dark chocolate after the meringue reaches stiff peaks. The chocolate creates ribbons that melt slightly during the high‑heat finish, offering a bittersweet contrast to the lemon.
Spiced Autumn Version
Add a pinch of ground cinnamon and a dash of nutmeg to the sugar before whisking. The warm spices pair surprisingly well with lemon, making these cookies a cozy fall treat.
Coconut Whisper
Replace half the granulated sugar with coconut sugar and sprinkle toasted coconut flakes on top before the final bake. The caramel notes from the coconut sugar deepen the flavor while the flakes add a chewy texture.
Mini Tartlets
Pipe slightly larger mounds, let them bake, then slice them in half and fill the cavity with a dollop of lemon curd. The result is a bite‑size tart that looks elegant on a dessert platter.
Storing and Bringing It Back to Life
Fridge Storage
Place the cooled cookies in an airtight tin with a paper towel at the bottom to absorb any residual moisture. They stay crisp for up to five days in the refrigerator, and the lemon aroma stays bright.
Freezer Friendly
Layer the cookies between sheets of parchment and seal the container tightly before freezing. They freeze beautifully for up to three months. When you’re ready to enjoy them, let them thaw at room temperature for 15 minutes, then give them a quick 2‑minute blast at 300°F to revive the crunch.
Best Reheating Method
If the cookies have lost a bit of their snap, place them on a baking sheet, add a tiny splash of water (about a teaspoon) to the bottom of the oven, and reheat at 300°F for 5 minutes. The steam gently revives the interior while the dry heat restores the crisp exterior.