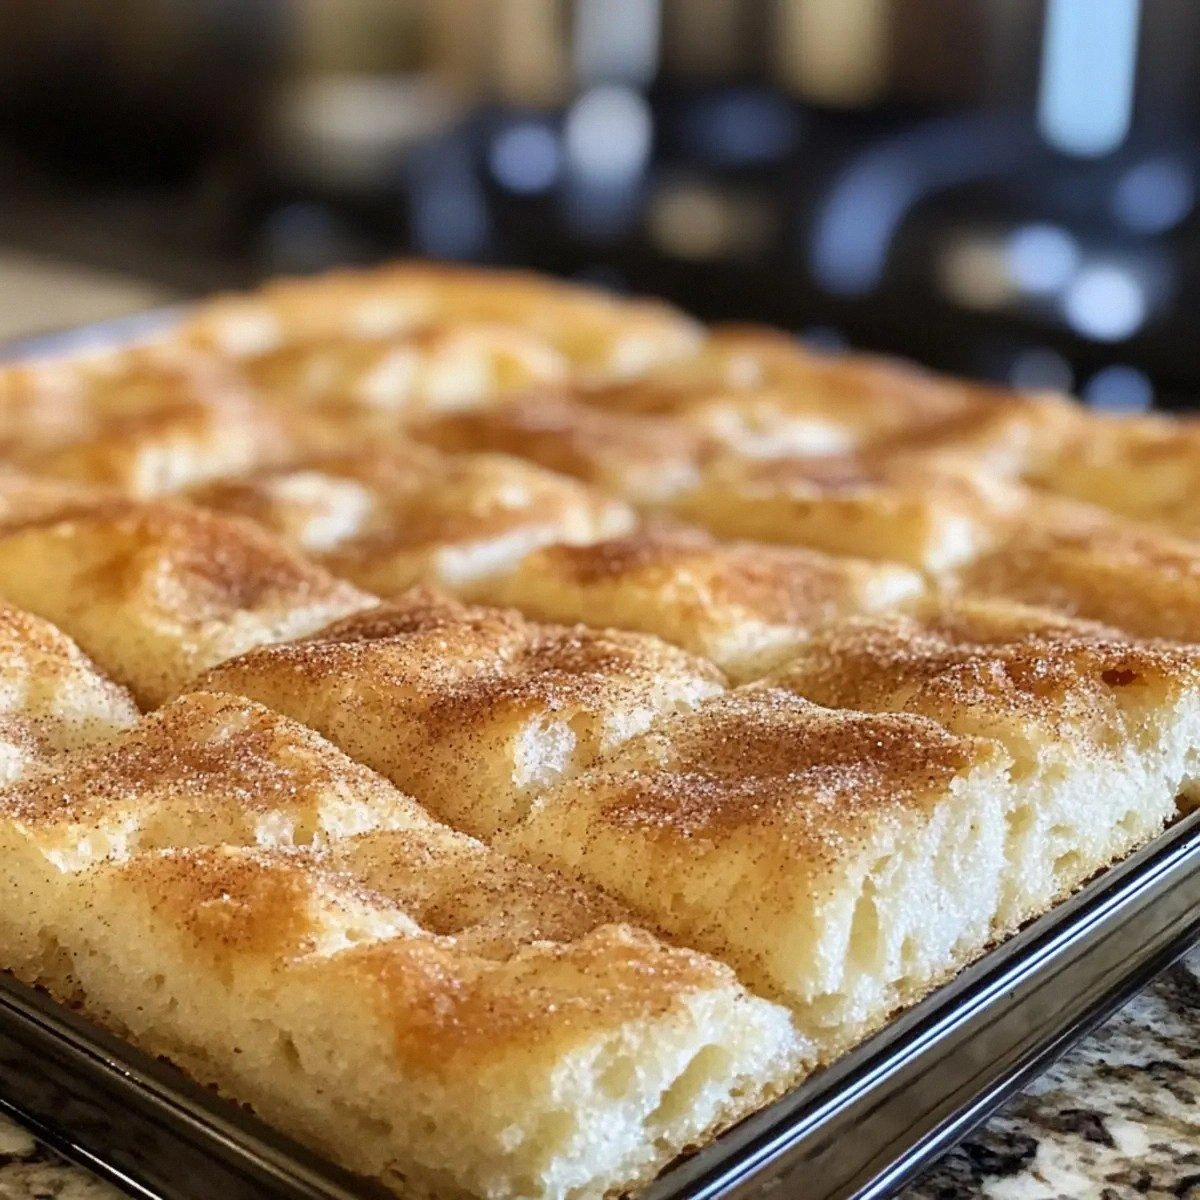
I’ll be honest — I ate half the batch before anyone else got to try it. It all started on a rainy Tuesday when my oven decided to betray me, flashing an error code that looked like a cryptic crossword clue. I was desperate for a dessert that could turn that gloom into a celebration, and a friend dared me to make a red velvet cake that would make even the most skeptical aunt gasp. I grabbed the pantry, stared at the red food coloring like it was a secret potion, and thought, “What if I could create a cake so moist it practically swims in its own buttery goodness?” The result? A cake that feels like a hug from the inside, with a frosting so tangy it makes your taste buds do a little happy dance.
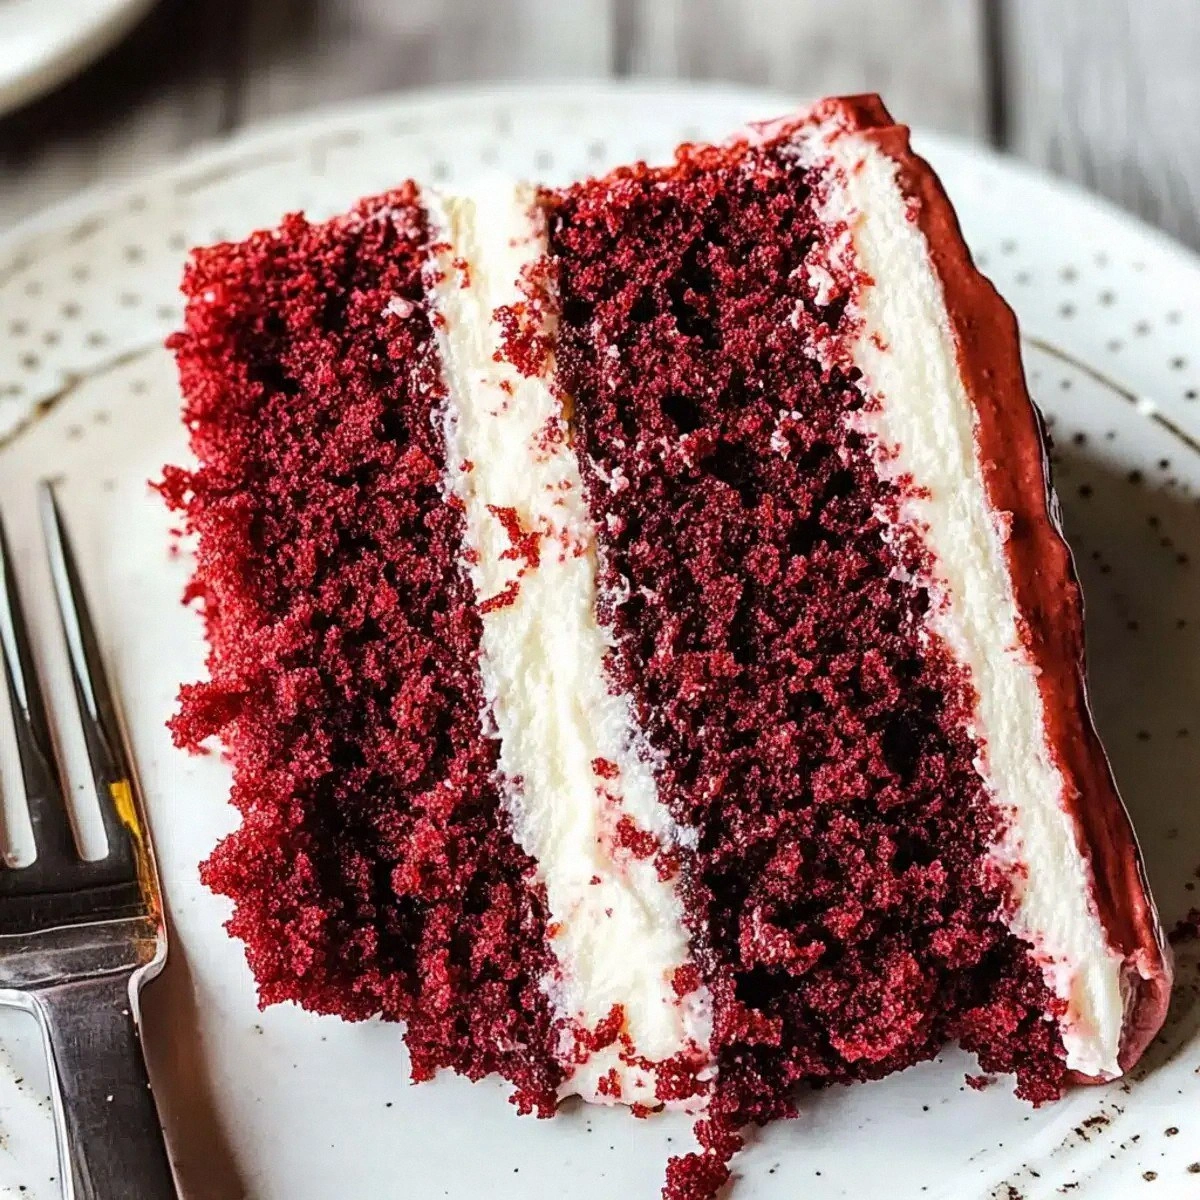
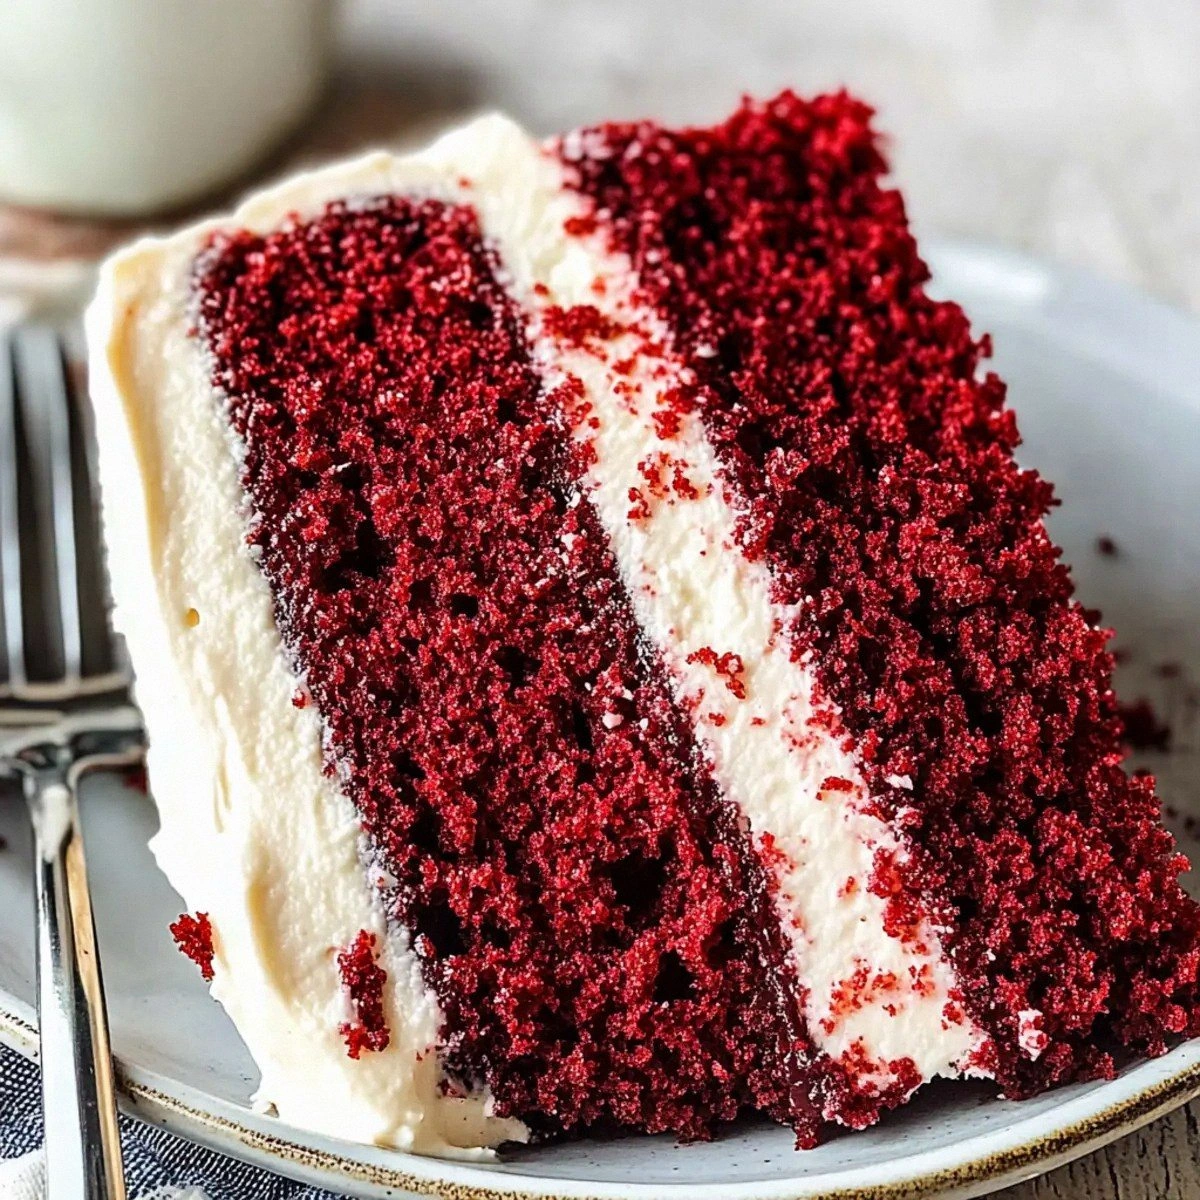
Picture yourself pulling this out of the oven, the whole kitchen smelling incredible, a deep, velvety aroma that whispers promises of decadence. The crumb is soft enough to melt on the tongue, yet sturdy enough to hold the generous layers of cream cheese frosting without collapsing like a soggy pancake. The frosting itself is a silky, slightly tangy cloud that clings to each slice like a lover refusing to let go. When you take that first bite, the contrast between the subtle cocoa undertone and the bright, buttery sweetness hits you like a perfectly timed drum roll at a fireworks show.
Most recipes get this completely wrong. They either over‑bake the cake, turning it into a dry brick, or they drown it in frosting, masking the delicate flavor with too much sweetness. Here’s what actually works: a precise balance of acidic buttermilk and vinegar that reacts with the baking soda to create a tender crumb, and a touch of cocoa that deepens the color without turning it brown. The secret weapon? A splash of heavy whipping cream in the frosting that keeps it light, airy, and just the right amount of luxurious.
I dare you to taste this and not go back for seconds. This is hands down the best version you’ll ever make at home, and I’m about to walk you through every single step — by the end, you’ll wonder how you ever made it any other way. Okay, ready for the game‑changer? Let’s dive in.
What Makes This Version Stand Out
- Moisture: The buttermilk‑vinegar combo creates a tender crumb that stays moist for days, so you can enjoy leftovers without sacrificing texture.
- Color: The red food coloring is balanced with a hint of cocoa, giving the cake a rich, natural‑looking hue that doesn’t look like a cartoon.
- Flavor: A whisper of cocoa adds depth, while the vanilla and a pinch of salt amplify the sweetness without overwhelming it.
- Frosting: The cream cheese frosting is lightened with heavy cream, making it silky rather than cloyingly dense.
- Simplicity: Only ten pantry staples and a few minutes of prep time, yet the result feels like a bakery masterpiece.
- Make‑Ahead: Both cake and frosting can be prepared a day ahead, allowing the flavors to meld and the frosting to firm up just right.
- Crowd‑Pleaser: Even the most skeptical eaters admit this cake is “too good to be true,” and it disappears faster than you can say “second slice.”
- Versatility: Perfect for birthdays, holidays, or a simple treat after a long day—no occasion required.
Inside the Ingredient List
The Flavor Base
All‑Purpose Flour is the backbone of any cake, providing structure while still allowing the crumb to stay tender. Using a high‑quality, unbleached flour ensures you get that perfect balance between strength and softness. If you skip it or substitute with a gluten‑free blend without xanthan gum, you’ll end up with a crumb that’s more crumbly than cake‑y. Swap tip: You can replace half the flour with almond flour for a nuttier flavor, but expect a slightly denser texture.
Granulated Sugar does more than sweeten; it helps aerate the batter when creamed with oil, creating tiny air pockets that expand during baking. Too little sugar and the cake will be flat and bland; too much and you risk a gummy interior. Choose fine‑grained sugar for quicker dissolution, especially important since we’re not beating butter and sugar together.
The Texture Crew
Cocoa Powder adds a subtle chocolate undertone that deepens the red hue without turning it brown. It also contributes a hint of bitterness that balances the sweetness of the frosting. If you’re allergic to cocoa, a teaspoon of instant coffee granules can mimic the flavor profile while keeping the color intact.
Baking Soda is the leavening hero, reacting with the vinegar and buttermilk to create carbon dioxide bubbles that lift the batter. Without it, the cake would be flat and dense. Make sure your soda is fresh—an old box loses its potency, and you’ll notice a heavy, un‑airy crumb.
Salt is the unsung champion that heightens every other flavor. A pinch of it can turn a bland cake into a taste sensation. If you’re on a low‑sodium diet, you can reduce it to ½ tsp, but don’t eliminate it entirely.
The Unexpected Star
Buttermilk brings acidity that reacts with the baking soda, creating a tender crumb and a slight tang that cuts through the sweetness. It also adds moisture, making the cake stay soft for days. If you don’t have buttermilk, whisk 1 cup of milk with 1 tbsp lemon juice or white vinegar and let it sit for five minutes.
Red Food Coloring is the visual star. I prefer a gel version because it delivers intense color without adding extra liquid that could thin the batter. A tablespoon of gel will give you that deep, velvety red that looks spectacular on any plate.
The Final Flourish
Cream Cheese is the heart of the frosting, delivering that tangy, creamy richness that makes each bite unforgettable. Use full‑fat cream cheese for the best texture; low‑fat versions turn the frosting grainy. Soften it to room temperature before mixing to avoid lumps.
Butter adds richness and helps the frosting set up nicely. When creamed with cream cheese, it creates a light, fluffy texture that spreads effortlessly. For a dairy‑free version, substitute with a plant‑based butter that melts similarly.
Powdered Sugar sweetens the frosting and gives it that glossy finish. Sift it to avoid any gritty texture. If you like a slightly less sweet frosting, you can reduce it to 3½ cups without compromising the structure.
Heavy Whipping Cream is the secret weapon that turns a dense frosting into a cloud‑like spread. It adds a luxurious mouthfeel and helps the frosting stay stable at room temperature. If you’re out of heavy cream, half‑and‑half works, but the frosting will be a tad less airy.
Everything's prepped? Good. Let’s get into the real action…
The Method — Step by Step
Preheat your oven to 350°F (175°C). Grease two 9‑inch round cake pans with a thin layer of vegetable oil, then line the bottoms with parchment paper. This double‑layered approach ensures the cakes release cleanly, preventing that dreaded “stuck‑to‑the‑pan” drama. While the oven heats, give the parchment a quick pat to make sure it’s flat—any wrinkles become bumps in the final cake.
In a large mixing bowl, whisk together the flour, cocoa powder, baking soda, and salt. This dry blend distributes the leavening evenly, so you don’t end up with pockets of bitter cocoa or salty spots. I like to sift the mixture twice; it feels like a mini‑spa for the flour, and the texture becomes feather‑light.
In a separate bowl, combine the vegetable oil and granulated sugar, beating with a hand mixer on medium speed for about 2 minutes. The mixture should look glossy and slightly thickened—this is where the sugar starts to dissolve into the oil, setting the stage for a tender crumb.
Add the eggs one at a time, beating well after each addition. Then stir in the vanilla extract, red food coloring, and vinegar. The mixture will take on a deep ruby hue; that’s the visual cue that the color is developing correctly. Watch out: If you add the vinegar too early, it can react with the baking soda before it’s mixed into the batter, leading to uneven rise.
Slowly pour the buttermilk into the wet mixture while the mixer runs on low. The batter will look a bit thin—that’s exactly what we want. Then, gradually add the dry ingredients, folding them in with a spatula until just combined. Over‑mixing at this stage can develop gluten, making the cake tough.
Divide the batter evenly between the two prepared pans, using a kitchen scale for precision. Smooth the tops with a spatula, then tap the pans gently on the counter to release any trapped air bubbles. The batter should settle into a uniform surface, ready for the oven’s embrace.
Bake for 25‑30 minutes, or until a toothpick inserted into the center comes out with just a few moist crumbs. The edges will start pulling away from the pan, and the cake will have a faint, toasty aroma that tells you it’s nearly done. Resist the urge to open the oven door early; every time you do, you lose heat and risk a collapsed center.
While the cakes cool in the pans for 10 minutes, prepare the frosting. Beat the softened cream cheese and butter together until light and fluffy—about 3 minutes on medium speed. Then gradually add the powdered sugar, one cup at a time, mixing on low to avoid a sugar cloud explosion. Finally, drizzle in the heavy whipping cream and the second teaspoon of vanilla extract, beating until the frosting is smooth and spreadable.
Once the cakes have cooled completely on a wire rack, run a thin knife around the edges to loosen them, then invert onto a serving plate. Place one layer on the plate, spread a generous dollop of frosting, then top with the second layer. Finish by frosting the sides and top, using an offset spatula to create smooth swirls or rustic peaks—your call.
That's it — you did it. But hold on, I've got a few more tricks that'll take this to another level…
Insider Tricks for Flawless Results
The Temperature Rule Nobody Follows
Never bake a cake straight from the fridge. Let the batter sit at room temperature for about 15 minutes before pouring it into the pans. This small pause equalizes the temperature throughout the mixture, ensuring a uniform rise. I once tried skipping this step and ended up with a dome that cracked like a dried-out riverbed.
Why Your Nose Knows Best
The moment the cake starts to smell nutty and slightly caramelized is your cue to check it. If you rely solely on the timer, you might overbake and lose that coveted moist crumb. Trust the nose—if the scent has deepened and the edges are pulling away, it’s time to pull the pans out.
The 5‑Minute Rest That Changes Everything
After baking, let the cakes rest in the pans for exactly five minutes before turning them out. This short rest lets the steam settle, preventing the cake from tearing as you release it. A friend tried to flip them immediately and ended up with a half‑melted disaster; a five‑minute pause saved my sanity.
Frosting Air‑Lock Technique
When spreading frosting, start from the center and work outward in a circular motion. This pushes any air bubbles toward the edges where they can be smoothed out. If you see a bubble, gently tap the side of the pan on the counter; the bubble will rise to the surface and pop.
The Chill‑Before‑Slice Secret
Refrigerate the assembled cake for at least 30 minutes before slicing. The frosting firms up, giving you clean, even slices without the frosting sliding off like a greased sled. I once served a warm cake and the frosting smeared everywhere—lesson learned.
Creative Twists and Variations
This recipe is a playground. Here are some of my favorite ways to switch things up:
Chocolate‑Swirl Velvet
Add 2 tablespoons of melted dark chocolate to the batter before folding in the dry ingredients. The chocolate ribbons create a marbled effect and deepen the flavor, perfect for chocolate lovers who still crave that signature red hue.
Citrus‑Infused Frosting
Replace the vanilla extract in the frosting with 1 tablespoon of freshly grated orange zest and a splash of orange liqueur. The citrus brightens the tangy cream cheese, giving the cake a festive, holiday‑ready twist.
Nutty Crunch Layers
Stir ½ cup finely chopped toasted pecans or walnuts into the frosting. The nutty crunch adds texture contrast and a buttery flavor that pairs beautifully with the velvet crumb.
Vegan Velvet
Swap the eggs for a flax‑egg mixture (2 tbsp ground flaxseed + 6 tbsp water per egg) and use coconut oil in place of vegetable oil. Use a plant‑based cream cheese and coconut cream for the frosting. The result is a dairy‑free version that still feels indulgent.
Spiced Velvet
Add a pinch of ground cinnamon and a dash of ground nutmeg to the dry ingredients. The warm spices give the cake a cozy, autumnal feel without overwhelming the classic red‑velvet profile.
Storing and Bringing It Back to Life
Fridge Storage
Cover the cake tightly with a layer of plastic wrap, then store in an airtight container. It will stay fresh for up to 5 days. The frosting may firm up a bit; let it sit at room temperature for 15 minutes before serving to regain its creamy texture.
Freezer Friendly
Wrap each cake layer in parchment, then in foil, and place them in a freezer‑safe bag. They’ll keep for up to 2 months. When you’re ready to enjoy, thaw overnight in the fridge, then bring to room temperature for an hour before frosting.
Best Reheating Method
To revive a slice, microwave it for 10‑12 seconds, but first add a tiny splash (about a teaspoon) of water to the plate. The steam revives the crumb, and the frosting softens just enough to melt in your mouth without turning rubbery.