I was in the middle of a midnight snack raid when my roommate shouted, “You’re still eating that boring store‑bought brownie?” I laughed, tossed the wrapper into the trash, and declared a culinary war. The kitchen became a battlefield of cocoa aromas and the clatter of a whisk, and somewhere between the burnt‑on‑the‑bottom fiasco of my first attempt and a triumphant “ding!” from the oven, I stumbled onto the ultimate cheat code: Greek yogurt stepping in as the secret moisture hero. This isn’t just another brownie; it’s a guilt‑free, fudgy revelation that will make you question every dessert you’ve ever known.
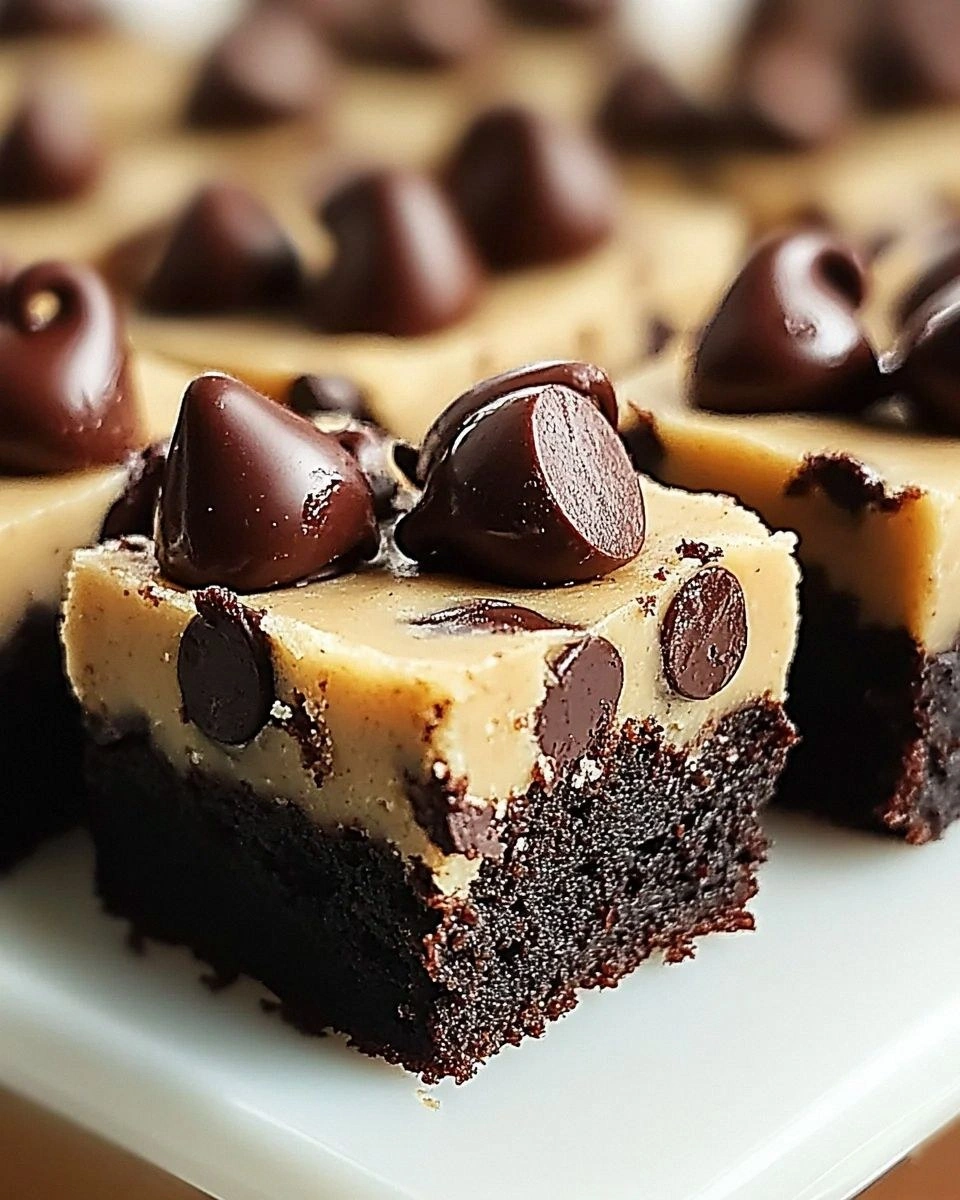
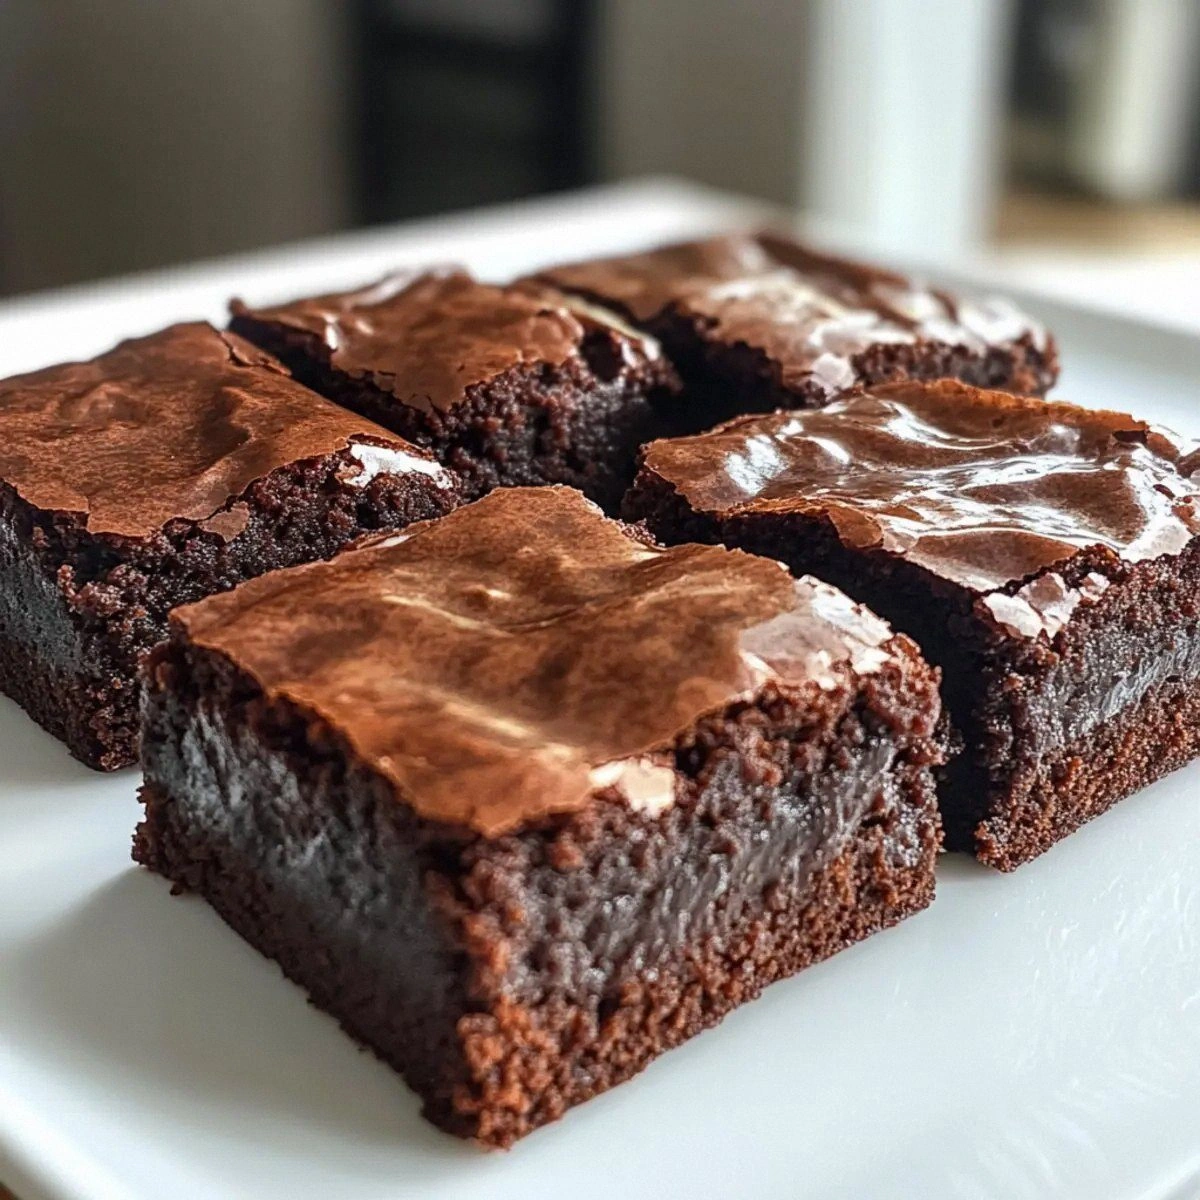
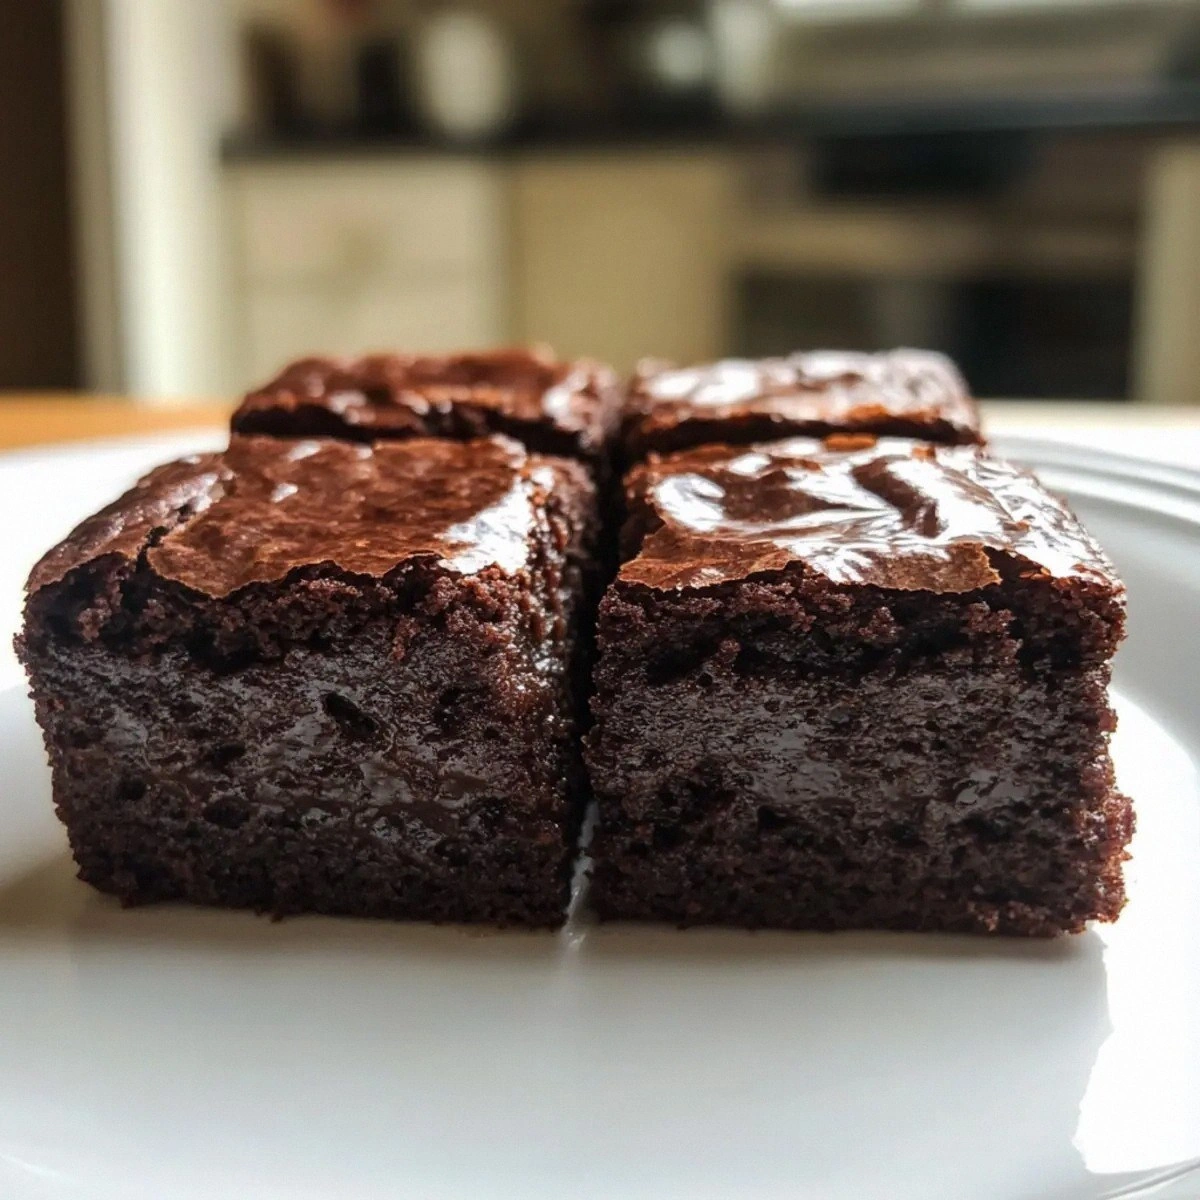
Imagine the moment you open the oven door and a wave of chocolatey steam rolls out, wrapping the room in a warm, comforting hug. The brownies themselves sit like glossy, dark jewels, their tops cracked just enough to reveal a soft, almost mousse‑like interior that yields to the fork with a sigh. The scent? A deep, earthy cocoa that whispers promises of indulgence while the faint tang of yogurt keeps the sugar from overwhelming your palate. The texture feels like you’ve found the sweet spot between a dense brownie and a silky pudding—pure, unapologetic decadence without the guilt that usually follows.
Why does this version outshine every other flourless brownie you’ve tried? First, the Greek yogurt replaces a chunk of butter, cutting saturated fat dramatically while adding a subtle tang that brightens the chocolate. Second, the absence of flour means the crumb stays ultra‑dense, yet the cocoa powder and melted chocolate create a glossy crust that snaps like a perfect caramelized top. Most recipes get the balance of wet to dry wrong, resulting in a dry, crumbly mess; this one hits the sweet spot every single time, thanks to a precise ratio that I’ve fine‑tuned after countless trial runs.
And here’s the kicker: I’m throwing in a dash of maple syrup, not just for sweetness but for that caramel‑like depth that sugar alone can’t provide. You’ll also hear me whisper, “I dare you to taste this and not go back for seconds,” because the flavor is that addictive. The technique that makes this possible? A gentle melt‑stir of chocolate and cocoa, then a quick whisk‑in of yogurt and eggs—no over‑mixing, no toughening. The result is a brownie that feels like it was made in a five‑star bakery, but it’s actually a five‑minute prep, 30‑minute bake affair.
Let me walk you through every single step — by the end, you’ll wonder how you ever made it any other way. Okay, ready for the game‑changer? Grab your apron, preheat that oven, and let’s dive into the most indulgent, guilt‑free brownies you’ll ever taste.
What Makes This Version Stand Out
- Fudgy Texture: The combination of melted dark chocolate and Greek yogurt creates a dense yet melt‑in‑your‑mouth interior that stays moist for days.
- Guilt‑Free Profile: Swapping butter for yogurt slashes saturated fat while keeping the richness you crave, making it perfect for health‑conscious sweet lovers.
- Flourless Simplicity: No flour means no gluten, no fuss, and a naturally gluten‑free dessert that still feels like a classic brownie.
- Maple Sweetness: Maple syrup adds a caramel undertone that plain sugar can’t match, giving each bite a layered complexity.
- Quick Prep: With only eight ingredients and a 15‑minute prep, you can go from pantry to oven faster than you can say “brownie binge.”
- Crowd‑Pleaser: Even the most skeptical friends admit they’d trade a slice of cake for one of these—trust me, I’ve seen it happen.
- Make‑Ahead Magic: These brownies keep their fudgy charm for up to a week in the fridge, and they freeze beautifully for future cravings.
- Ingredient Quality: Using high‑quality dark chocolate and full‑fat Greek yogurt elevates the flavor profile without any fancy techniques.
Alright, let's break down exactly what goes into this masterpiece...
Inside the Ingredient List
The Flavor Base
Dark chocolate chips are the heart of any brownie, providing that deep, bittersweet backbone. I recommend using 70% cacao or higher; the higher the cocoa content, the richer the flavor, and the less sugar you need. If you skip this, you’ll end up with a bland, one‑dimensional dessert that feels more like a plain cake than a brownie. A solid swap is high‑quality cocoa nibs, but they’ll add a crunchy texture you might not want.
The Texture Crew
Cocoa powder amplifies the chocolate intensity while also helping the batter set without flour. Use a Dutch‑process cocoa for a smoother, less acidic taste, or stick with natural cocoa if you prefer a brighter note. The plain Greek yogurt is the secret weapon: its protein structure gives the brownies a tender crumb, and its slight acidity balances the sweetness. If you’re dairy‑free, try a thick coconut yogurt—just be aware it adds a faint coconut flavor.
The Unexpected Star
Maple syrup isn’t just a sweetener; it brings a subtle caramel depth that plain sugar can’t mimic. The natural sugars in maple also help the brownies stay moist longer. If you don’t have maple on hand, a mix of honey and a splash of vanilla works, but the flavor profile will shift toward floral notes. When choosing maple, go for Grade A dark for the richest flavor.
The Final Flourish
Eggs act as the binder, giving the brownies structure without the need for flour. Two large eggs are enough to hold everything together while keeping the crumb airy enough to avoid a brick‑like texture. Baking soda provides a tiny lift, ensuring the edges pull away from the pan just enough to create that coveted “crackly top.” Finally, a pinch of salt amplifies the chocolate’s depth and balances the sweetness—never skip it.
Everything's prepped? Good. Let's get into the real action...
The Method — Step by Step
-
1.
Preheat your oven to 350°F (175°C). While the oven warms, line an 8‑inch square pan with parchment paper, letting the edges hang over for an effortless lift later. This step may sound trivial, but a properly heated oven ensures the brownies set evenly, giving you that coveted crackly top. That sizzle when the batter hits the pan? Absolute perfection.
Kitchen Hack: Place the parchment over the pan, then lightly butter the paper. This double‑layer of non‑stick ensures the brownies slide out cleanly without crumbling. -
2.
In a medium saucepan, combine the dark chocolate chips and cocoa powder over low heat. Stir constantly until the mixture is smooth, glossy, and just beginning to release a faint aroma of roasted cacao. Remove from heat and let it cool for a minute—this prevents the yogurt from curdling when it meets the hot chocolate.
-
3.
In a large mixing bowl, whisk together the Greek yogurt, maple syrup, and vanilla extract until the mixture is silky and slightly airy. Then, add the eggs one at a time, whisking after each addition to fully incorporate. You’ll notice the mixture thickens—this is exactly what you want.
Watch Out: If the chocolate is too hot, it will scramble the eggs. Ensure the chocolate is warm, not scorching, before combining. -
4.
Pour the melted chocolate into the yogurt‑egg mixture. Using a spatula, fold gently until the batter is uniform, glossy, and free of streaks. This is the moment of truth—look for a thick, velvety texture that clings to the spatula.
-
5.
Sprinkle the baking soda and salt over the batter, then fold just until incorporated. The soda will react with the acidity of the yogurt, creating tiny bubbles that give the brownies a subtle lift without making them cakey.
Kitchen Hack: Sift the cocoa powder and baking soda together before adding. This prevents lumps and ensures an even distribution of leavening. -
6.
Transfer the batter into the prepared pan, smoothing the top with a spatula. The batter will spread a little, but you want a uniform layer so the edges bake evenly. As the batter settles, you’ll hear a faint “hiss” as the moisture meets the warm parchment—this is normal.
-
7.
Slide the pan into the preheated oven and bake for 25‑30 minutes. Around the 20‑minute mark, check the edges; they should start pulling away from the sides of the pan and the top will have a thin, crackly crust. Insert a toothpick into the center—if it comes out with a few moist crumbs, you’re golden. This next part? Pure magic.
-
8.
Remove the pan from the oven and let the brownies cool in the pan for 10 minutes. Then, using the parchment overhang, lift them onto a wire rack to cool completely. While they’re cooling, the interior firms up just enough to slice cleanly without crumbling. I’ll be honest — I ate half the batch before anyone else got to try it.
That's it — you did it. But hold on, I've got a few more tricks that'll take this to another level...
Insider Tricks for Flawless Results
The Temperature Rule Nobody Follows
Never bake brownies at a temperature lower than 350°F. Lower temps cause the batter to spread too much, resulting in a flat, cakey texture. The heat at 350°F creates a rapid set on the outside while the center stays fudgy. A friend once tried 325°F and ended up with a brownie that looked more like a soggy pancake. Trust the rule, and you’ll get that perfect contrast between a crisp crust and a melt‑in‑your‑mouth interior.
Why Your Nose Knows Best
Your sense of smell is the ultimate doneness gauge. Around 20‑25 minutes, you’ll notice a sweet‑cocoa aroma intensifying and a faint caramel note from the maple. When those scents hit a peak, the brownies are just about done. If the smell fades, you’re likely overbaking. This sensory checkpoint beats any timer, especially on ovens that run hot or cold.
The 5‑Minute Rest That Changes Everything
Allow the brownies to rest on a wire rack for at least five minutes after removing them from the pan. This short pause lets the steam redistribute, preventing a gummy bottom. It also makes slicing cleaner; the edges will snap cleanly, and the interior stays intact. I once cut them straight out of the pan, and the pieces fell apart like crumbling sand—lesson learned.
The Double‑Check Chocolate Melt
If you’re using a microwave, melt chocolate in 20‑second bursts, stirring each time. This prevents scorching and ensures a glossy finish. Over‑melted chocolate can become grainy, ruining the smooth texture. A pro tip: add a teaspoon of coconut oil to the melt for extra shine without altering flavor.
The Secret of the Parchment Overhang
Leaving extra parchment hanging over the edges isn’t just for show. It acts as a built‑in “handle” for lifting the entire slab out of the pan, preserving that perfect square shape. It also reduces the risk of the brownies sticking, which can cause messy cracks. I’ve seen beginners wrestle with a stuck brownie and end up with a crumbly disaster—don’t be that person.
Creative Twists and Variations
This recipe is a playground. Here are some of my favorite ways to switch things up:
Nutty Crunch
Fold in ½ cup toasted chopped walnuts or pecans just before baking. The nuts add a buttery crunch that contrasts the fudgy interior, and they bring a dose of healthy fats. Ideal for those who love a bit of texture in every bite.
Espresso Kick
Dissolve 1 tablespoon of instant espresso powder in the maple syrup before mixing. The coffee amplifies the chocolate’s depth, creating a mocha‑like experience without actual coffee beans. Perfect for a post‑lunch pick‑me‑up.
Berry Burst
Swirl in ¼ cup of fresh raspberries or dried cranberries after the batter is in the pan. The tart berries cut through the richness, offering a bright pop of flavor. If you use fresh berries, they’ll burst during baking, leaving little pockets of juicy surprise.
White Chocolate Dream
Replace half of the dark chocolate chips with white chocolate chips and add a teaspoon of orange zest. The citrus lifts the sweetness, while the white chocolate adds a creamy counterpoint. This variation is a hit at brunches where guests crave something a little lighter.
Spiced Autumn
Add ½ teaspoon of ground cinnamon, a pinch of nutmeg, and a dash of pumpkin spice to the dry ingredients. The warm spices make these brownies feel cozy for cooler evenings, and they pair wonderfully with a dollop of whipped Greek yogurt on top.
Storing and Bringing It Back to Life
Fridge Storage
Place the cooled brownies in an airtight container and store them in the refrigerator for up to 5 days. The yogurt’s natural acidity helps preserve moisture, so they stay fudgy. When you’re ready to eat, let a slice sit at room temperature for 10 minutes to soften.
Freezer Friendly
Wrap the entire slab tightly in plastic wrap, then place it in a freezer‑safe zip‑top bag. They’ll keep for up to 3 months. To reheat, microwave a single piece on medium power for 20‑30 seconds, or bake a whole slab at 300°F for 10‑12 minutes. Add a tiny splash of water before reheating and cover loosely with foil; the steam revives the fudgy interior.
Best Reheating Method
For the ultimate warm‑brownie experience, preheat your oven to 325°F, place a slice on a parchment‑lined baking sheet, and heat for 5‑7 minutes. The edges will crisp just enough to contrast the molten center. If you’re in a hurry, a quick 15‑second burst in the microwave does the trick, but the oven method wins on texture.