I still remember the day I ruined three batches of cookies and a pan of brownies in one glorious afternoon of kitchen chaos. There I stood, flour in my hair, chocolate smeared across my cheek, staring at a counter that looked like a dessert crime scene. My best friend had challenged me to bring something "mind-blowing" to game night, and I was determined to deliver. But somewhere between the cookie dough that refused to cooperate and the brownies that turned into chocolate-flavored rubber, I had an epiphany that changed my dessert game forever.
Picture this: it's 2 AM, I'm running on pure sugar and determination, and I start wondering what would happen if I took the best parts of both disasters and mashed them together. The chewy edges of brownies that everyone fights over. The buttery, brown-sugar magic of cookie dough that nobody can resist sneaking straight from the bowl. What if — and stay with me here — what if we didn't have to choose? What if we could layer that soft, safe-to-eat cookie dough goodness right on top of rich, fudgy brownie bites sized perfectly for popping in your mouth?
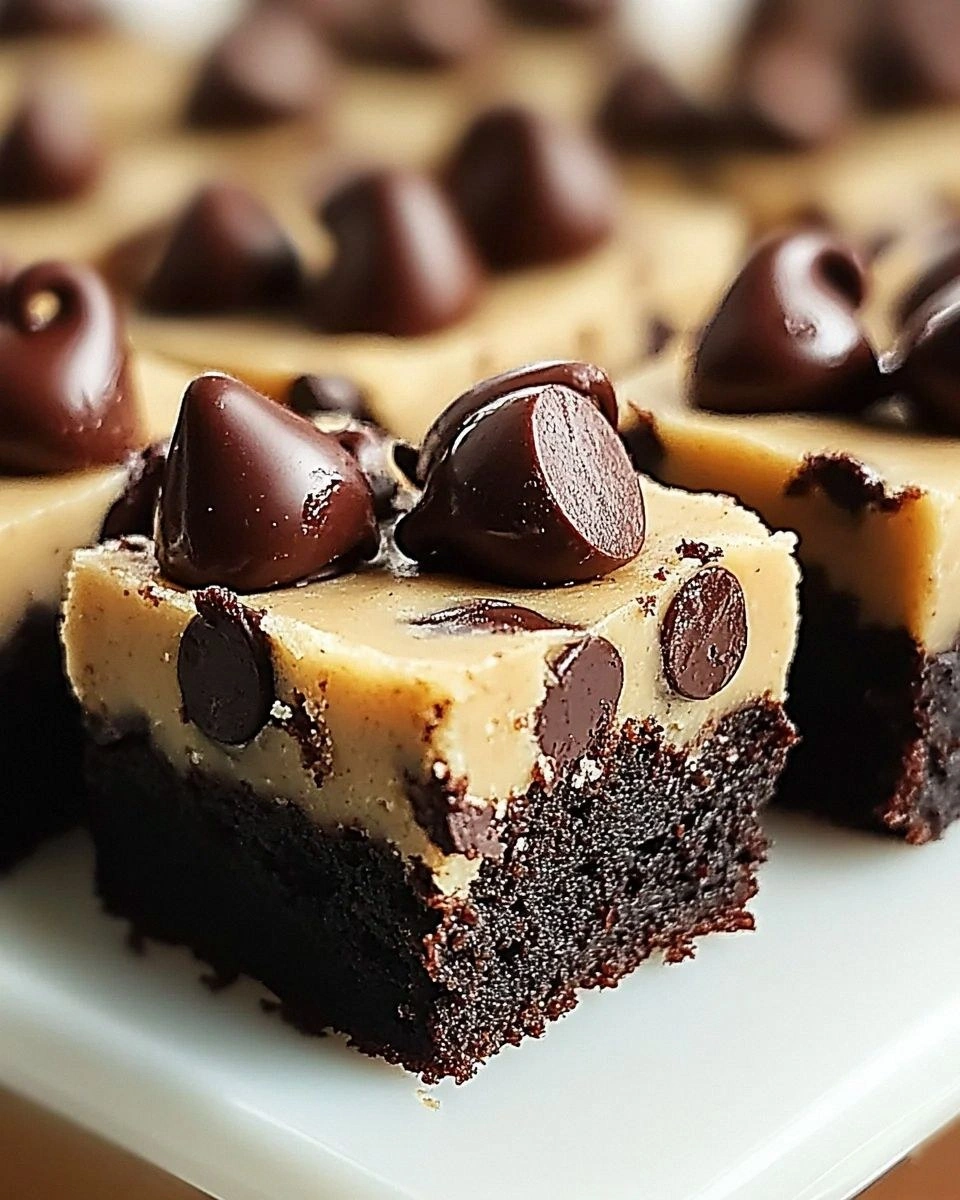
That night, I discovered something that made me the dessert hero of game night and every gathering since. These Chocolate Chip Cookie Dough Brownie Bites aren't just another dessert mashup — they're the answer to every late-night craving, every potluck panic, every "I need to impress someone with minimal effort" moment. The brownie base bakes up with those coveted crackly tops and fudgy centers, while the cookie dough layer stays soft and scoopable, studded with melty chocolate chips that create little pockets of heaven in every bite.
Here's the kicker that makes this recipe different from every other "cookie dough brownie" recipe floating around the internet: we're using heat-treated flour and skipping eggs in the cookie dough layer, so it's completely safe to eat raw. No more worrying about salmonella or weird textures. Plus, I've figured out the exact temperature and timing that keeps the brownie base fudgy without overcooking, while ensuring the cookie dough layer sets up perfectly. Let me walk you through every single step — by the end, you'll wonder how you ever made it any other way.
What Makes This Version Stand Out
Safe-to-Eat Cookie Dough: Unlike those recipes that just plop regular raw dough on top (hello, food poisoning risk), we heat-treat the flour and use condensed milk instead of eggs. You get all the authentic cookie dough flavor and texture without playing Russian roulette with raw eggs. I dare you to taste this and not go back for seconds — actually, I triple-dog dare you.
The Perfect Size: Most recipes make giant bars that are impossible to eat gracefully. These bite-sized beauties fit perfectly in cupcake liners, making portion control effortless and presentation Instagram-worthy. They're like the sophisticated older sibling of those messy, handheld desserts that leave you wearing more than you eat.
Texture Contrast: The brownie layer bakes up with those crispy edges that shatter like thin ice, giving way to a fudgy center that melts on your tongue. The cookie dough layer stays cool and soft, creating this incredible temperature and texture play that makes people close their eyes when they take the first bite. That moment when the warm brownie meets the cool cookie dough? Pure magic.
No Special Equipment Needed: Forget about candy thermometers, double boilers, or any of that fancy stuff. If you've got a mini muffin tin and basic baking tools, you're golden. Most recipes get this completely wrong, calling for equipment you'll use once and forget about. This is honest-to-goodness pantry baking at its finest.
Make-Ahead Champion: These actually taste better after a day in the fridge. The flavors meld together, the cookie dough firms up perfectly, and you can slice them into clean, professional-looking squares. Picture yourself pulling this out of the oven, the whole kitchen smelling incredible, knowing you've got dessert handled for the entire week.
Crowd Psychology: Bring these to any gathering and watch what happens. People hover around the dessert table, trying to act casual while they calculate how many they can grab before looking greedy. I've seen grown adults develop elaborate strategies involving "going to get water" just to snag another one. If you've ever struggled with desserts that disappear too fast, you're not alone — and I've got the fix.
Customizable Canvas: This recipe is your playground. Want to add peanut butter chips? Go for it. Prefer dark chocolate? Be my guest. Craving something with a salty-sweet vibe? A sprinkle of flaky salt on top transforms the whole experience. The base recipe is bulletproof, so you can experiment without fear.
Inside the Ingredient List
The Flavor Base
Butter is the foundation of both layers here, and quality matters more than you'd think. I'm talking about the good stuff — European-style butter with higher fat content that creates that impossible richness you can't fake. For the brownie layer, we melt it down with chocolate to create that glossy, crackly top that makes people think you went to pastry school. The cookie dough layer uses softened butter beaten with brown sugar until it looks like fluffy clouds of caramel-scented heaven. Skip the cheap margarine here — this is dessert, not a health food convention, and we want every bite to taste like celebration.
Chocolate selection is where most home bakers go wrong. Those chocolate chips in the cookie dough layer? They need to be the semi-sweet kind that holds their shape while getting slightly melty. But for the brownie layer, we're going in with a mix of unsweetened chocolate and good cocoa powder. The unsweetened chocolate gives us that deep, complex flavor that makes people ask "what's your secret?" while the cocoa powder adds intensity without extra fat. Trust me on this combo — it's what separates "good" from "where have these been all my life?"
The Texture Crew
Eggs are the unsung heroes of texture in the brownie layer. We're using two whole eggs plus an extra yolk for that fudgy, almost truffle-like consistency. The proteins in the eggs create structure while the fat in the yolk keeps everything tender. For the cookie dough, we're skipping eggs entirely and using sweetened condensed milk instead. This gives us that authentic cookie dough flavor and texture while keeping it completely safe to eat raw. The condensed milk also adds a subtle caramel note that makes people wonder why your cookie dough tastes better than anyone else's.
Flour might seem boring, but it's the difference between brownie bites that hold together and ones that crumble into a sad mess. All-purpose flour works perfectly here — no need for cake flour or bread flour. The key is measuring it correctly (spoon and level, don't scoop) and heat-treating it for the cookie dough layer. The brownie layer gets regular flour since it bakes at 350°F, which is hot enough to kill any bacteria. This is the moment of truth where precision matters — too much flour and your brownies turn into chocolate bricks, too little and they fall apart when you try to remove them from the pan.
The Unexpected Star
Brown sugar in the cookie dough layer isn't just for sweetness — it's hygroscopic, meaning it attracts moisture from the air. This keeps your cookie dough layer soft and scoopable even after days in the fridge. I use dark brown sugar for that deeper molasses flavor that makes people nostalgic for bakery cookies from childhood. The molasses in brown sugar also adds a subtle complexity that plain white sugar can't match. If you only have light brown sugar, it'll work, but you're missing out on that rich, almost butterscotch note that makes people close their eyes when they taste it.
Vanilla extract gets added to both layers because it's the background singer that makes the lead ingredients shine. Use real vanilla extract, not the imitation stuff that tastes like sadness and artificial everything. For the cookie dough layer, I go heavy on the vanilla — two full teaspoons — because we're not baking it, so that raw alcohol flavor won't cook off. This gives us that authentic cookie dough taste that transports you back to stealing bites from your grandma's mixing bowl. Okay, ready for the game-changer? A pinch of espresso powder in the brownie layer amplifies the chocolate flavor without making it taste like coffee. It's like turning up the volume on your favorite song — same song, just better.
The Final Flourish
Chocolate chips are where you can really have fun. Semi-sweet is classic, but try mixing in some mini chips with regular-sized ones for textural variety. The mini chips distribute more evenly through the cookie dough, while the larger ones give you those satisfying pockets of melted chocolate. I keep my chocolate chips in the freezer before adding them — this prevents them from melting completely into the dough and gives you those distinct chocolate bursts in every bite. Don't go overboard though — too many chips and your cookie dough layer becomes more chocolate than dough.
Sea salt might seem counterintuitive in a dessert, but it's the secret weapon that makes all the other flavors pop. A tiny pinch in both layers balances the sweetness and brings out the chocolate's complexity. I finish these with a light sprinkle of flaky sea salt on top — not enough to make them salty, just enough to make people wonder why they can't stop eating them. That little hit of salt on your tongue right before the sweetness kicks in? Pure magic.
The Method — Step by Step
- Start by heat-treating your flour for the cookie dough layer — this is non-negotiable if you want to eat it raw without worry. Preheat your oven to 350°F, spread 1 cup of flour on a baking sheet in an even layer, and bake for 5-7 minutes until it reaches 160°F. The flour should smell slightly toasty but not browned. Let it cool completely before using, or you'll end up with warm cookie dough that melts your chocolate chips into a swirly mess. I usually do this step first and let it cool while I prep everything else.
- Line your mini muffin tin with paper liners — trust me on this. I've tried the "just grease the pan" method and ended up with brownie bites that required a chisel to remove. The paper liners let you pop these out cleanly and make for easy grabbing at parties. Spray the liners lightly with cooking spray for extra insurance, especially if you're using the fancy foil ones that tend to stick. This tiny step saves you from the heartbreak of perfect brownie bites that crumble when you try to remove them.
- Melt your chocolate and butter for the brownie layer using the microwave method — it's faster and less fussy than a double boiler. Chop 3 ounces of unsweetened chocolate and combine it with 1/2 cup of butter in a microwave-safe bowl. Microwave in 30-second bursts, stirring between each, until smooth and glossy. Don't walk away from the microwave here — chocolate goes from perfectly melted to burnt and grainy in seconds. That sizzle when the butter hits the hot chocolate? Absolute perfection.
- Beat the eggs and sugar for the brownie layer until they reach the ribbon stage — this is where most people rush and end up with dense, heavy brownies. Use your mixer on medium-high speed for a full 3-4 minutes until the mixture is pale, thick, and falls from the beaters in a steady ribbon. This incorporates air that gives you that delicate, fudgy texture instead of chocolate concrete. The mixture should nearly double in volume and look like pale yellow frosting.
- Fold the chocolate mixture into the egg mixture gently — we're not making scrambled eggs here. Add the chocolate in three additions, folding with a spatula until just combined after each addition. Overmixing deflates all that beautiful air we just incorporated, leading to tough brownies that sink in the middle. The batter should look glossy and luxurious, like liquid chocolate velvet.
- Combine your dry ingredients separately and sift them directly into the wet ingredients. This prevents those unpleasant pockets of raw flour or cocoa powder that taste like bitter disappointment. Fold just until you see no more streaks of flour — a few small lumps are better than overmixed batter. The batter should be thick but pourable, like really good chocolate mousse that hasn't quite set yet.
- Fill your mini muffin cups about 2/3 full with brownie batter — they rise more than you'd think. I use a small cookie scoop for consistent sizing, which ensures even baking and professional-looking results. Tap the pan gently on the counter to release any air bubbles that could create craters in your brownie bites. Bake at 350°F for 12-15 minutes, until the edges look set but the centers still jiggle slightly when you shake the pan.
- While the brownies bake, make your cookie dough layer by beating softened butter with brown sugar until it's light and fluffy — this takes 2-3 minutes of serious mixing. Add the sweetened condensed milk and vanilla, beating until completely smooth. The mixture might look slightly curdled at first, but keep mixing and it will come together into a creamy, dreamy base that tastes like the essence of every great cookie you've ever eaten.
- Add your heat-treated flour gradually to the butter mixture, mixing just until combined. Stir in the chocolate chips last, folding them in gently to distribute evenly without crushing them. The dough should be soft and scoopable, like premium ice cream that's been sitting out for five minutes — firm enough to hold its shape but soft enough to spread easily. If it's too stiff, add condensed milk a teaspoon at a time until you reach the perfect consistency.
- Let the brownie bites cool completely before adding the cookie dough layer — I know it's tempting to rush, but warm brownies will melt your cookie dough into a puddle of buttery regret. Once cool, use a small cookie scoop or spoon to top each brownie with a generous mound of cookie dough. Press down gently to adhere, then smooth the tops with an offset spatula or the back of a spoon for that professional bakery finish.
Insider Tricks for Flawless Results
The Temperature Rule Nobody Follows
Room temperature ingredients aren't just a suggestion — they're the difference between cookie dough that spreads like frosting and cookie dough that holds its shape like a dream. Take your butter out of the fridge at least an hour before you start, or you'll end up with cold lumps that refuse to incorporate properly. Same goes for your eggs and condensed milk. Cold ingredients don't emulsify well, leading to a separated, greasy mess that no amount of mixing will fix. I set everything out on the counter before I even preheat the oven, giving everything time to come to temperature while I prep my pans and measure ingredients.
But here's the thing most recipes don't tell you — your "room temperature" might be different from mine. If your kitchen is cold (below 68°F), your butter won't soften properly. If it's hot (above 75°F), your butter gets too soft and your cookie dough will be greasy. Aim for butter that yields slightly to pressure but still holds its shape. It should feel like a perfectly ripe peach — soft but not mushy. This next part? Pure magic. If your butter is too cold, cut it into small cubes and let it sit for 10 minutes — the increased surface area speeds up softening without melting the edges like microwaving does.
Why Your Nose Knows Best
Forget timers — your nose is the most accurate kitchen timer you own. When the brownies are perfectly baked, your kitchen will fill with the scent of deep, rich chocolate that's slightly nutty and caramelized. If you smell sharp, acrid notes, you've gone too far and your brownies are overbaked. That moment when the aroma shifts from "raw chocolate" to "I need to eat this immediately" is your cue to check for doneness. I'll be honest — I ate half the batch before anyone else got to try it because I couldn't resist that intoxicating aroma.
The cookie dough layer has its own aromatic cues too. When you're mixing it, it should smell like the best bakery you've ever walked into — buttery, sweet, with hints of vanilla and brown sugar. If it smells flat or one-dimensional, you need more vanilla or salt. Your nose can detect imbalances that your taste buds will confirm later. This is why professional bakers always smell their ingredients before using them — rancid nuts, spoiled butter, or flat vanilla will ruin everything, and your nose catches these problems before your wallet pays the price.
The 5-Minute Rest That Changes Everything
After you fill the muffin cups with brownie batter, let the pan rest for exactly 5 minutes before putting it in the oven. This allows the air bubbles to rise to the surface and pop naturally, preventing those weird craters that make your brownie bites look like mini moonscapes. It also lets the flour hydrate slightly, which gives you a more even texture and prevents the dreaded dry edge with a raw center situation. Use this time to clean up your mixing bowls or start on the cookie dough layer.
The same principle applies after baking — let your brownie bites cool in the pan for 10 minutes before removing them. They're still setting up during this time, and moving them too early causes breakage and crumbling. But don't let them cool completely in the pan, or they'll stick to the liners like they're glued on. That 10-minute sweet spot is when they're firm enough to handle but still warm enough to release cleanly. A friend tried skipping this step once — let's just say it didn't end well, and she ended up serving brownie crumble over ice cream instead of the elegant bites she'd planned.
Creative Twists and Variations
This recipe is a playground. Here are some of my favorite ways to switch things up:
Triple Chocolate Threat
Replace half the semi-sweet chocolate chips in the cookie dough layer with white chocolate chips, and add a tablespoon of cocoa powder to the cookie dough base. The result is layers of milk chocolate, dark chocolate, and white chocolate that create a chocolate experience so intense, it should come with a warning label. The white chocolate adds creamy sweetness that balances the deeper chocolate notes, while the cocoa powder in the dough intensifies the chocolate flavor without adding more chips. This version is for the person who orders double chocolate everything and still wants more.
Salted Caramel Dream
Drizzle homemade or store-bought caramel sauce over the brownie layer before adding the cookie dough, then finish with a generous sprinkle of flaky sea salt. The caramel adds a buttery richness that seeps slightly into the brownie, creating these amazing pockets of gooey sweetness. The salt enhances everything — it's like turning the volume up on all the flavors while adding its own subtle complexity. This variation disappears fastest at potlucks, especially when people hit that caramel surprise in the middle.
Peanut Butter Paradise
Swap out 1/4 cup of the butter in the cookie dough layer for creamy peanut butter, and use peanut butter chips instead of chocolate chips. The peanut butter adds this incredible depth and richness that makes the cookie dough taste like the inside of a peanut butter cup. If you're feeling extra fancy, add a mini peanut butter cup on top of each brownie bite before adding the cookie dough layer. This version is dangerous — I once ate six in one sitting and had to lie down afterward, but it was totally worth it.
Mint Chocolate Madness
Add 1/2 teaspoon of peppermint extract to the cookie dough layer and use mint chocolate chips or Andes mint pieces. The cool mint flavor cuts through the richness of the brownie and creates this refreshing contrast that makes these incredibly addictive. They're like thin mints and brownies had a beautiful baby. This variation is perfect for holiday cookie exchanges or anytime you want something that tastes sophisticated but still satisfies that chocolate craving.
S'mores Explosion
Press a small piece of graham cracker into the bottom of each muffin cup before adding the brownie batter, then mix mini marshmallows and chocolate chips into the cookie dough layer. Use a kitchen torch to lightly toast the marshmallows on top for that authentic campfire flavor. The graham cracker base adds crunch and that familiar s'mores flavor, while the toasted marshmallows bring the whole campfire experience to your kitchen. Kids go absolutely wild for this version, but I've seen plenty of adults fight over the last one too.
Coffee Lover's Deluxe
Dissolve 1 tablespoon of instant espresso powder in 1 teaspoon of hot water and add it to the brownie batter. Use espresso-flavored chocolate chips in the cookie dough layer, or regular chips with an additional 1/4 teaspoon of espresso powder. The coffee enhances the chocolate flavor without making these taste like coffee — they just taste more chocolatey. This is the variation that converts people who claim they don't like coffee desserts. The espresso adds depth and complexity that makes people ask "what's in these?" in the best way possible.
Storing and Bringing It Back to Life
Fridge Storage
These keep beautifully in the fridge for up to 5 days when stored in an airtight container. The cookie dough layer actually improves after a day — the flavors meld together and the texture firms up to the perfect consistency. Layer them between sheets of parchment paper if you're stacking them, or they'll stick together and you'll lose that perfect dome shape. The cold temperature keeps the chocolate chips snappy and prevents the brownie from drying out, while the cookie dough stays perfectly scoopable.
Bring them to room temperature before serving for the best experience — about 15 minutes on the counter is perfect. Cold brownie bites are still delicious, but letting them warm slightly brings out all the chocolate flavors and makes the cookie dough layer soft and creamy again. If your fridge runs particularly cold, you might need 20-25 minutes. They're still safe to eat cold, but the flavor and texture are significantly better at room temperature.
Freezer Friendly
These freeze like champions for up to 3 months, making them perfect for emergency dessert situations. Flash freeze them first by placing them on a baking sheet until solid, then transfer to a freezer-safe container or bag. This prevents them from sticking together and lets you grab just one or two at a time. Let them thaw in the fridge overnight, or at room temperature for about 30 minutes. The texture holds up remarkably well — the cookie dough layer stays creamy and the brownie base remains fudgy.
For best results, wrap each brownie bite individually in plastic wrap before freezing. This protects them from freezer burn and lets you grab single servings without thawing the whole batch. I've been known to keep a secret stash in the freezer for those days when only chocolate therapy will do. Pro tip: they're actually pretty amazing partially frozen, like little chocolate ice cream sandwiches with cookie dough instead of ice cream.
Best Reheating Method
While these are designed to be eaten at room temperature or slightly chilled, sometimes you want that fresh-baked experience. The key is gentle warming — 10-15 seconds in the microwave is plenty. Any longer and the cookie dough layer melts into a puddle of buttery sadness. You want to warm just the brownie layer slightly while keeping the cookie dough cool and creamy. Add a tiny splash of water before reheating — it steams back to perfection and prevents the brownie from drying out.
If you're reheating multiple brownie bites, do them in batches rather than all at once. Microwave them on 50% power for better control, checking every 5 seconds. The goal is to take the chill off and slightly warm the brownie, not create hot spots that melt the chocolate chips. And now the fun part — serve them immediately while the brownie is warm and the cookie dough is still cool. That temperature contrast is absolutely incredible and makes these taste like they just came out of a professional bakery.