I remember the night my kitchen turned into a disaster zone. A rogue saucepan had exploded, splattering hot chocolate across the countertop, and I stared at the mess with a mix of horror and disbelief. That moment was the catalyst for my quest to create a dessert that would turn a kitchen catastrophe into a sweet triumph. I was determined to craft something that could rescue any culinary mishap with a single, indulgent bite.
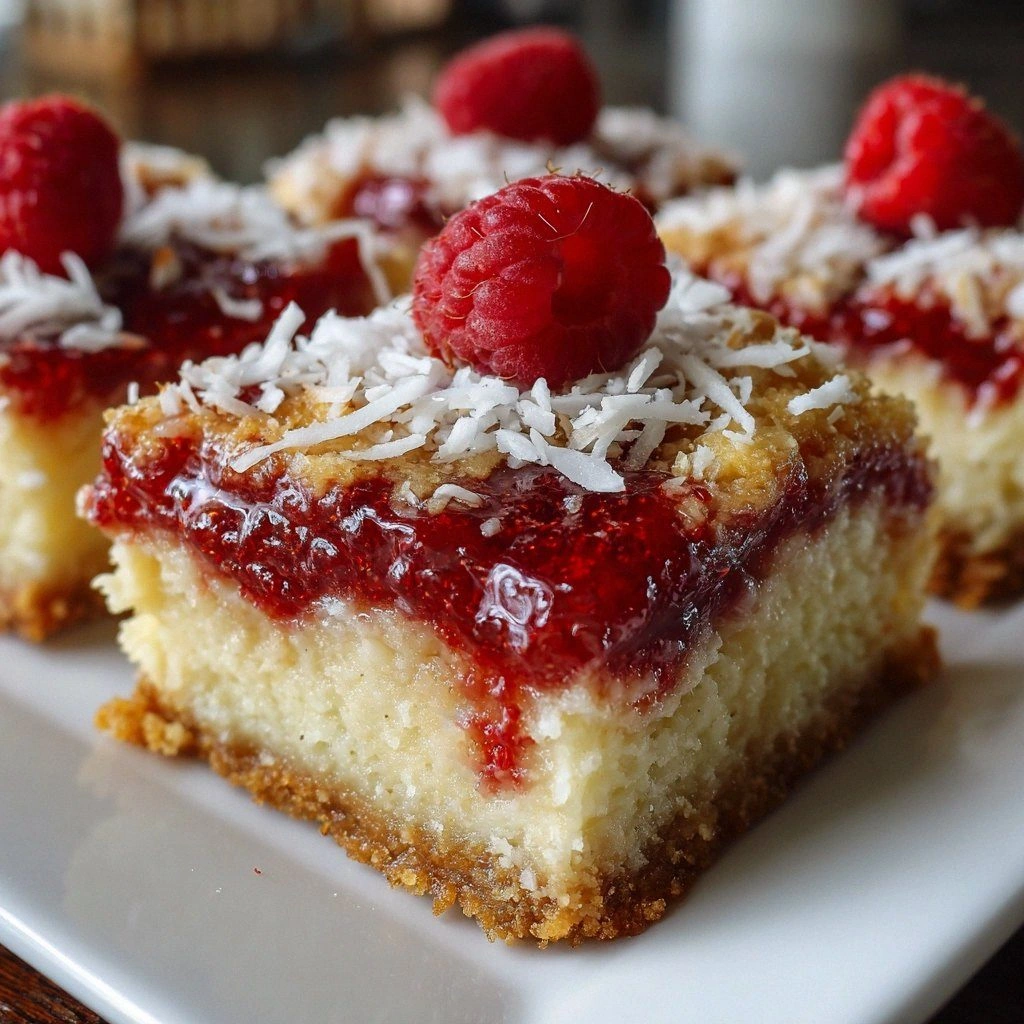
Fast forward to this afternoon, and the air in my kitchen is thick with the scent of toasted coconut and fresh raspberries. The sound of the blender whirring is a gentle lullaby, while the rhythmic tapping of my spoon against the mixing bowl creates a soothing percussion. The visual is a kaleidoscope of deep purple berries nestled in a creamy coconut base, all encased in a buttery almond crust that glistens like a promise of delight. The texture feels both airy and firm, a harmonious contrast that makes every bite feel like a revelation.
What makes this version stand out from every other recipe out there is the intentional layering of flavors and textures that dance together on your palate. The almond crust provides a nutty, slightly sweet foundation that balances the tartness of the raspberries, while the coconut filling adds a creamy, tropical nuance that feels like a vacation in a bite. I’ve discovered that a pinch of sea salt in the crust brings out the natural sweetness of the berries, while a dash of lemon zest in the filling cuts through the richness, creating a crisp finish. The combination of fresh raspberries and coconut milk gives the filling a silky mouthfeel that melts instantly.
But there’s a twist you won’t expect: a subtle hint of vanilla extract that lingers long after you finish. This detail elevates the bars from ordinary to extraordinary, adding depth that makes the dessert feel more refined. It’s a secret that I’ve kept close, and I’m excited to share it with you because it’s the difference between a good dessert and an unforgettable one. Picture yourself pulling these out of the oven, the whole kitchen smelling incredible, and the anticipation building with every crackle and pop.
I dare you to taste this and not go back for seconds. The first bite will be a burst of tart berries, followed by a velvety coconut swell that coats your tongue like velvet. The almond crust will give you a satisfying crunch that shatters like thin ice, leaving you craving more. If you’ve ever struggled with making bars that stay together, you’re not alone — and I’ve got the fix. This is hands down the best version you’ll ever make at home.
Most recipes get this completely wrong. They either overcook the filling or underbake the crust, resulting in a soggy mess. Here’s what actually works: a low oven temperature, a careful balance of wet and dry ingredients, and a little patience when the bars rest. I’ve experimented with different ratios, and the key is to keep the crust moist enough to hold together but dry enough to crisp. The result is a bar that holds its shape, yet gives a gentle, buttery bite that melts in your mouth.
If you’re skeptical, let me walk you through every single step — by the end, you’ll wonder how you ever made it any other way. The recipe is straightforward, but each step has its own character. The preparation feels like a ritual, the baking a moment of triumph, and the cooling a calm after the storm. I promise you’ll be amazed at how simple yet sophisticated these bars can be.
I’ve spent hours tweaking the ratios to find the perfect harmony between sweet and tart. The raspberries are the star, but they’re supported by the coconut and almond base. The almond flour adds a subtle nuttiness, while the shredded coconut provides a light, airy texture. The coconut milk gives the filling a silky consistency that feels like a tropical breeze. The combination of these ingredients is what makes the bars unforgettable.
And now, the fun part. I’ve added a tiny splash of lemon zest that not only brightens the flavor but also adds a subtle citrus undertone that lifts the entire dish. The lemon zest is a game-changer, providing a fresh contrast to the richness of the coconut and almond. It’s a detail that many recipes overlook, but it makes a huge difference. The result is a bar that’s both sweet and slightly tart, with a complex flavor profile that keeps you coming back for more.
Everything’s prepped? Good. Let’s get into the real action. The next few steps will guide you through the process of creating a crust that’s both sturdy and flavorful, a filling that’s silky and vibrant, and a topping that adds a final touch of caramelized coconut. I’ll show you how to achieve the perfect balance of textures and flavors, so you can impress your guests with a dessert that’s truly unforgettable. Stay with me here — this is worth it.
Okay, ready for the game-changer? This next part? Pure magic. The crust is the foundation of these bars, and it’s where the flavor really starts. By combining almond flour, shredded coconut, melted coconut oil, honey, and a pinch of sea salt, you create a base that’s both nutty and sweet. The key is to keep the mixture moist enough to hold together, but dry enough to crisp. Once you’ve formed the crust, let it set in the fridge while you prepare the filling.
I’ve found that chilling the crust for 10 minutes before adding the filling helps the bars hold their shape. The crust will firm up slightly, making it easier to press the filling into place. This small step is often overlooked, but it makes a big difference in the final texture. The result is a bar that’s sturdy yet tender, with a crust that’s perfectly toasted. If you skip this step, the bars may crumble or be too soft to slice cleanly.
What Makes This Version Stand Out
- Taste: The blend of fresh raspberries, creamy coconut, and nutty almond creates a flavor profile that’s both vibrant and comforting. The subtle lemon zest adds a bright finish that cuts through the sweetness. This harmony of flavors is what makes these bars unforgettable.
- Texture: The crust is crisp on the outside and tender on the inside, while the filling is silky and melt-in-your-mouth. The toasted coconut topping adds a final crunch that’s caramelized and satisfying. The contrast in textures keeps each bite exciting.
- Simplicity: Despite its complex flavor, the recipe uses only a handful of ingredients that you likely already have in your pantry. The steps are straightforward, and the process is forgiving. Anyone can master this recipe with minimal effort.
- Uniqueness: The almond crust is a game-changer, providing a nutty base that sets these bars apart from ordinary coconut bars. The addition of lemon zest gives a fresh twist that most recipes miss. The result is a dessert that feels both familiar and innovative.
- Crowd Reaction: These bars are guaranteed to impress at parties, potlucks, or a quiet evening at home. Guests will rave about the balanced sweetness and the delightful crunch. The bars are easy to portion, making them a perfect finger food.
- Ingredient Quality: Using fresh raspberries, unsweetened shredded coconut, and high-quality almond flour elevates the entire dish. The ingredients’ natural flavors shine through, creating a dessert that feels artisanal. The quality of the ingredients directly translates to the quality of the final product.
- Cooking Method: Baking at a low temperature ensures a tender crust and a silky filling. The method is simple yet precise, allowing for consistent results. The technique is easy to replicate, even for novice bakers.
- Make-Ahead Potential: These bars can be made a day in advance, and they stay fresh in the fridge for up to five days. The flavors develop over time, making them even more delicious. This makes them an ideal dessert for busy weeknights.
Alright, let's break down exactly what goes into this masterpiece. The key to a great bar is the balance between the crust, filling, and topping. Each component plays a vital role in the overall experience. The crust provides structure, the filling offers flavor, and the topping adds a final touch of crunch. Together, they create a dessert that’s both indulgent and sophisticated.
Inside the Ingredient List
The Flavor Base
Fresh raspberries are the star of the show. Their bright, tart flavor cuts through the sweetness of the coconut and honey, creating a balanced taste profile. If you skip the raspberries, the bars become overly sweet and lose their signature brightness. You can swap in frozen raspberries if fresh ones aren’t available, but thaw them first to avoid excess liquid. When selecting raspberries, look for firm, dark-colored berries that feel heavy for their size.
The Texture Crew
Almond flour and shredded coconut work together to create a crisp, nutty crust. The almond flour adds a subtle nuttiness that pairs perfectly with the coconut, while the shredded coconut provides a light, airy texture. If you omit the coconut, the crust will become denser and less flavorful. A good alternative is using oat flour, but you’ll need to adjust the liquid to keep the mixture cohesive. For the best results, toast the shredded coconut lightly before mixing to enhance its flavor.
The Unexpected Star
Coconut milk is the secret to the silky, creamy filling. It gives the bars a tropical, melt-in-your-mouth quality that’s hard to resist. Skipping coconut milk will make the filling dry and clumpy, which defeats the purpose of this dessert. If you prefer a dairy-free option, coconut cream is a great substitute, but it’s thicker, so you may need to thin it with a splash of water. The coconut milk’s natural sweetness also balances the tartness of the raspberries.
The Final Flourish
A pinch of sea salt is the final touch that elevates every component. Salt enhances the sweetness of the raspberries and the nuttiness of the almond crust, creating a harmonious flavor profile. If you’re watching sodium intake, use a low-sodium salt or reduce the amount slightly. Salt also helps to balance the overall taste, making each bite more complex. A tiny pinch is all you need to bring everything together.
Everything's prepped? Good. Let's get into the real action. The next steps will guide you through creating a crust that’s both sturdy and flavorful, a filling that’s silky and vibrant, and a topping that adds a final touch of caramelized coconut. I’ll show you how to achieve the perfect balance of textures and flavors, so you can impress your guests with a dessert that’s truly unforgettable. Stay with me here — this is worth it.
The Method — Step by Step
- Preheat the oven to 325°F (163°C) and line an 8-inch square pan with parchment paper. The low temperature ensures a gentle bake, preventing the crust from burning while allowing the filling to set properly. As the oven heats, the air inside your kitchen will feel warm and inviting. This step is crucial for achieving a tender, golden crust.
- In a large bowl, combine 1 cup almond flour, ½ cup shredded coconut, ¼ cup melted coconut oil, 2 tbsp honey, and a pinch of sea salt. Mix until the mixture resembles coarse crumbs. The coconut oil keeps the crust moist, while the honey adds a subtle sweetness that complements the berries. Be careful not to overmix; you want the crumbs to hold together.
- Press the crumb mixture firmly into the bottom of the prepared pan, creating an even layer. Use the back of a spoon or the flat side of a measuring cup to smooth the surface. This ensures a uniform crust that bakes evenly. If the mixture feels too dry, add a splash of water, one teaspoon at a time.
- Bake the crust for 12-15 minutes, or until it turns a light golden brown. Keep an eye on it; the edges should start pulling away slightly from the pan. This is the moment of truth, where the crust develops its flavor. Once done, remove it from the oven and let it cool while you prepare the filling.
- In a blender, combine 2 cups fresh raspberries, ½ cup coconut milk, ¼ cup maple syrup, 2 tbsp cornstarch, 1 tsp vanilla extract, zest of 1 lemon, and a pinch of sea salt. Blend until smooth, then stir in ¼ cup toasted shredded coconut. The cornstarch thickens the mixture, creating a silky filling that sets without being too firm.
- Pour the raspberry-coconut mixture over the cooled crust, spreading it evenly. The filling should cover the crust completely, creating a glossy surface. The lemon zest adds a bright aroma that signals the dessert’s freshness. Gently tap the pan on the counter to release any air bubbles.
- Return the pan to the oven and bake for an additional 20-25 minutes, or until the filling is set and the edges of the crust begin to brown. The filling will look slightly translucent at the center, indicating it’s ready. The aroma at this point is intoxicating, a blend of sweet berries and toasted coconut.
- Remove the bars from the oven and let them cool completely on a wire rack. Cooling allows the filling to firm up, making it easier to cut clean slices. While the bars cool, you can prepare a simple glaze or dust them with powdered sugar if desired. The bars will develop a beautiful, glossy finish.
- Once cooled, lift the bars out of the pan using the parchment paper. Slice them into 12 even pieces with a sharp knife. A hot knife will make clean cuts; wipe it between slices if necessary. The bars should hold together, showcasing the crisp crust and silky filling.
- Serve immediately or store in an airtight container in the fridge for up to five days. If you’re serving them at a party, let them sit at room temperature for 15 minutes to bring out the flavors. The bars are best enjoyed fresh, but they stay delicious even when refrigerated.
- Optional: For an extra touch of elegance, drizzle a simple glaze made from powdered sugar and a splash of lemon juice over the top. This adds a sweet, tangy finish that complements the berries. Let the glaze set for a few minutes before serving. The glaze will create a subtle shine and a burst of flavor.
That's it — you did it. But hold on, I've got a few more tricks that'll take this to another level. The final touches can elevate the bars from good to unforgettable, and I’ll share those secrets right now. Stay with me here — this is worth it.
Insider Tricks for Flawless Results
The Temperature Rule Nobody Follows
Many bakers bake at 375°F, but that temperature can scorch the crust before the filling sets. Lowering the oven to 325°F ensures a gentle bake, allowing the crust to brown slowly while the filling thickens properly. I’ve found that this slight adjustment makes the difference between a dry bar and a moist, flavorful one. If you’re using a convection oven, reduce the temperature by 25°F to avoid overcooking.
Why Your Nose Knows Best
The scent of the bars baking is a reliable indicator of doneness. When the crust starts to brown and the filling emits a sweet, fruity aroma, it’s time to pull them out. Trusting your nose can prevent the bars from drying out. If you’re new to baking, let your sense of smell guide you more than the clock.
The 5-Minute Rest That Changes Everything
After removing the bars from the oven, let them rest for 5 minutes before cutting. This brief pause allows the filling to set further, making the bars easier to slice and preventing them from falling apart. During this time, the flavors meld together, creating a richer taste. I’ve seen the difference it makes in the final texture.
Use Parchment Paper to Simplify Cleanup
Lining the pan with parchment paper not only prevents sticking but also makes cleanup a breeze. You can simply lift the bars out with the paper, and the pan stays clean. This is especially handy when you’re serving a crowd. If you’re short on parchment, a silicone baking mat works as a good alternative.
Keep the Filling Smooth
Blending the filling until completely smooth eliminates lumps and ensures a silky mouthfeel. If you find the mixture too thick, add a splash of coconut milk or water. A smooth filling also helps the bars set evenly, preventing uneven textures. Skipping this step can result in a grainy experience.
Store in an Airtight Container
Keeping the bars in an airtight container preserves their freshness and prevents them from absorbing odors from the fridge. This is essential if you plan to store them for more than a day. The airtight container also helps maintain the crispness of the crust. Remember to let the bars cool completely before sealing.
Creative Twists and Variations
This recipe is a playground. Here are some of my favorite ways to switch things up:
Chocolate Drizzle Delight
Drizzle melted dark chocolate over the bars after they cool. The chocolate adds a rich, bittersweet layer that pairs beautifully with the berries. This variation is perfect for chocolate lovers. It also adds a glossy finish that’s visually appealing.
Almond Butter Swirl
Swirl a tablespoon of almond butter into the filling before baking. The almond butter gives a creamy, nutty flavor that enhances the crust. This twist adds depth and richness. It’s a great way to incorporate more nutty notes.
Minty Freshness
Add a handful of fresh mint leaves to the filling for a refreshing kick. The mint balances the sweetness and adds a cool aroma. This version is ideal for summer gatherings. The mint also provides a subtle green hue.
Pistachio Crunch
Replace the shredded coconut with chopped pistachios for a nutty crunch. The pistachios add a distinct flavor and a pop of color. This variation is a hit among nut enthusiasts. It also gives the bars a slightly savory edge.
Lemon Yogurt Twist
Swap the coconut milk for Greek yogurt and add a tablespoon of lemon zest. The yogurt creates a tangy, creamy filling that pairs well with the berries. This variation is a lighter, protein-packed option. It’s especially good for brunch.
Spiced Pumpkin Variation
Add a pinch of pumpkin spice to the filling for a warm, autumnal flavor. The spice blend complements the berries and coconut nicely. This version is perfect for fall gatherings. It also adds a subtle sweetness.
Storing and Bringing It Back to Life
Fridge Storage
Store the bars in an airtight container at room temperature for up to 3 days. The crust remains crisp, and the filling stays moist. For best flavor, let the bars sit at room temperature for 15 minutes before serving. Avoid refrigerating if you prefer a softer texture.
Freezer Friendly
Wrap each bar individually in plastic wrap and place them in a freezer bag. They can be frozen for up to 3 months. When ready to serve, let them thaw at room temperature for 30 minutes. This method preserves the texture and flavor.
Best Reheating Method
To reheat, place the bars on a baking sheet and warm them in a preheated 300°F oven for 5-7 minutes. If you prefer a quick fix, microwave each bar for 10-15 seconds, but be careful not to overheat. A tiny splash of water before reheating helps steam the filling back to perfection. The bars will regain their silky texture.