I was standing in my kitchen on a cold December night, the kind where the wind howls outside and the only thing keeping you sane is the promise of sugar and cocoa. I had just attempted a classic peppermint bark, but the result was a sad, flat slab that tasted like a missed high‑five. I stared at the mess, muttering to myself, “There has to be a better way to combine chocolate and mint without turning it into a candy‑cane disaster.” That moment sparked a dare: I would create a cookie that could hold a silky peppermint filling, a chocolate shell that crackles like fresh snow, and a festive look that would make even the Grinch grin.
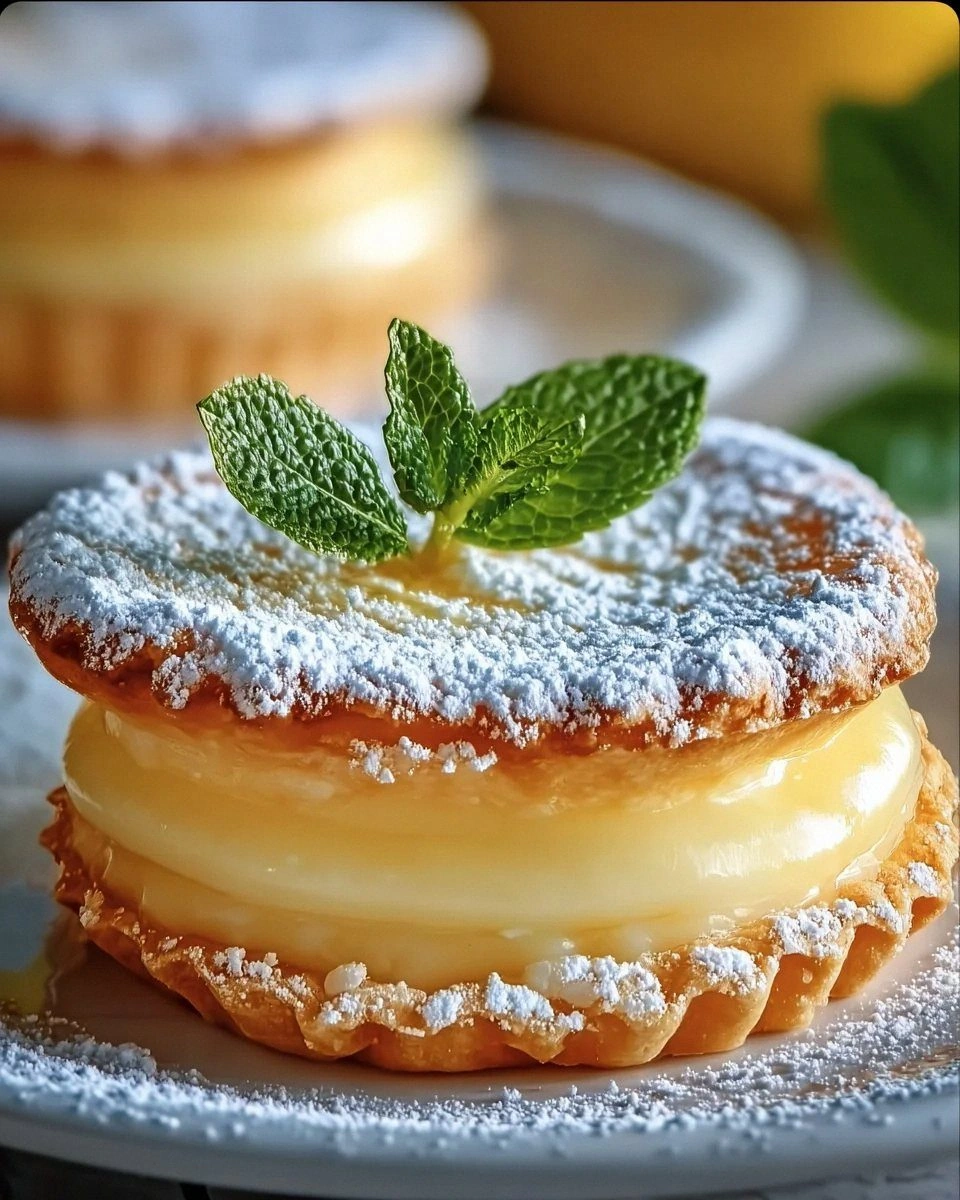
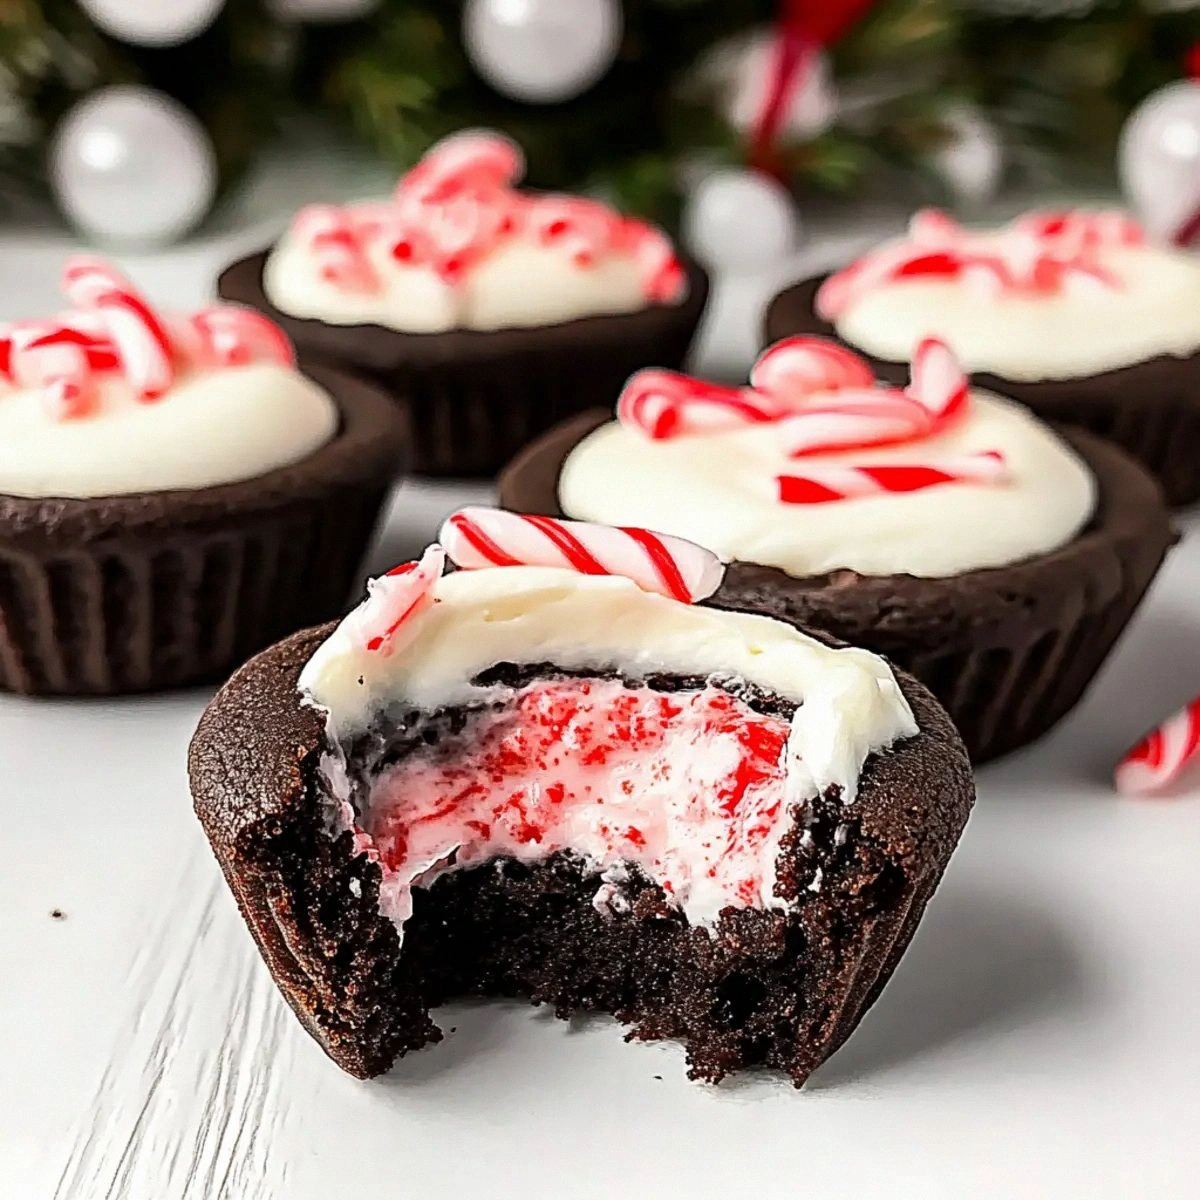
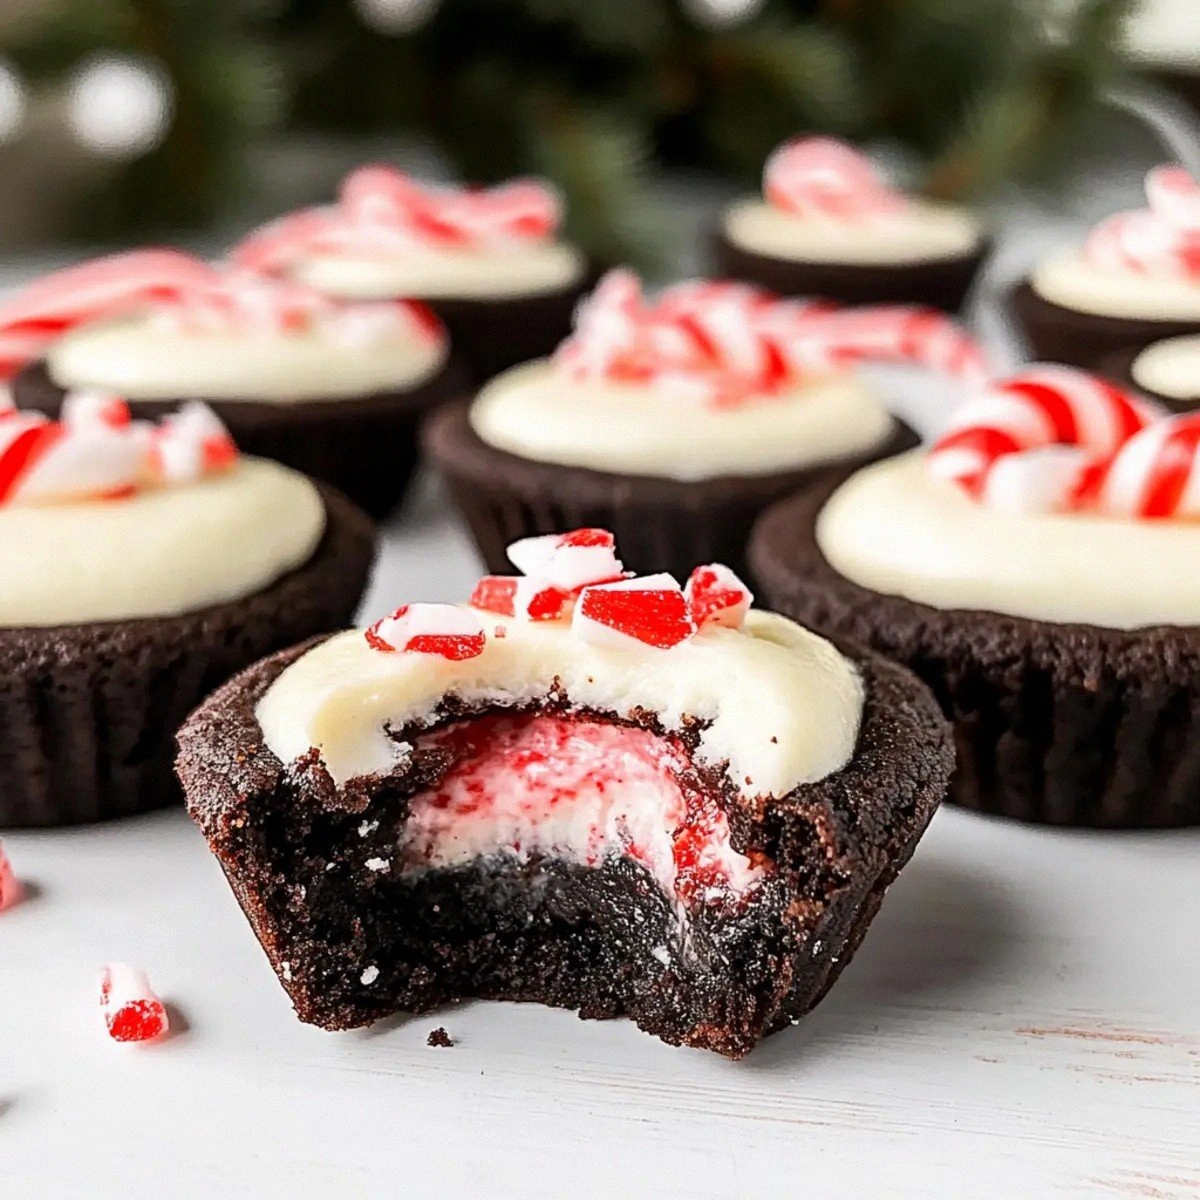
Picture this: the oven door swings open, a warm, buttery aroma of chocolate and butter mingles with a whisper of peppermint, and the kitchen feels like a winter wonderland in a glass jar. The cookies themselves are glossy, dark‑brown, and studded with tiny shards of crushed candy canes that catch the light like frosted ornaments. When you bite into one, the edges give way with a satisfying snap, revealing a cloud of peppermint‑infused cream cheese filling that’s as smooth as fresh‑painted frosting on a holiday cake. The taste? A bold, bittersweet chocolate base that doesn’t overpower the mint, but instead lets it dance like a ballerina on a stage of cocoa.
Most recipes get this completely wrong. They either drown the chocolate in mint or, worse, they make a soggy mess that looks like a melted snow globe. I’ve tried a dozen “peppermint cookie” versions that turned out either too sweet, too flat, or just plain confusing. This version, however, uses a blend of Dutch‑processed and black cocoa for depth, a pinch of salt to balance the sugars, and a secret splash of heavy cream that keeps the dough tender without becoming gummy. The result is a cookie that holds its shape, offers a crisp edge, and still feels soft enough to melt in your mouth.
And now the fun part: I’m going to walk you through every single step — from selecting the perfect cocoa to folding in those candy‑cane shards. By the end, you’ll wonder how you ever made any other version, because this is hands down the best version you’ll ever make at home. I dare you to taste this and not go back for seconds. Ready? Let’s dive in.
What Makes This Version Stand Out
- Taste: A balanced symphony of dark chocolate bitterness and crisp peppermint that never feels cloyingly sweet.
- Texture: A buttery crust that cracks like thin ice, paired with a creamy, melt‑in‑your‑mouth filling.
- Simplicity: Only 16 ingredients, all pantry‑friendly, and no fancy equipment beyond a mixer and a baking sheet.
- Uniqueness: The combination of Dutch‑processed and black cocoa gives a depth you won’t find in standard chocolate recipes.
- Crowd Reaction: Guests constantly ask for the recipe, and the candy‑cane garnish makes it Instagram‑ready.
- Ingredient Quality: Using real butter and high‑quality cocoa powders makes the flavor sing.
- Cooking Method: A two‑stage bake that first sets the shell, then finishes the edge for that perfect snap.
- Make‑Ahead Potential: Fill the cups a day ahead; they hold up beautifully, and the flavors meld even more.
Inside the Ingredient List
The Flavor Base
All‑purpose flour is the skeleton of any good cookie, providing structure without weighing it down. The 1 cup you’ll use should be spooned and leveled, not packed, to avoid a dense crumb. If you substitute cake flour, expect a softer, more delicate bite, but you might lose that satisfying snap.
Dutch‑processed cocoa powder brings a mellow, rounded chocolate flavor, while black cocoa adds an almost espresso‑like intensity that makes the cookies look gorgeously dark. Skipping the black cocoa will result in a lighter color and a less complex flavor profile, which is a shame for a holiday treat.
The Texture Crew
Unsalted butter, softened to room temperature, creates the rich mouthfeel we crave. If you use salted butter, cut the pinch of salt in half to avoid over‑salting. The granulated sugar and light brown sugar together give a perfect balance of sweetness and a hint of caramel depth; the brown sugar’s molasses also helps with browning.
The large egg acts as a binder, adding moisture and helping the dough hold together. For a richer flavor, you could use an extra yolk, but be careful not to make the dough too wet. Vanilla extract is the quiet hero, rounding out the chocolate and mint notes.
The Unexpected Star
Heavy whipping cream is the secret weapon that keeps the cookie dough tender and prevents it from becoming crumbly. It also adds a subtle richness that you’ll taste in every bite. If you’re out of cream, a mixture of whole milk and a splash of melted butter can work in a pinch, though the texture will be slightly less luxurious.
Cream cheese, when mixed with sugar, peppermint extract, and a drop of red gel, becomes the dreamy filling that sets these cups apart. Using full‑fat cream cheese ensures a silky, stable filling; low‑fat versions tend to weep and become grainy.
The Final Flourish
Peppermint extract is the aromatic powerhouse that gives the filling its signature cool snap. A single teaspoon is enough; more can quickly become overwhelming. The red food‑gel drop is purely for visual drama, turning the filling a festive pink that looks like a tiny holiday miracle.
Finally, the chopped candy canes add a crunchy surprise and a burst of minty sweetness. If you can’t find candy canes, crush peppermint bark or use crushed peppermint candies for a similar effect.
Everything's prepped? Good. Let’s get into the real action…
The Method — Step by Step
Preheat your oven to 350°F (175°C) and line a standard muffin tin with paper liners. While the oven warms, whisk together the flour, Dutch‑processed cocoa, black cocoa, baking soda, and that pinch of salt in a large bowl. This dry blend should look uniformly dark and slightly powdery; any clumps mean you need to sift again.
In a separate mixing bowl, cream the softened butter with the granulated and light brown sugars until the mixture is light, fluffy, and smells like a bakery on a holiday morning. This should take about 3‑4 minutes on medium speed; if the butter is too warm, the mixture will look greasy instead of airy.
Kitchen Hack: Add a splash of heavy cream (about 2 tbsp) to the butter‑sugar mix; it helps achieve a silkier texture without over‑mixing.Beat in the egg and vanilla extract until fully incorporated. The batter should look glossy and slightly thickened, not runny. At this stage, you’ll notice the chocolate scent intensifying, a sign that the cocoa powders are fully integrating.
Gradually add the dry ingredients to the wet mixture, mixing on low speed until just combined. Over‑mixing will develop gluten, leading to tough cookies, so stop as soon as you no longer see flour streaks. The dough will be thick, almost dough‑like, and a little sticky – that’s perfect.
Fold in the heavy whipping cream and the chopped candy canes. The cream adds moisture, while the candy canes give those delightful crunchy bursts. The dough should now be glossy and speckled with red‑white shards; if it looks dry, add a teaspoon more cream.
Kitchen Hack: Toast the candy cane pieces on a dry skillet for 30 seconds before folding them in; this releases extra mint oil and adds a deeper flavor.Scoop about 1 tablespoon of dough into each muffin liner, pressing it down gently with the back of a spoon to create a shallow well. This well will hold the peppermint filling later, so don’t over‑compact the dough; you want a slight rim to keep the filling from spilling.
Now for the filling: In a medium bowl, beat the softened cream cheese until smooth, then add the 1/4 cup granulated sugar, peppermint extract, and the single drop of red gel. Beat until the mixture is light and airy, about 2 minutes. The color should turn a soft pink, and the aroma will be unmistakably minty.
Watch Out: Over‑mixing the cream cheese can cause it to become too thin, leading to filling that leaks during baking. Stop as soon as it’s smooth.Pipe or spoon about 1 teaspoon of the peppermint cream into each dough well, making sure the filling sits just below the rim. The contrast between the dark chocolate dough and the pink filling is what makes these cups look like tiny holiday miracles.
Bake the cups for 12‑14 minutes, or until the edges of the cookies have set and turned a deep, mahogany hue while the centers still look slightly soft. The scent at this point should be intoxicating—chocolate, butter, and mint swirling together. Let the cups cool in the pan for 5 minutes, then transfer to a wire rack to finish cooling completely.
That's it — you did it. But hold on, I've got a few more tricks that'll take this to another level, because the holiday season deserves nothing less than perfection.
Insider Tricks for Flawless Results
The Temperature Rule Nobody Follows
Always start with a fully preheated oven. A cold oven will cause the cookies to spread unevenly, resulting in a soft, soggy base. I once tried to save time by turning the oven on midway; the cookies came out flat as pancakes. Trust the heat, and the edges will pull away just enough to create that signature snap.
Why Your Nose Knows Best
Your sense of smell is the ultimate timer. Around the 10‑minute mark, you’ll notice a sweet, toasted chocolate aroma that signals the edges are beginning to caramelize. If you smell a faint burnt scent before the timer, pull them out early—over‑baking turns the delicate crunch into a brittle that shatters too easily.
The 5‑Minute Rest That Changes Everything
After removing the cups from the oven, let them rest on the baking sheet for exactly five minutes before moving them to a wire rack. This short rest lets the steam finish the cooking process gently, preventing the centers from cracking. A friend tried skipping this step once—let's just say the filling leaked like a busted snowball.
Candy Cane Crunch Preservation
If you plan to store the cups, keep the candy cane pieces separate until just before serving. Moisture from the filling can soften the shards, making them lose their crunch. Toss them on top right before plating for that final burst of festive texture.
The Double‑Bake Finish
For an ultra‑crisp rim, after the initial bake, turn the oven down to 300°F (150°C) and bake the cups an additional 5 minutes. This low‑heat finish dries out the outer layer without over‑browning the interior. The result is a cookie that sounds like a tiny bell when you tap it—pure holiday magic.
Creative Twists and Variations
This recipe is a playground. Here are some of my favorite ways to switch things up:
White Chocolate Peppermint
Swap the Dutch‑processed and black cocoa for 1/2 cup white chocolate chips melted into the dough. The result is a snowy‑white base that lets the red‑pink filling pop visually. Perfect for a “Winter Wonderland” theme.
Spicy Mocha Mint
Add a pinch of cayenne pepper to the dry mix and a tablespoon of instant espresso powder to the dough. The subtle heat and coffee notes create a sophisticated flavor that adult guests rave about.
Nutty Crunch
Fold in 1/4 cup finely chopped toasted hazelnuts or almonds with the candy canes. The nutty undertone adds depth and a satisfying bite that complements the mint.
Vegan Delight
Replace butter with coconut oil, use a plant‑based cream cheese alternative, and swap the egg for a flax “egg.” The texture changes slightly, but the flavor remains bold—great for guests with dietary restrictions.
Alcohol‑Infused
Stir a tablespoon of peppermint schnapps or crème de menthe into the cream cheese filling. The subtle boozy note adds warmth and makes these cups perfect for after‑dinner sipping.
Storing and Bringing It Back to Life
Fridge Storage
Place the cooled cups in an airtight container and store them in the refrigerator for up to 5 days. The mint filling stays firm, and the cookies retain their crunch if you keep a small paper towel in the container to absorb excess moisture.
Freezer Friendly
Wrap each cup individually in parchment paper, then place them in a zip‑top freezer bag. They’ll freeze beautifully for up to 2 months. When you’re ready to serve, let them thaw in the fridge for an hour, then bring to room temperature for the best texture.
Best Reheating Method
To revive the cookies, preheat your oven to 300°F (150°C) and bake the cups for 5‑7 minutes. Add a tiny splash (about 1 tsp) of water to the bottom of the baking sheet; the steam will re‑hydrate the crumb without making it soggy, and the filling will become luxuriously soft again.