I still remember the exact moment these cookies ruined me for all other pumpkin desserts forever. It was a drizzly Tuesday afternoon, my kitchen smelled like a cinnamon stick exploded, and I was elbow-deep in what I thought would be another "meh" batch of fall cookies. You know the drill—pumpkin spice everything, but nothing ever quite hits that perfect balance of pillowy-soft centers and caramelized chewy edges. I was ready to write off pumpkin cookies entirely, destined to live in brownie land forever.
Then something magical happened. The butter hit the sugars at just the right temperature, creating this fluffy cloud that smelled like childhood memories and Saturday morning cartoons. The pumpkin puree went in—not too much, just enough to make the dough glow like autumn sunshine—and suddenly my stand mixer sounded like it was purring. Old-fashioned oats tumbled in last, rolling through the orange-speckled dough like tiny edible life preservers, and that's when I knew. These weren't going to be those sad, cakey excuses for cookies that taste like disappointment with a hint of nutmeg.
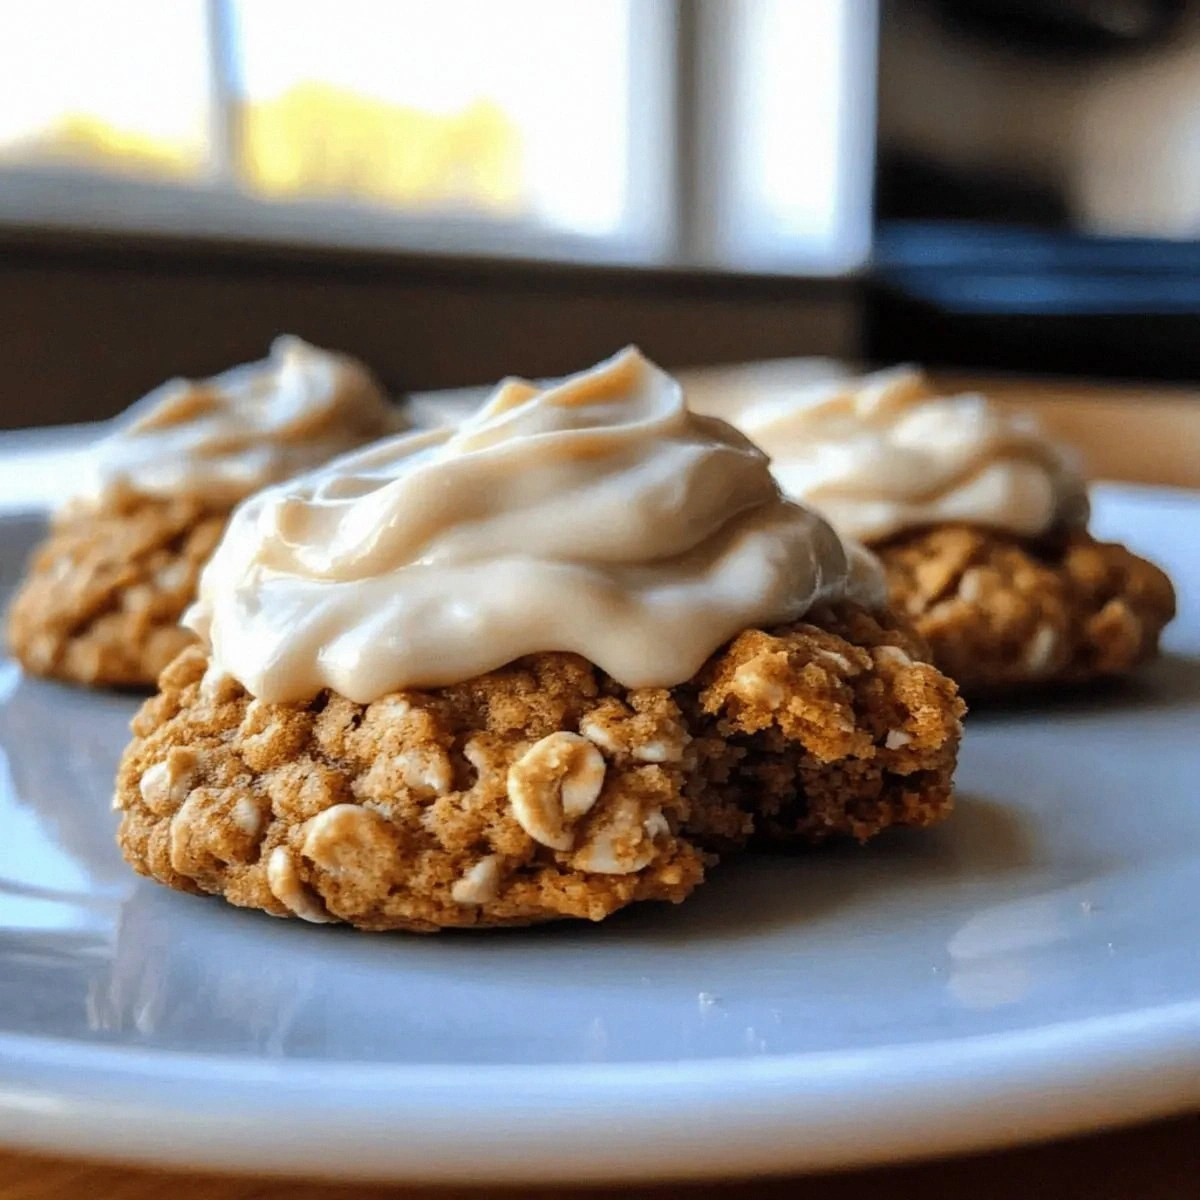
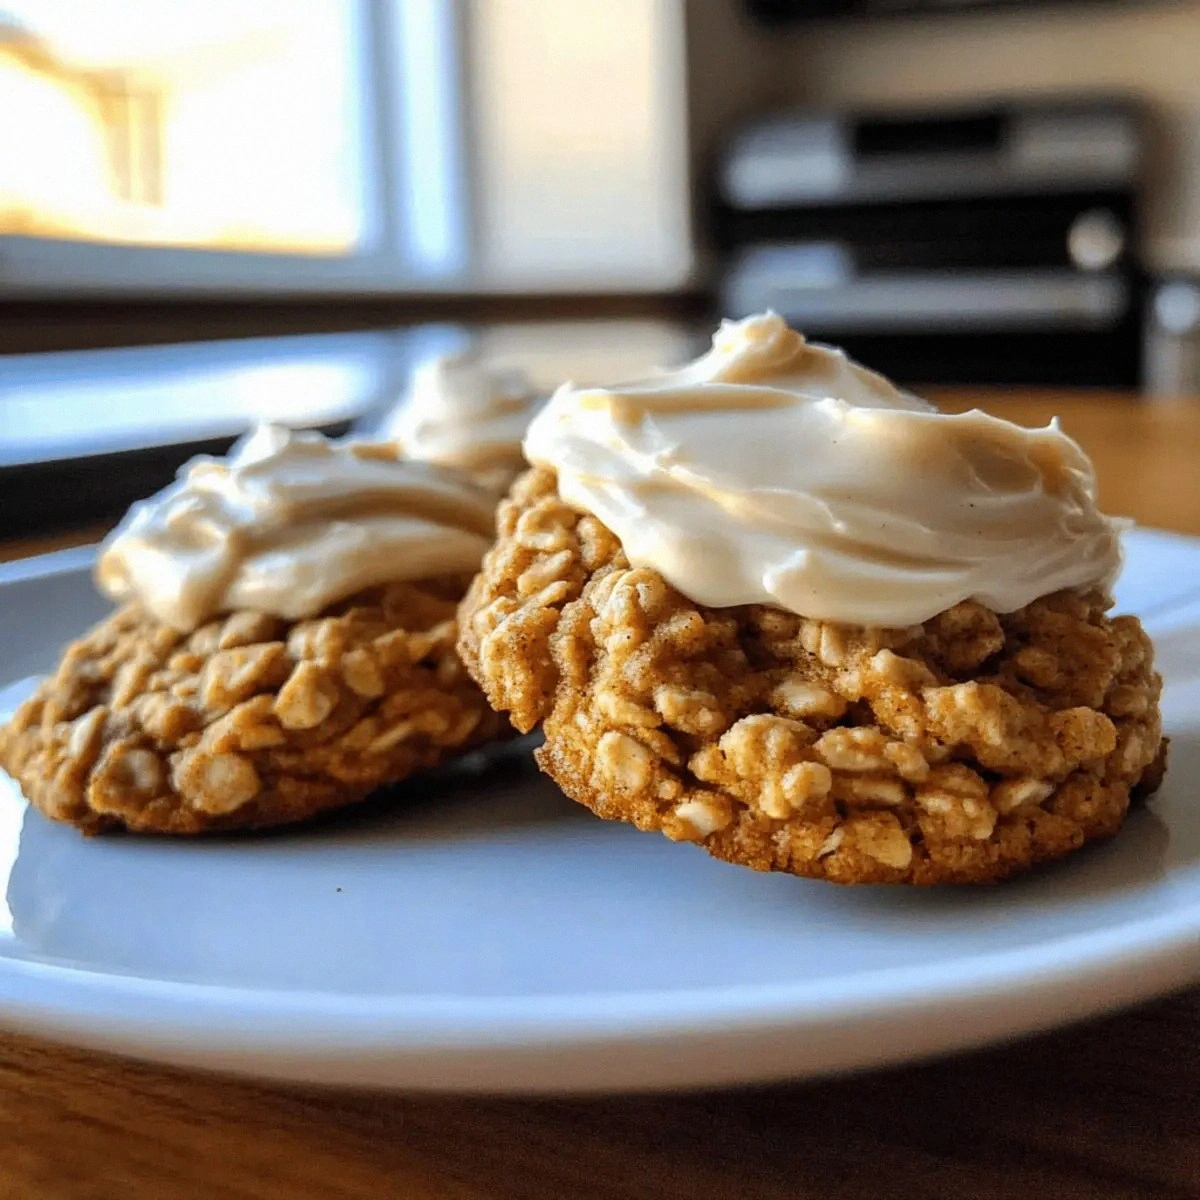
The first batch came out looking like they belonged on a bakery window display, all crackly tops and golden edges that whispered promises of caramelized perfection. But here's the kicker—I hadn't even made the maple frosting yet. One swipe of that glossy, ivory blanket across the warm cookie and I actually gasped out loud. Not a cute little "oh my," but a full-on dramatic gasp that made my cat leap off the counter in terror. The frosting melted into every crevice, creating rivers of maple-scented bliss that pooled in the oatmeal craters like liquid gold.
Picture yourself pulling these from your oven, the whole kitchen smelling like someone bottled autumn and turned it into a candle. Your neighbors will suddenly remember they borrowed sugar from you three years ago. Your kids will abandon their video games. Your partner will start texting heart-eye emojis from the other room. I dare you to taste one and not go back for seconds—actually, I double-dog dare you, because I've never seen it happen. Let me walk you through every single step—by the end, you'll wonder how you ever made it any other way.
What Makes This Version Stand Out
This isn't just another pumpkin cookie recipe that tastes like someone blended pie filling with flour and called it a day. Oh no, my friend. These beauties achieve what most recipes completely miss—the perfect chew factor that makes your jaw work just enough to release all those warm spices, while staying so tender they practically dissolve on your tongue. The secret lies in the ratio of butter to pumpkin, the specific type of oats, and a technique that sounds weird until you see the results.
- Texture Perfection: Most pumpkin cookies turn out cakey and dry because they use too much leavening. This recipe uses just enough baking soda to give you those gorgeous crackly tops while keeping the centers dense and fudgy, almost like a brownie met an oatmeal cookie and had a beautiful baby.
- Flavor Depth: Instead of dumping in a generic "pumpkin pie spice" blend, we're building layers with individual spices—cinnamon for warmth, nutmeg for mystery, and cloves for that haunting background note that keeps people guessing. The result tastes like autumn exploded in the best possible way.
- Maple Frosting Magic: This isn't your basic powdered sugar glaze. We're creating a tangy cream cheese base that balances the sweetness, then hitting it with real maple syrup—not that fake pancake stuff. The tang and maple create this push-pull of flavors that makes your taste buds do a happy dance.
- Oatmeal That Matters: Old-fashioned rolled oats aren't just filler here—they're the backbone that gives these cookies their signature chew. Quick oats turn to mush, but these beauties maintain their integrity, creating little pockets of texture that make each bite interesting.
- Brown Butter Option: Want to level up? Brown half the butter for nutty, caramel notes that make people ask "what's that amazing flavor?" It's an extra five minutes that transforms good cookies into legendary status.
- Make-Ahead Champion: The dough actually improves after a night in the fridge, letting the oats hydrate and the spices meld. Plus, the cookies freeze like dreams, so you can have fresh-baked perfection any time the craving strikes.
- Crowd Psychology: These disappear faster than free samples at Costco. I've watched grown adults hide them in napkins, claim dietary restrictions don't apply, and schedule "casual drop-bys" when they know I'm baking. You've been warned.
Alright, let's break down exactly what goes into this masterpiece...
Inside the Ingredient List
Every ingredient here pulls its weight—no passengers allowed. We're building flavor like a symphony, where each component has a solo moment but contributes to the greater whole. Skip anything at your peril, because I've tested this recipe within an inch of its life, and substitutions change everything. That said, I'll give you the honest truth about what you can fudge and what you absolutely cannot.
The Flavor Base
The butter is your foundation—use the good stuff, not that bargain-bin margarine imposter. Real butter contains milk solids that brown and caramelize, creating nutty, toffee notes you can't fake. Room temperature means you can press a finger in and leave an indent, but it's not melty or greasy. Too cold and it won't cream properly; too warm and your cookies will spread like gossip at a family reunion.
Both sugars matter more than you'd think. Brown sugar brings molasses undertones and moisture that keeps cookies chewy for days, while granulated sugar provides structure and those crispy edges we crave. Dark brown sugar works too if you want deeper caramel flavor, but light brown gives you more control. Pack it firmly when measuring—no air pockets or your ratios get thrown off.
Pumpkin puree is the star, but not the way most recipes use it. Too much and you get cake; too little and why bother? One cup hits the sweet spot where you taste pumpkin in every bite but the cookies still act like cookies. Make sure it's puree, not pie filling—Libby's is my go-to because it's consistently smooth and not watery like some organic brands can be.
The Texture Crew
Old-fashioned rolled oats are non-negotiable. Quick oats turn to glue and steel-cut oats stay crunchy like gravel—trust me, I've made every mistake possible. Look for oats that still have their individuality, not the dusty bottom-of-the-can stuff. If your oats smell rancid (yes, they can go bad), toss them and buy fresh.
All-purpose flour is your structure, but don't just dump it in. Spoon it into your measuring cup and level with a knife, or better yet, weigh it. Too much flour gives you hockey pucks; too little and your cookies spread into one giant sheet. The protein content matters—King Arthur has more protein than Gold Medal, so adjust your liquid if you switch brands.
The Spice Symphony
Individual spices beat premixed every time. Cinnamon should smell like it could start a candle company—if it's been in your cabinet since last year, it's lost its mojo. Nutmeg tastes completely different when you grate it fresh, and the difference will blow your mind. Cloves are potent little devils—measure carefully because too much makes cookies taste like potpourri.
Salt isn't just salt here—it's a flavor amplifier that makes everything else taste more like itself. I use kosher because the larger crystals distribute more evenly, but sea salt works too. Just don't use iodized table salt, which can give a metallic edge to baked goods.
The Unexpected Star
Vanilla extract is your secret weapon for depth. Cheap imitation vanilla tastes like sadness and chemicals, while real vanilla adds floral notes that complement warm spices beautifully. Madagascar is classic, but try Mexican vanilla for something different—it has a spicier, more complex profile that plays beautifully with pumpkin.
The eggs aren't just binding—they're emulsifiers that hold fat and liquid together in perfect harmony. Room temperature eggs mix more evenly, preventing weird lumps or separated dough. If you forgot to take them out, submerge in warm water for 5 minutes—never microwave unless you want scrambled egg cookies.
Everything's prepped? Good. Let's get into the real action...
The Method — Step by Step
- Start by creaming your butter and sugars together for a full 3-4 minutes on medium speed. This isn't the time to rush—proper creaming traps air that gives you lift and prevents dense cookies. The mixture should turn pale and fluffy, almost like coffee ice cream that's been left out too long. Scrape down the bowl twice during mixing to ensure everything gets incorporated evenly. When you think it's ready, go another 30 seconds—most people under-mix here and wonder why their cookies are flat.
- Add the eggs one at a time, beating each until completely absorbed before adding the next. The dough should look like it's trying to break apart before coming back together—that's the emulsion forming. Add vanilla with the second egg so it distributes evenly. If the mixture looks curdled, your butter was too cold—keep beating and it should smooth out. Room temperature ingredients are your insurance policy against a broken dough.
- Now comes the pumpkin puree, and here's where most recipes go wrong. Add it all at once and mix just until combined—over-mixing develops gluten which gives you tough cookies. The dough will look slightly separated at first, like oil and water trying to become friends. Keep mixing and suddenly it transforms into this gorgeous orange cloud that smells like fall exploded in your kitchen. Scrape the bowl again because pumpkin loves to hide in corners.
- Whisk together all your dry ingredients except the oats in a separate bowl. This ensures the leavening and spices distribute evenly—nobody wants a bite that's all baking soda or all cloves. Add the dry ingredients in three additions, mixing just until each is mostly absorbed. The dough will be thick and slightly sticky, like orange Play-Doh that smells way better than it looks.
- Fold in the oats with a spatula, not the mixer. This prevents over-mixing and keeps the oats whole for better texture. The dough will seem like it can't possibly hold all those oats, but keep folding and suddenly it all comes together. Those oats are going to hydrate as the dough rests, creating the perfect chewy texture. If some oats refuse to cooperate, just press them in—they'll behave once baked.
- Cover the dough with plastic wrap pressed directly onto the surface. This prevents a skin from forming and keeps the dough from drying out. Refrigerate for at least 2 hours or up to 3 days. Yes, you can skip this step, but your cookies will spread and be sad instead of thick and chewy. The oats need time to drink up moisture, and the flavors need time to meld into something greater than the sum of their parts.
- When ready to bake, preheat your oven to 350°F and position racks in the upper-middle and lower-middle positions. Line two baking sheets with parchment—don't grease them or your cookies will spread too much. Use a medium cookie scoop or two spoons to portion dough into 2-tablespoon mounds, spacing them 2 inches apart. They look huge but they need room to spread without becoming one giant cookie sheet.
- Bake for 12-14 minutes, rotating pans halfway through. The edges should be set and golden, but the centers will still look slightly underbaked—that's perfect. They'll finish cooking from residual heat as they cool. Over-baking is the enemy of chewy cookies; they should look like they need "just one more minute" when you pull them out. Cool on the pan for 5 minutes before transferring to a wire rack—this sets the structure so they don't fall apart.
That's it—you did it. But hold on, I've got a few more tricks that'll take this to another level...
Insider Tricks for Flawless Results
The Temperature Rule Nobody Follows
Here's the thing about temperature—it affects everything in baking, yet most recipes treat it like a suggestion instead of a commandment. Your butter should be cool room temperature, around 65°F. Too warm and your cookies spread into puddles; too cold and they stay in dough balls like little rocks. I keep a kitchen thermometer specifically for butter because I've ruined too many batches eyeballing it.
Same goes for your eggs and pumpkin. Cold eggs can make your beautiful emulsion break, creating curdled dough that bakes up dense and weird. Let everything sit out for 30-45 minutes before starting. If you're impatient (I see you), you can warm eggs in a bowl of warm water for 5 minutes. Just don't use hot water unless you want partially cooked eggs, which is a horror show no amount of sugar can fix.
Why Your Nose Knows Best
Trust your sense of smell more than the timer. When these cookies are perfectly baked, your kitchen will smell like someone opened a fall-scented candle store inside a bakery. The aroma shifts from raw dough to warm spices to something deeper and more complex right at the perfect moment. If you wait for visual cues alone, you've probably already over-baked them.
I'll be honest—I set my timer for 2 minutes less than the minimum time, then hover like a helicopter parent. The moment I smell that transition from "cookies are baking" to "something magical is happening," I check them. Usually they're done or need just one more minute. Your oven might be different, so learn its personality instead of blindly following times.
The 5-Minute Rest That Changes Everything
After pulling cookies from the oven, let them sit undisturbed for exactly 5 minutes. Not 3, not 7—5. This is when the magic happens: the centers finish setting, the sugars re-crystallize for that perfect chew, and the flavors concentrate. Move them too early and they fall apart; leave them too long and they stick to the pan like they've taken root.
During this rest, they'll deflate slightly and develop that gorgeous crinkly top that makes them look professional. Run a spatula around the edges after 5 minutes—if they release easily, they're ready to move. If they resist, give them another minute. This rest also makes them easier to frost because the surface firms up instead of melting the frosting instantly.
The Frosting Timing Sweet Spot
Here's where most people mess up the frosting—they either slather it on hot cookies and watch it disappear, or wait too long and fight with set cookies. The sweet spot is when cookies are warm but not hot, around 15-20 minutes after baking. They should feel warm to touch but not burn your finger.
At this temperature, the frosting melts just enough to settle into every crack and crevice, creating those gorgeous glossy pools that make people weak in the knees. Too hot and it becomes a glaze that soaks in completely; too cool and it sits on top like a hat. Test one cookie first—if the frosting melts completely away, wait 5 more minutes.
Creative Twists and Variations
This recipe is a playground. Here are some of my favorite ways to switch things up:
Chocolate Chunk Pumpkin Dreams
Fold in 1 cup of chopped dark chocolate (not chips—they don't melt properly) with the oats. The bitterness of 70% chocolate creates this incredible contrast with the sweet pumpkin base. Use a serrated knife to chop a good quality bar into irregular chunks—some tiny shards, some big chunks—for chocolate in every bite. People will ask if you're secretly a professional baker.
Salted Caramel Swirl
Drizzle homemade or store-bought caramel over the frosted cookies, then sprinkle with flaky sea salt. The salt wakes up all the warm spices while the caramel adds buttery richness that makes grown adults close their eyes in bliss. Maldon salt works best because the large flakes provide pops of salt instead of general saltiness.
Pecan Praline Crunch
Add 1 cup of toasted pecans with the oats, then sprinkle the frosted cookies with praline pieces. To make quick praline, melt 1/2 cup sugar until amber, stir in 1/4 cup pecans, spread thin on parchment, then break into shards once cool. The crunch against the soft cookie is textural heaven.
Cream Cheese Stuffing
Before baking, press a small cube of cold cream cheese into the center of each dough ball, then cover with more dough. The cream cheese stays creamy and tangy, creating a surprise center that oozes slightly when warm. Use block cream cheese, not the whipped kind, and keep it cold so it doesn't melt into the cookie.
Breakfast Cookie Remix
Add 1/2 cup of dried cranberries and replace 1/2 cup of the oats with toasted coconut flakes. The tart cranberries cut through the richness while coconut adds tropical notes that make these feel like vacation cookies. They're still indulgent but somehow justify eating cookies for breakfast. Not that we needed justification.
Espresso Glaze Upgrade
Replace 1 tablespoon of the maple syrup in the frosting with strong espresso. The coffee intensifies the maple flavor while adding depth that makes people ask "what's that amazing flavor?" It's like your favorite coffee shop and bakery had a delicious baby. Use good espresso—not instant coffee—or the flavor falls flat.
Storing and Bringing It Back to Life
Fridge Storage
Store unfrosted cookies in an airtight container at room temperature for up to 5 days, with parchment between layers. They actually improve on day 2 as the flavors meld and the oats fully hydrate. Keep frosted cookies in a single layer in the fridge—the cream cheese needs to stay cold—but let them come to room temperature for 15 minutes before serving. Cold frosting is sad frosting.
Freezer Friendly
These freeze beautifully both before and after baking. Freeze dough balls on a sheet pan, then transfer to bags for up to 3 months. Bake from frozen, adding 2-3 extra minutes. For baked cookies, freeze unfrosted, then frost after thawing. Frozen frosted cookies work but the texture suffers slightly—still better than no cookies.
Best Reheating Method
Revive slightly stale cookies by wrapping in a damp paper towel and microwaving for 8-10 seconds. The steam rehydrates them perfectly. For cookies that spread too much or got over-baked, crumble them over ice cream or yogurt—they become the best topping ever. Nothing goes to waste in cookie land.