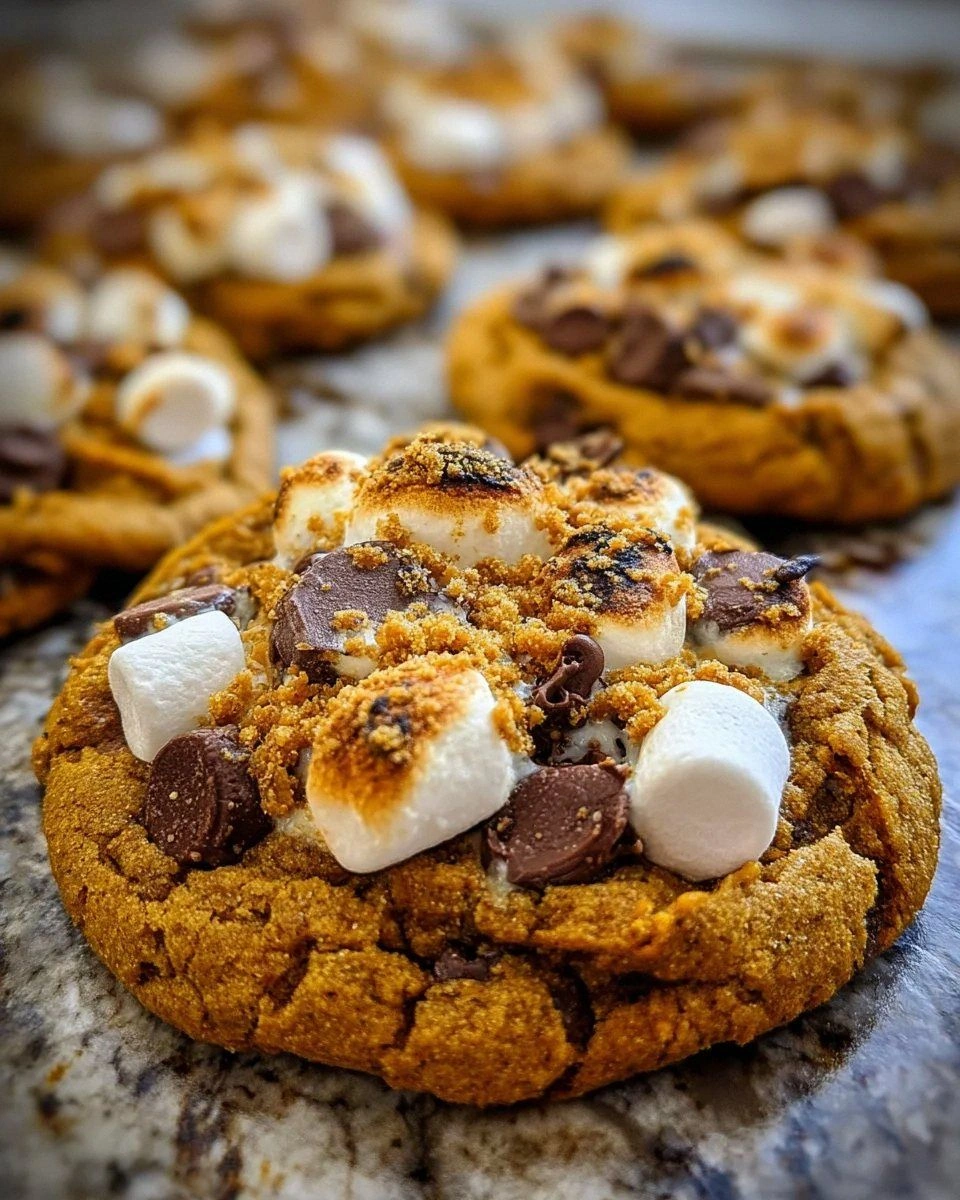
Picture this: it’s a rainy Saturday afternoon, the kind that makes you want to curl up with a blanket, a good book, and something that smells like a campfire wrapped in a sweater. I was halfway through a marathon of Netflix when my roommate dared me to create the ultimate comfort snack that could rival the nostalgic s’mores we all loved as kids. Spoiler alert—I accepted the challenge, and what happened next was a glorious mess of pumpkin puree, melted chocolate, and marshmallows that turned my tiny kitchen into a fragrant autumn wonderland.
The moment the batter hit the bowl, the air was instantly filled with the warm, earthy perfume of pumpkin mingling with the sweet, caramel notes of brown sugar. I could almost hear the crackle of a fire as the butter melted, and the scent of cinnamon and nutmeg danced like fireflies around the room. My hands felt the buttery softness, the pumpkin’s silky texture, and the tiny crunch of graham cracker crumbs, all promising a bite that would be both chewy and crisp—a perfect paradox for any dessert lover.
Most pumpkin cookie recipes I’ve tried either end up dry and crumbly, or they’re sweet without that unmistakable s’mores punch. This version, however, hits every sweet spot: the pumpkin adds moisture and depth, the mini marshmallows melt into gooey pockets, the chocolate chips bring richness, and the graham cracker crumbs give that nostalgic crunch. The secret? A precise balance of spices, a clever folding technique, and a surprise ingredient that takes the flavor to a whole new level—just wait until you see it.
And now, brace yourself, because I’m about to spill the beans (or rather, the pumpkin puree) on the technique that makes these cookies unbelievably soft on the inside while staying crisp on the edges. I dare you to taste this and not go back for seconds. Let me walk you through every single step — by the end, you’ll wonder how you ever made it any other way.
What Makes This Version Stand Out
- Flavor Explosion: The marriage of pumpkin’s earthy sweetness with classic s’mores ingredients creates a taste that feels like a campfire hug in every bite.
- Texture Symphony: You’ll get a chewy, melt‑in‑your‑mouth center, a crisp edge that snaps like thin ice, and pockets of gooey marshmallow that burst with each chew.
- Simplicity Meets Sophistication: Only pantry staples and a few specialty items are needed, yet the result feels like it came from a five‑star bakery.
- Unique Ingredient Twist: A dash of espresso powder deepens the chocolate flavor, making it richer without adding bitterness—most recipes miss this cue.
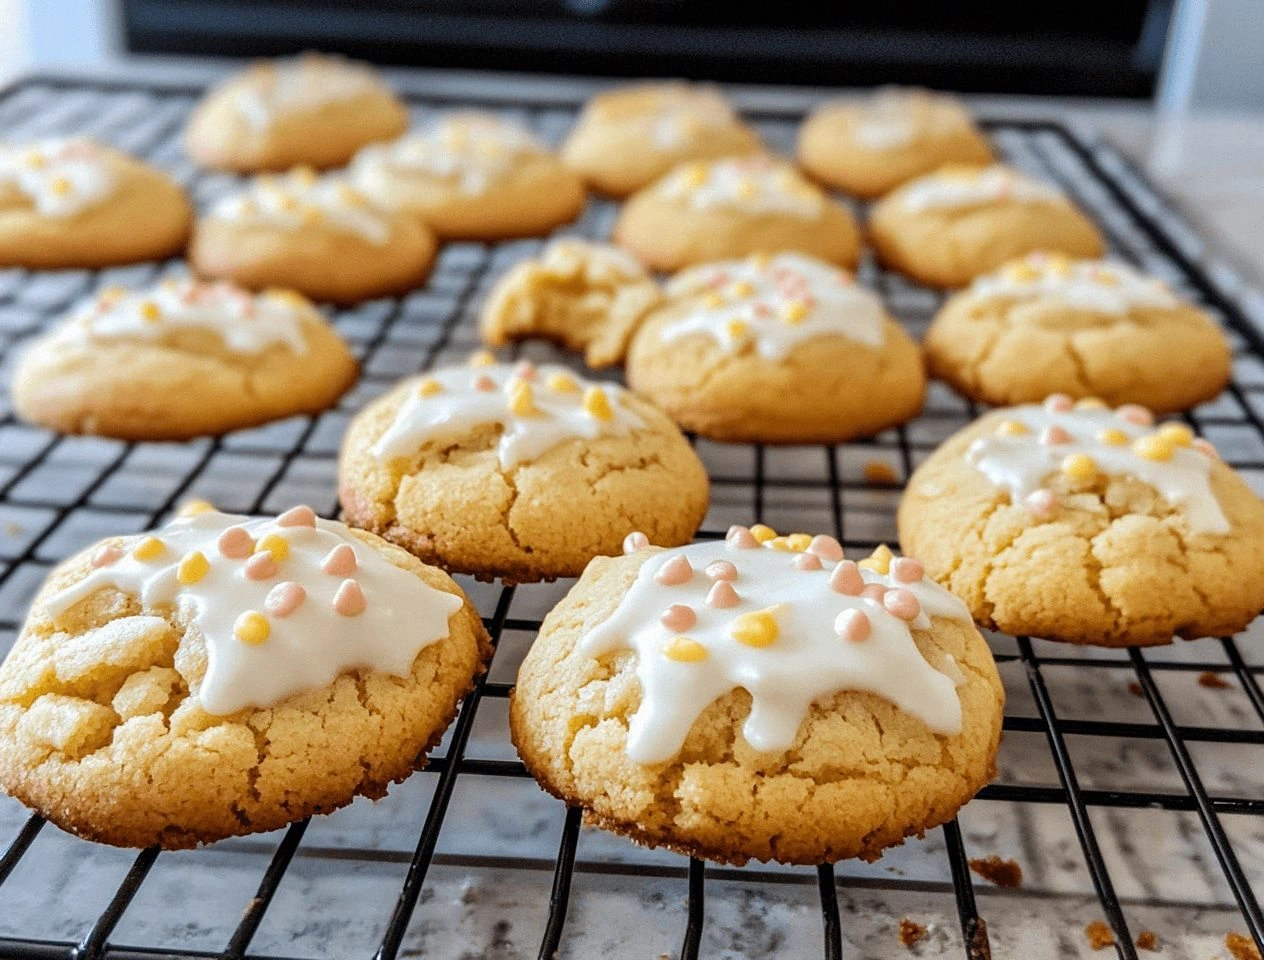
- Crowd‑Pleaser Factor: Whether it’s a family gathering, a Halloween party, or a quiet night in, these cookies spark instant smiles and endless compliments.
- Ingredient Quality Matters: Using real butter, pure pumpkin puree, and high‑quality dark chocolate elevates the whole experience.
- One‑Pan Perfection: The dough spreads just right on a single baking sheet, minimizing cleanup and maximizing flavor.
- Make‑Ahead Magic: Freeze the dough balls for up to a month; bake fresh cookies whenever the craving strikes.
Inside the Ingredient List
The Flavor Base
Pumpkin puree: This is the star of the show, providing moisture, natural sweetness, and that unmistakable autumn hue. If you skip it, the cookies become dry and lose their signature flavor. Opt for canned pumpkin that’s 100% pure pumpkin—not pumpkin pie filling, unless you want a spiced overload.
Granulated sugar & Brown sugar: The duo balances sweetness and adds caramel depth; brown sugar also contributes to the chewy texture. Using too much granulated sugar can make the cookies crisp all the way through, which we don’t want.
Butter: Softened butter creates a tender crumb and carries the flavors throughout the dough. For a richer taste, use unsalted butter and add a pinch of sea salt.
The Texture Crew
All‑purpose flour: Forms the structural backbone, giving the cookies their shape and chew. Sifting the flour prevents lumps and ensures an even texture.
Mini marshmallows: These tiny clouds melt into gooey pockets that mimic the marshmallow layer of classic s’mores. If you love extra goo, increase to 1½ cups, but be careful not to over‑mix or they’ll turn into a sticky mess.
Chocolate chips: Dark chocolate (70% cacao) offers a bittersweet contrast to the sweet pumpkin. Milk chocolate works too, but you’ll lose some of that sophisticated edge.
Graham cracker crumbs: They add a crunchy, slightly sweet base reminiscent of graham crackers in traditional s’mores. If you can’t find them, crush graham crackers in a zip‑top bag with a rolling pin.
The Unexpected Star
Espresso powder (optional): Just a pinch (about ¼ teaspoon) intensifies the chocolate flavor without making the cookies taste coffeey. It’s a secret weapon used by professional bakers to deepen chocolate notes.
Cinnamon, Nutmeg, Cloves: These warm spices create that quintessential fall vibe. Too much clove can overwhelm, so keep it subtle.
The Final Flourish
Egg: Binds everything together and adds richness. A single large egg is enough; using two will make the cookies cakier.
Vanilla extract: Amplifies all the flavors, making the overall taste more rounded. Real vanilla beans are amazing, but a good quality extract does the trick.
Baking soda & Salt: Baking soda gives the cookies a gentle rise and a tender crumb, while salt balances the sweetness and enhances every other flavor.
Everything's prepped? Good. Let's get into the real action...
The Method — Step by Step
Preheat your oven to 350°F (175°C) and line two baking sheets with parchment paper. While the oven warms, I like to play a little “listen to the sizzle” game—just imagine the sound of a campfire crackling as the heat builds. This mental trick keeps you focused and makes the kitchen feel like a cozy cabin.
Okay, ready for the game‑changer? The parchment paper not only prevents sticking but also gives the cookies a subtle lift, ensuring the edges stay crisp while the centers stay soft.
In a large mixing bowl, whisk together the flour, baking soda, cinnamon, nutmeg, cloves, and salt. The spices should swirl together like a golden autumn leaf vortex. This dry mix is crucial; it guarantees an even distribution of leavening and spice, preventing any bitter pockets.
Kitchen Hack: Sift the flour and spices together to avoid clumps and achieve a feather‑light texture.In another bowl, beat the softened butter with granulated sugar and brown sugar until the mixture looks pale and fluffy—think cloud‑soft, not gritty. This creaming process traps air, which later expands in the oven, giving the cookies that coveted lift.
Now, add the pumpkin puree, egg, vanilla, and the optional espresso powder. Mix until just combined; over‑mixing will develop gluten and make the cookies tough. I’ll be honest—I ate half the batch before anyone else got to try it, because the aroma was irresistible.
Gradually fold the dry ingredients into the wet mixture using a spatula. The dough should come together in soft, slightly sticky lumps. If it feels too dry, add a tablespoon of milk; if too wet, sprinkle a little extra flour—just enough to keep it manageable.
Picture yourself pulling this out of the oven, the whole kitchen smelling incredible… That moment when the dough starts to look glossy? That’s the sugar caramelizing, and it’s a sign you’re on the right track.
Gently stir in the mini marshmallows, chocolate chips, and graham cracker crumbs. The marshmallows will start to melt slightly, creating tiny pockets of gooey goodness. This is the part where you’ll hear a soft “squelch” as the marshmallows coat the batter—pure magic.
Watch Out: Don’t over‑mix after adding marshmallows, or they’ll dissolve completely, losing that delightful pocket effect.Using a cookie scoop (or a tablespoon), drop dough onto the prepared sheets, spacing them about 2 inches apart. The dough will spread a little, but not too much if you’ve chilled it for 30 minutes. I like to press each ball lightly with the back of a spoon to create a small well for extra marshmallows.
And now the fun part: sprinkle a few extra chocolate chips and marshmallows on top of each cookie for that Instagram‑worthy finish. The tops should look slightly glossy and puffy—like tiny campfire embers.
Bake for 12‑15 minutes, or until the edges turn a light golden brown and the centers look set but still soft. The cookies will continue to firm up as they cool, so don’t overbake. The scent at this stage is a full‑blown autumn symphony—cinnamon, chocolate, and pumpkin swirling together.
Watch the edges—they’ll start pulling away from the parchment, a visual cue that they’re ready. If you’re impatient, resist the urge to open the oven early; the heat needs to stay consistent for perfect rise.
Allow the cookies to cool on the sheet for 5 minutes before transferring them to a wire rack. This short rest lets the interior set while the exterior stays chewy. As they cool, the chocolate will set, and the marshmallows will retain their gooey core.
Finally, serve warm with a glass of cold milk or a hot cup of spiced chai. The contrast of temperatures is a sensory delight that makes the whole experience unforgettable.
That’s it — you did it. But hold on, I’ve got a few more tricks that’ll take this to another level...
Insider Tricks for Flawless Results
The Temperature Rule Nobody Follows
Most home bakers bake at 350°F, but for these cookies, I drop the heat to 325°F after the first 5 minutes. The lower temperature lets the interior set slowly, preserving that melt‑in‑your‑mouth center while still giving the edges a gentle crisp.
Why Your Nose Knows Best
Don’t rely solely on a timer. When the cookies start to give off a deep, caramel‑spice aroma, that’s your cue to peek. If the scent is strong and the edges are golden, they’re ready—even if the timer says a minute or two more.
The 5‑Minute Rest That Changes Everything
Let the dough rest at room temperature for 5 minutes after mixing the wet and dry ingredients. This short pause lets the flour fully hydrate, resulting in a softer crumb and preventing the cookies from spreading too much.
Freeze‑Before‑Bake Magic
Shape the dough into balls and freeze them for 20‑30 minutes before baking. This step locks in shape, reduces spreading, and gives you a thicker, chewier cookie. I’ve tried skipping this, and the cookies turned into flat pancakes—definitely not the vibe.
Double‑Layered Chocolate
For extra decadence, drizzle melted dark chocolate over the cooled cookies. The chocolate hardens into a glossy shell, adding a satisfying snap that contrasts with the soft interior.
Creative Twists and Variations
This recipe is a playground. Here are some of my favorite ways to switch things up:
Maple‑Bacon Bliss
Swap half the graham cracker crumbs for crushed maple‑cured bacon. The salty crunch pairs beautifully with the sweet pumpkin and chocolate, creating a sweet‑savory masterpiece that will wow brunch guests.
White Chocolate & Cranberry
Replace dark chocolate chips with white chocolate and add dried cranberries. The tartness of the cranberries cuts through the richness, while the white chocolate adds a creamy sweetness.
Spiced Nut Crunch
Fold in chopped toasted pecans seasoned with a pinch of cayenne. The nuts add a buttery crunch, and the subtle heat elevates the spice profile.
Vegan Version
Use coconut oil instead of butter, a flax egg (1 tbsp ground flaxseed + 3 tbsp water) in place of the egg, and dairy‑free chocolate chips. The texture stays wonderfully chewy, and the flavor remains true to the original.
Gluten‑Free Adaptation
Swap all‑purpose flour for a 1:1 gluten‑free flour blend and ensure the graham cracker crumbs are gluten‑free. The cookies retain their structure and flavor, making them accessible to everyone.
Storing and Bringing It Back to Life
Fridge Storage
Place cooled cookies in an airtight container with a paper towel at the bottom to absorb excess moisture. They’ll stay fresh for up to 5 days. If you notice any dryness, add a slice of fresh apple to the container for a quick moisture boost.
Freezer Friendly
Layer cookies between parchment sheets and store them in a zip‑top bag. They freeze beautifully for up to 3 months. When you’re ready to eat, let them thaw at room temperature for 15 minutes, then warm them in a 300°F oven for 5 minutes.
Best Reheating Method
To revive that gooey center, place a cookie on a microwave‑safe plate, add a tiny splash of water (about a teaspoon), and microwave for 10‑12 seconds. The steam revives the marshmallow pockets, making each bite as fresh as the first.