I was standing in my kitchen, staring at a half‑baked gingerbread house that had collapsed like a cardboard skyscraper, when my roommate dared me to create something that could actually survive a holiday table. I laughed, I grabbed a pack of Oreo cookies, and I whispered to myself, “If this works, I’m never touching gingerbread again.” The idea was simple: combine the crunchy, chocolate‑y goodness of Oreos with the silky, pudding‑laden layers of a classic lasagna. I imagined a dessert that would stack up like a festive lasagna, each tier a different shade of holiday cheer, and I was instantly hooked.
Picture this: the aroma of melted butter and crushed cookies filling the air, the faint scent of vanilla dancing with the sweet perfume of chocolate pudding, and a whisper of fresh whipped topping that feels like a cloud drifting over a snowy landscape. The sound? The gentle thump of the spoon as it folds the cream cheese, the soft scrape of a spatula spreading the layers, and the occasional crackle when the cookie crust hits the pan. The texture? A buttery, crumbly base that shatters like thin ice, followed by a velvety, mousse‑like middle that clings to your fork like a dream. And the taste? A perfect balance of chocolate, vanilla, and a hint of festive sparkle from sprinkles and candy‑colored M&Ms.
Most cookie‑based desserts end up either too dry or overly sweet, and they rarely have that layered drama that makes a lasagna so satisfying. This version, however, nails the balance by using instant pudding mixes that set without any stovetop heat, letting the dessert stay light and airy while the Oreo crust stays firm enough to hold its own. I’ll be honest — I ate half the batch before anyone else got a chance to try it, and I still have a few slices left for you. I dare you to taste this and not go back for seconds; the combination is that addictive.
And now, the secret weapon: a splash of cold milk that I add to the pudding mixes at the very last second, creating a silk‑smooth texture that feels like a velvet curtain falling over a stage of cookies. This tiny trick is what separates a good dessert from a legendary one. Let me walk you through every single step — by the end, you'll wonder how you ever made it any other way.
What Makes This Version Stand Out
- Flavor Explosion: The marriage of chocolatey Oreo crumbs with sweet vanilla and chocolate pudding creates a taste that’s both nostalgic and novel, making every bite a surprise party in your mouth.
- Texture Symphony: You get a crunchy crust, a creamy middle, and a fluffy topping — three distinct textures that play off each other like a well‑orchestrated holiday choir.
- Zero‑Cook Layers: No stovetop, no oven (aside from the quick bake of the crust), which means you can assemble this in under 20 minutes and still achieve that “made‑from‑scratch” look.
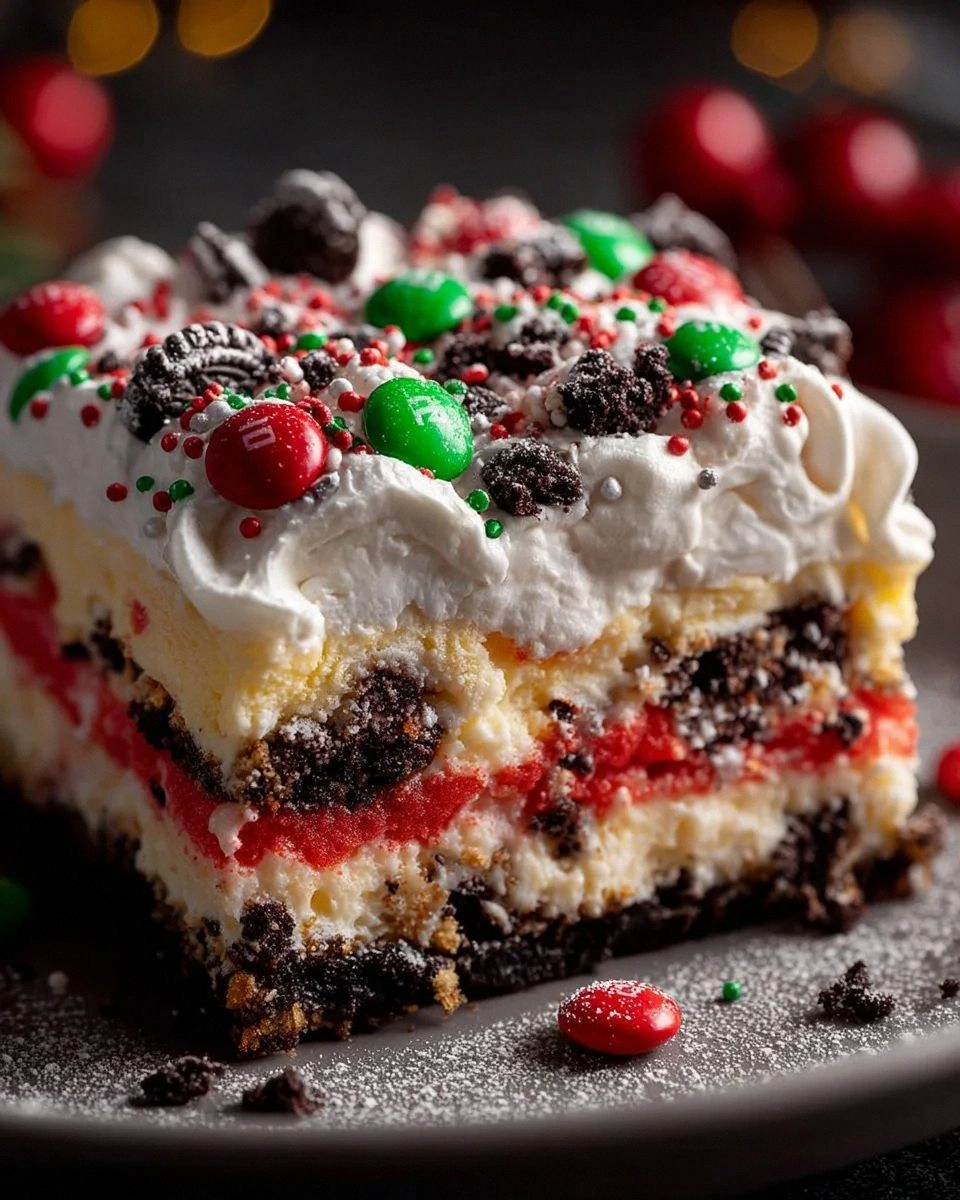
- Festive Flair: Sprinkles, red‑and‑green candies, and a dusting of cocoa turn this dessert into a centerpiece that screams Christmas without shouting.
- Make‑Ahead Magic: Once assembled, the lasagna holds its shape in the fridge for up to 24 hours, giving you a stress‑free dessert that’s ready when the guests arrive.
- Ingredient Quality: Using real Oreo cookies (or a gluten‑free version) and high‑fat cream cheese ensures a rich mouthfeel that cheap substitutes just can’t match.
- Allergy‑Friendly Options: Swap butter for coconut oil, dairy cream cheese for a vegan alternative, and you still get the same indulgent experience.
- Impressively Simple: The steps are straightforward, but the result feels like a professional pastry chef’s secret weapon.
Inside the Ingredient List
The Flavor Base
The Oreo cookies are the undisputed star of the crust. Their chocolate wafer and creamy filling combine to give a deep cocoa flavor that you can’t replicate with generic chocolate biscuits. If you skip them, you lose the signature crunch and the subtle sweet‑cream undertone that makes the base sing. For a gluten‑free twist, look for certified GF chocolate sandwich cookies that have a similar texture.
Unsalted butter binds the crushed cookies into a cohesive crust. The butter’s fat content melts into the crumbs, creating a buttery lattice that holds firm when chilled. If you’re dairy‑free, coconut oil works just as well, but expect a faint coconut aroma that can actually complement the holiday vibe.
The Texture Crew
Cream cheese provides the luxurious richness that underpins the pudding layers. Its tang balances the sweetness of the sugar and pudding, preventing the dessert from becoming cloying. Using low‑fat cream cheese will cut calories, but you’ll miss out on that melt‑in‑your‑mouth mouthfeel.
Granulated sugar is the subtle sweetener that helps the cream cheese blend smoothly. Powdered sugar could be used for a silkier texture, but it dissolves faster and can make the mixture too airy if over‑whipped.
Milk (the regular kind) adds moisture to the cream cheese mixture, ensuring it stays supple and spreadable. Almond or oat milk are excellent dairy‑free alternatives, though they can slightly thin the mixture if not measured carefully.
The Unexpected Star
Instant vanilla and chocolate pudding mixes are the secret sauce that turns this dessert into a lasagna‑style masterpiece. They set without heat, meaning you can layer them directly onto the crust. If you’re feeling adventurous, swap the chocolate pudding for a butterscotch or caramel version for a richer holiday twist.
Cold milk (used for the pudding) is crucial because it helps the powders hydrate evenly, preventing lumps. Using warm milk will cause the pudding to set too quickly, resulting in a grainy texture that no one wants.
The Final Flourish
Whipped topping brings a light, airy layer that feels like a cloud over the denser pudding. If you need a vegan option, coconut‑based whipped cream works beautifully, though it adds a faint coconut flavor that can be delightful.
Christmas sprinkles and mini M&M’s or red and green candies are the visual fireworks that turn this dish into a holiday showstopper. They add a tiny crunch and a burst of color that makes every slice Instagram‑ready.
Everything's prepped? Good. Let's get into the real action and start building this edible holiday masterpiece.
The Method — Step by Step
- Crush the Oreos. Place 24 Oreo cookies (about 2 cups of crumbs) into a large zip‑top bag. Seal it, then smash them with a rolling pin until they’re fine, uniform crumbs. Transfer the crumbs to a mixing bowl, and watch the dust rise like a festive snowstorm. Kitchen Hack: Add a tablespoon of melted butter to the crumbs before mixing; it prevents the crust from becoming too dry.
- Make the buttery crust. Melt ½ cup (1 stick) unsalted butter in the microwave for about 30 seconds. Pour the melted butter over the Oreo crumbs, and stir with a fork until every crumb is glossy and clings together. Press the mixture firmly into the bottom of a 9‑x‑13‑inch baking dish, creating an even layer about ½‑inch thick. The crust should feel firm to the touch; if it seems crumbly, add a splash more butter.
- Pre‑bake the crust. Slide the dish into a preheated oven at 350°F (175°C) for 8‑10 minutes, just until the edges turn a light golden brown. You’ll hear a faint sizzle that signals the butter is caramelizing — that’s the moment when the flavor deepens. Let the crust cool completely before adding any wet ingredients; otherwise, the crust will become soggy.
- Prepare the cream cheese layer. In a large bowl, beat 8 oz softened cream cheese with ½ cup granulated sugar until smooth and fluffy, about 2 minutes on medium speed. Add ½ cup milk and 1 tsp vanilla extract, then continue beating until the mixture is light and glossy. This layer should spread like a silky frosting, not a dense batter. Watch Out: Over‑mixing can cause the cream cheese to separate, resulting in a grainy texture later.
- Mix the pudding layers. In a separate bowl, whisk together one packet of instant vanilla pudding mix with ½ cup cold milk until thickened. In another bowl, whisk the instant chocolate pudding mix with the remaining ½ cup cold milk. Both puddings should be glossy and set enough to hold their shape when spread. This is the next part? Pure magic.
- Assemble the layers. Spread the vanilla pudding over the cooled Oreo crust, smoothing it with an offset spatula. Then, carefully layer the chocolate pudding on top, creating a striking contrast that looks like a lasagna’s sauce. Finally, dollop the whipped topping over the chocolate layer, spreading it to the edges. The visual should resemble a festive lasagna with three distinct “sauces.”
- Decorate with holiday cheer. Sprinkle a generous handful of Christmas sprinkles over the whipped topping, then scatter mini M&M’s or red‑and‑green candies across the surface. Press them lightly so they stick. The colors should pop like ornaments on a tree, and the tiny crunch adds a delightful surprise with every bite.
- Chill and set. Cover the dish with plastic wrap and refrigerate for at least 2 hours, preferably overnight. This allows the pudding layers to fully set and the crust to firm up, making slicing clean and easy. When you pull the first slice out, you’ll see distinct layers that hold together like a well‑constructed lasagna. Picture yourself pulling this out of the fridge, the whole kitchen smelling incredible...
- Serve and enjoy. Use a sharp, warm knife (dip it in hot water and wipe dry) to cut clean squares. Serve each piece on a festive plate, and watch your guests' eyes widen as they discover the hidden layers. I dare you to try one bite and not smile — that’s a promise.
- That’s it — you did it. But hold on, I've got a few more tricks that'll take this to another level...
Insider Tricks for Flawless Results
The Temperature Rule Nobody Follows
Always let the Oreo crust cool completely before adding any wet ingredients. If the crust is still warm, the butter will melt again and the crumbs will turn soggy, ruining the structural integrity. I once tried to speed things up by adding the pudding while the crust was warm — the whole thing collapsed like a house of cards. Patience is a virtue, especially when you want a crisp base.
Why Your Nose Knows Best
When the crust finishes baking, trust your nose. A light, toasty aroma means the butter has caramelized just enough to add depth. If you smell a burnt scent, pull it out immediately; over‑baking will give a bitter aftertaste that overwhelms the delicate pudding.
The 5‑Minute Rest That Changes Everything
After you spread the whipped topping, let the lasagna sit uncovered for five minutes before refrigerating. This short rest lets the topping settle, preventing it from sliding off when you cut the first slice. A friend tried to skip this step once — the topping slumped like a sad snowbank.
Layer‑Lock Technique
When spreading the vanilla and chocolate puddings, use a small offset spatula and press gently from the center outward. This “locking” motion creates a slight compression that helps the layers adhere without mixing colors. The result is a clean, defined line between vanilla and chocolate that looks professional.
Holiday Aroma Boost
Add a pinch of ground cinnamon or nutmeg to the whipped topping before spreading. The spice doesn’t dominate the flavor but adds a subtle holiday warmth that makes the dessert feel even more seasonal. If you’re allergic to nuts, you can skip this step without compromising texture.
The Final Frost
Just before serving, lightly dust the top with a thin layer of cocoa powder. It adds a sophisticated matte finish and a hint of bitterness that balances the sweetness. This tiny detail turns a good dessert into a show‑stopping masterpiece.
Creative Twists and Variations
This recipe is a playground. Here are some of my favorite ways to switch things up:
Peppermint Crunch
Swap the chocolate pudding for a peppermint-flavored instant pudding and add crushed candy canes to the topping. The minty zing pairs wonderfully with the chocolate base, creating a festive flavor that reminds you of a candy‑cane swirl.
White Chocolate Raspberry
Replace the chocolate pudding with white chocolate instant pudding, and fold in a handful of fresh raspberry puree into the vanilla layer. The tartness of the raspberries cuts through the sweetness, offering a sophisticated palate cleanser.
Nutty Caramel Delight
Stir a tablespoon of caramel sauce into the chocolate pudding and sprinkle toasted chopped pecans over the whipped topping. The caramel adds a buttery richness while the nuts contribute a satisfying crunch.
Vegan Holiday Version
Use coconut oil instead of butter, dairy‑free cream cheese, almond milk, and a coconut‑based whipped topping. The flavor profile remains indulgent, and the dish stays completely plant‑based for vegan guests.
Coffee‑Infused Kick
Add a teaspoon of instant espresso powder to the chocolate pudding mix. The coffee notes deepen the chocolate flavor, giving the lasagna an adult‑only edge that’s perfect for after‑dinner sipping.
Storing and Bringing It Back to Life
Fridge Storage
Cover the lasagna tightly with plastic wrap and store it in the refrigerator for up to 3 days. The pudding layers stay firm, and the crust remains crisp as long as it’s not exposed to moisture. If you notice the top drying out, place a sheet of parchment paper over the surface before sealing.
Freezer Friendly
For longer storage, slice the lasagna into individual portions, wrap each piece in cling film, then place them in a freezer‑safe bag. They’ll keep for up to 2 months. To defrost, move a piece to the fridge overnight, then let it sit at room temperature for 15 minutes before serving.
Best Reheating Method
While the lasagna is best served cold, if you prefer a warm dessert, microwave a slice for 15‑20 seconds on medium power. Add a tiny splash (about a teaspoon) of milk before heating; the steam will revive the pudding’s silky texture, preventing it from becoming rubbery.