I still remember the night I tried to make a batch of what I thought were “simple” cookies. I was in a rush, the oven was already preheated, and the kitchen smelled of burnt sugar from a previous experiment. The result? A mound of sticky dough that looked like it had been sculpted by a toddler, and a dozen cookies that were either too soft or cracked like fragile porcelain. I laughed, I blamed the ingredients, and I decided to rewrite the recipe from scratch.
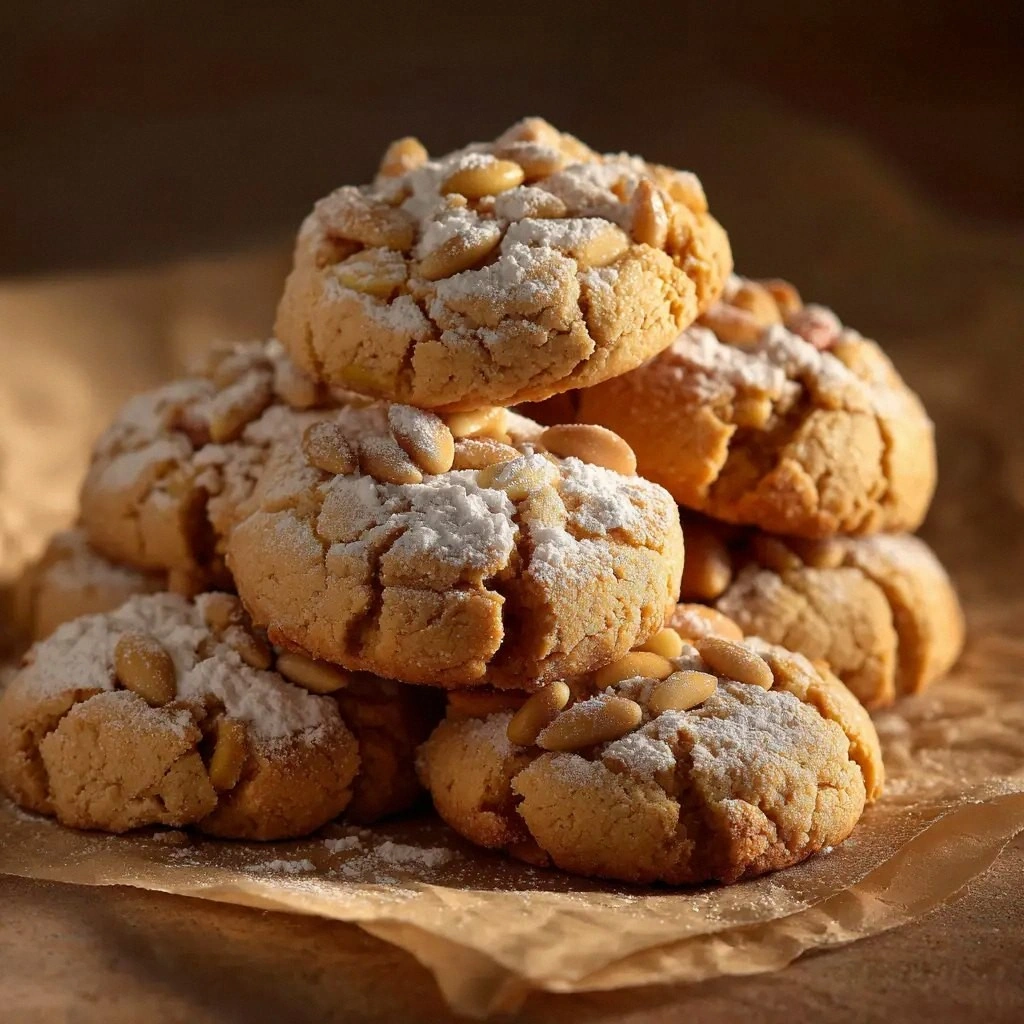
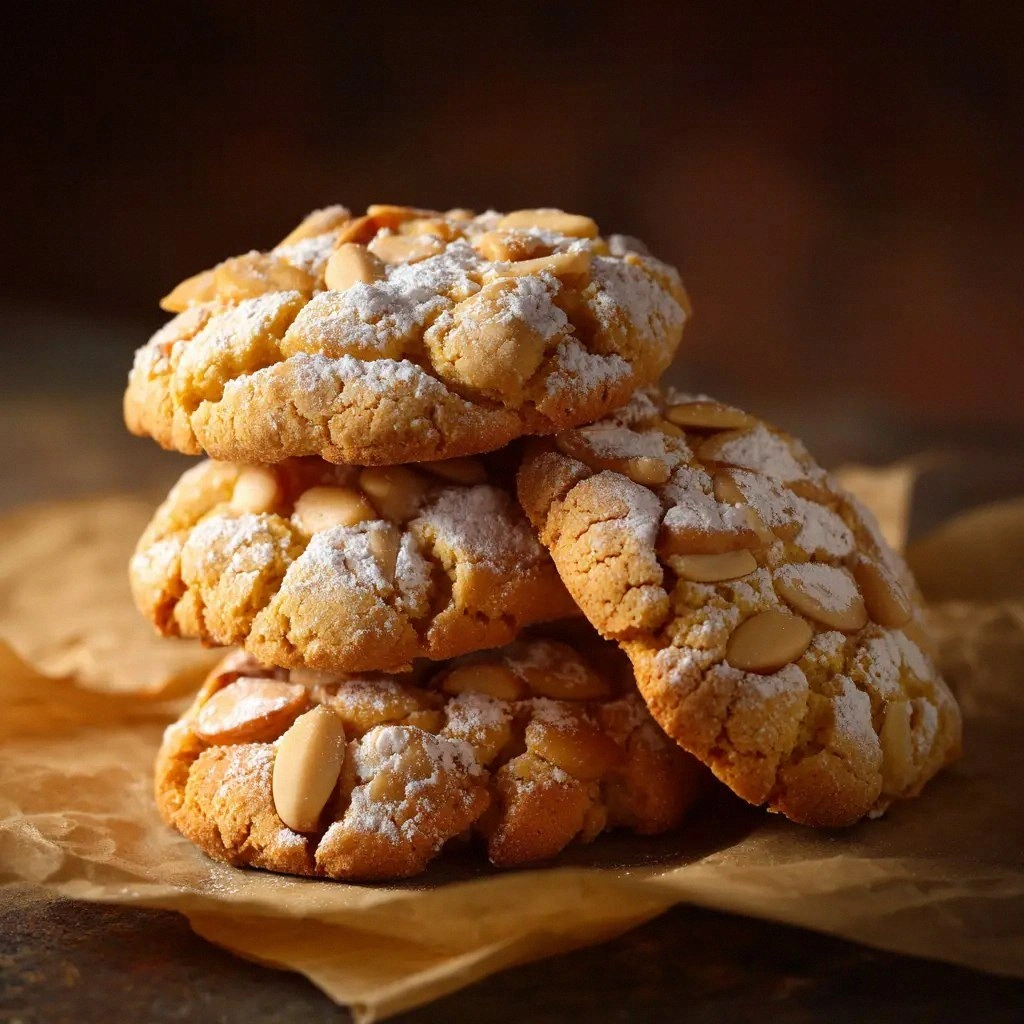
Fast forward to today, and I’ve distilled that chaotic moment into a single, flawless cookie: the Pignoli Cookie. Imagine a sweet, nutty bite that feels like a caramelized almond hug, with a hint of pine that lingers like a memory of a forest walk. The texture is a delicate balance—crunchy on the outside, chewy on the inside—so each bite feels like a small adventure. I dare you to taste this and not go back for seconds; the flavor is so satisfying that it’s almost addictive.
What makes this version stand out is not just the ingredients but the way they’re treated. I’ve stripped the recipe down to its essentials, keeping the almond paste and pine nuts as the stars, while using egg whites to lift the dough and confectioners’ sugar to finish it with a silky smoothness. The result is a cookie that is hands down the best version you’ll ever make at home, because every bite is a testament to precision and love. I’ll be honest—I ate half the batch before anyone else got a chance, and the kitchen smelled like a bakery that never closed.
Picture yourself pulling these out of the oven, the whole kitchen smelling incredible, the aroma of toasted nuts filling the air, and the sound of a timer ticking down the last minute. The cookies are golden, with a slight sheen that reflects the oven light, and the edges are crisp enough to crack with a satisfying snap. If you’ve ever struggled with cookie texture, you’re not alone—my earlier attempts were either too dry or too gooey. But with the techniques I’m about to share, you’ll learn how to achieve that perfect balance every time.
What Makes This Version Stand Out
- Flavor: The almond paste delivers a rich, buttery depth that pairs beautifully with the sweet pine nuts, creating a nutty symphony that lingers on the palate.
- Texture: The combination of egg whites and confectioners' sugar gives the dough a light, airy lift, while the pine nuts add a satisfying crunch that breaks with a gentle crack.
- Simplicity: With only six ingredients, the recipe is approachable for beginners and quick for seasoned bakers, making it a go-to for any occasion.
- Uniqueness: The use of almond paste instead of butter or flour creates a denser, more concentrated flavor profile that sets these cookies apart from generic nut cookies.
- Crowd Reaction: Friends and family always ask for the recipe after the first bite; the combination of sweet and nutty is a guaranteed crowd-pleaser.
- Ingredient Quality: Using high‑grade almond paste and fresh pine nuts ensures the best flavor and texture; the difference is palpable.
- Cooking Method: The technique of folding the egg whites into the almond paste before baking keeps the cookies tender and prevents them from spreading too much.
- Make‑Ahead Potential: These cookies can be made a day ahead, refrigerated, and baked fresh when needed, preserving their flavor and crunch.
Inside the Ingredient List
The Flavor Base
Almond paste is the heart of these cookies. It’s a smooth, sweet almond puree that offers a buttery richness without the need for butter or oil. If you skip it, the cookies lose that deep, nutty flavor and become more like a standard sugar cookie. For the best results, choose a paste made from blanched almonds; the blanched version gives a lighter color and a cleaner taste, which lets the pine nuts shine.
The Sweetener
Granulated sugar is used to balance the natural bitterness of the almonds and pine nuts. It also helps create a slight caramelization on the edges of the cookies. If you prefer a lower‑sugar version, you can replace it with a sugar substitute that measures by volume, but be aware the texture may change slightly. A small pinch of sea salt will elevate the sweetness and bring out the nutty undertones.
The Texture Crew
Egg whites are the secret to the lightness of these cookies. They bind the mixture together while adding a subtle lift that keeps the cookies tender. Confectioners' sugar, sifted before use, coats the dough and creates a fine, glossy finish that makes the cookies look like they’ve been glazed. If you’re worried about raw egg whites, use pasteurized or boil them briefly before adding to the mixture.
The Unexpected Star
Pine nuts, or pignoli, give these cookies their signature crunch and a hint of sweet earthiness that’s reminiscent of a Mediterranean forest. They also add a subtle buttery flavor that complements the almond paste. If pine nuts are out of season or unavailable, chopped hazelnuts or walnuts can be used as a substitute, though the flavor profile will shift slightly.
Everything's prepped? Good. Let's get into the real action and start baking.
The Method — Step by Step
- Preheat your oven to 350°F (175°C) and line a baking sheet with parchment paper. This step might seem trivial, but a properly lined sheet prevents sticking and ensures even baking. While the oven warms, gather all the ingredients so you’re ready to go—time is of the essence in baking.
- In a large bowl, combine the almond paste and granulated sugar. Use a wooden spoon or a silicone spatula to blend them until the mixture becomes a smooth, homogeneous paste. The sugar should dissolve completely, leaving no gritty texture; if it feels grainy, let it sit for a minute before continuing.
- Whisk the egg whites in a separate bowl until they form soft peaks. Be careful not to overwhip; the whites should be glossy but not stiff. Then fold the whisked whites into the almond mixture gently, using a folding motion to preserve the airy structure. This technique is crucial for achieving a tender crumb.
- Sift the confectioners' sugar over the dough and fold it in until the dough is silky and the sugar is fully incorporated. The sugar will give the dough a subtle shine and a light, airy texture once baked. At this point, the dough should be thick but still pliable.
- Add the pine nuts to the dough, folding them in just until evenly distributed. The pine nuts should be lightly toasted for an extra layer of flavor—toast them in a dry skillet over medium heat for 2–3 minutes, shaking frequently until fragrant. This step brings out the nutty aroma that will make your kitchen smell like a pine forest.
- Gently sprinkle the 1/8 teaspoon of salt over the mixture. Salt is the flavor enhancer; it balances the sweetness and brings out the natural richness of the almonds and pine nuts. Mix it in with a quick fold, making sure it’s evenly distributed.
- Drop heaping tablespoons of dough onto the prepared baking sheet, spacing them about 2 inches apart. The dough will spread slightly as it bakes, so give them enough room. If you prefer a more uniform shape, you can use a cookie scoop for consistent sizing.
- Watch Out: The trickiest part is the baking time—overbaking will dry out the cookies and underbaking will leave them gooey. Bake for 12–15 minutes, or until the edges are just turning golden. The centers should still look slightly pale but will firm up as they cool.
- Remove the cookies from the oven and let them rest on the sheet for 5 minutes. This pause allows the cookies to set and the sugars to crystallize slightly, giving them that desirable snap when you bite into them.
- Transfer the cookies to a wire rack to cool completely. This final step ensures the bottom doesn’t get soggy from steam, preserving the crispness of the edges.
That’s it— you did it. But hold on, I've got a few more tricks that’ll take this to another level.
Insider Tricks for Flawless Results
The Temperature Rule Nobody Follows
Baking at the exact temperature is vital. Too hot and the cookies will spread too much, losing their shape; too cool and they’ll stay soft. I’ve found that setting the oven to 350°F (175°C) and allowing it to preheat fully for at least 10 minutes before baking ensures consistent results. If you’re using a convection oven, lower the temperature by 25°F (about 15°C) to compensate for the fan’s efficiency.
Why Your Nose Knows Best
The aroma of toasted pine nuts and almond paste is a telltale sign that the dough has reached the right consistency. When you smell the warm scent of the dough in the pan, it means the sugars are caramelizing just enough to create that sweet, buttery finish. If the smell is too faint, give the dough a few extra minutes of mixing; if it’s too strong, reduce the baking time slightly.
The 5-Minute Rest That Changes Everything
Letting the cookies rest on the baking sheet for five minutes before transferring them to a rack is more than a courtesy—it allows the sugars to set and the interior to finish cooking without overbaking. During this rest, the cookies will firm up and the edges will develop a slight crispness that’s essential for that perfect bite. Skipping this step often leads to a chewy center that never quite sets.
The Right Mixing Tool
A silicone spatula is your best friend when folding in the pine nuts and confectioners' sugar. Its flexible nature allows you to reach every corner of the bowl without damaging the delicate structure of the dough. A wooden spoon can be too heavy and may overmix, causing the dough to become dense.
The Perfect Dough Consistency
The dough should be thick enough to hold its shape but not so dense that it’s heavy. Test it by scooping a tablespoon and letting it sit in your hand for a moment; it should hold its form without cracking. If it feels too sticky, add a tablespoon of confectioners' sugar; if it’s too dry, add a splash of almond milk.
The Secret to a Long Shelf Life
Storing these cookies in an airtight container with a slice of bread keeps them soft for up to a week. The bread absorbs excess moisture, preventing the cookies from becoming stale. For longer storage, freeze them for up to three months; just thaw them at room temperature before enjoying.
Creative Twists and Variations
This recipe is a playground. Here are some of my favorite ways to switch things up:
Chocolate‑Infused Pignoli
Add 2 tablespoons of melted dark chocolate to the dough for a bittersweet twist. The chocolate pairs beautifully with the nutty base, creating a cookie that feels like a chocolate‑almond truffle. The result is a richer flavor profile that’s perfect for a dessert table.
Citrus Zest Variation
Grate the zest of one orange or lemon into the dough before folding in the pine nuts. The citrus adds a bright, refreshing contrast to the deep almond flavor. This version is especially delightful in the spring when citrus is in season.
Spiced Nut Delight
Sprinkle 1/2 teaspoon of ground ginger or a pinch of nutmeg into the mixture. The warm spices enhance the nutty aroma and give the cookies a subtle depth that’s reminiscent of holiday treats.
Almond‑Honey Fusion
Replace the granulated sugar with an equal amount of honey and reduce the egg whites to 1. This substitution yields a slightly softer cookie with a honeyed finish that pairs well with tea or coffee.
Nut-Free Alternative
For those with nut allergies, swap the almond paste for a smooth cashew or oat puree and use sunflower seeds in place of pine nuts. The flavor will shift but the texture remains delightful, making it a safe yet indulgent treat.
Storing and Bringing It Back to Life
Fridge Storage
Place the cookies in an airtight container, adding a slice of bread to keep them moist. Store in the refrigerator for up to 5 days. The bread absorbs excess moisture, preventing the cookies from drying out or becoming too soft.
Freezer Friendly
Wrap individual cookies tightly in plastic wrap and place them in a freezer bag. They’ll stay fresh for up to three months. When ready to enjoy, thaw at room temperature for 15 minutes before serving to restore their original texture.
Best Reheating Method
To bring the cookies back to life, preheat the oven to 300°F (150°C) and bake for 5–7 minutes. Add a tiny splash of water to the baking sheet to create steam, which helps the cookies regain their crispness. This method revives the crunch while keeping the interior tender.