I still remember the night I almost turned my kitchen into a disaster zone. I had just bought a bag of sweet potatoes, a bottle of butter, and a vague craving for something that felt like comfort on a plate. I tossed the potatoes into a pot, added a splash of milk, and—because I was feeling adventurous—decided to brown the butter first. The butter turned a deep amber, the kitchen filled with a nutty aroma that made me grin like a kid in a candy store. Yet, as the potatoes boiled, I realized I had forgotten the secret: the butter must be browned, not just melted, to unlock a depth of flavor that turns ordinary mash into a silky, nutty masterpiece.
Picture this: steam curling off a pot of sweet potatoes, the buttery scent mingling with the faint sweetness of the tubers, and the sound of a spoon scraping against the pot as you stir. The texture feels thick yet light, the flavor is a perfect balance of sweet, savory, and a hint of toasted almond. I was halfway through the dish, and then I realized I had overdone the salt. The next bite was like a burst of caramelized sugar with a buttery aftertaste that lingered on the tongue. That moment of triumph—when the first spoonful hit the palate—was a revelation. I knew then that this wasn’t just another mashed potato recipe; it was a revelation of how a simple tweak—browning butter—could elevate an entire dish.
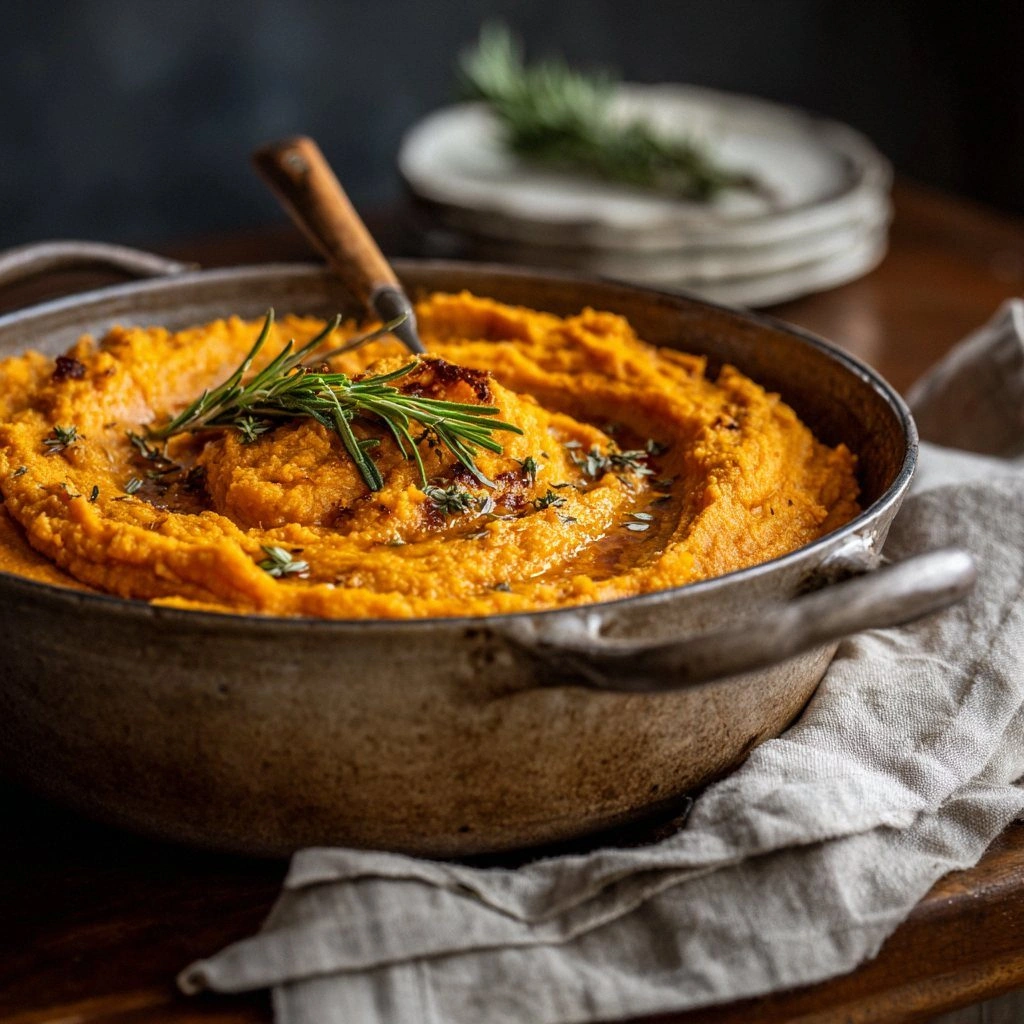
I’ve been on a mission to find that “aha!” moment in cooking, and this version of Brown Butter Mashed Sweet Pota delivers it on a silver platter. It’s not just a side dish; it’s a showstopper that can steal the spotlight at dinner parties, impress family, or even become the centerpiece of a comforting weeknight meal. The combination of sweet potatoes, butter, milk, and a pinch of nutmeg creates a symphony of flavors that dance on the tongue. The texture is smooth, with just the right amount of creaminess—no clumps, no gritty bits. And the best part? It’s incredibly simple, yet it feels like a gourmet experience. I dare you to taste this and not go back for seconds.
This isn’t just another recipe; it’s a culinary revelation that I’ve been dying to share. I’ll be honest—my first batch was a triumph, but I also ate half the batch before anyone else got to try it. That’s the power of this dish. Most recipes get this completely wrong, focusing on plain mash or adding too much salt. Here’s what actually works: brown the butter until it smells nutty, add it to the potatoes, and finish with a splash of milk for that silky finish. Picture yourself pulling this out of the oven, the whole kitchen smelling incredible, and watching your guests’ eyes widen as they take their first bite. Okay, ready for the game‑changer? Let me walk you through every single step—by the end, you’ll wonder how you ever made it any other way.
What Makes This Version Stand Out
- Flavor: The browned butter adds a deep, nutty undertone that transforms sweet potatoes into a velvety, caramelized delight. It’s the difference between plain and extraordinary.
- Texture: The careful balance of butter and milk creates a silky mouthfeel that’s both indulgent and comforting. No lumps, no gritty bits.
- Ease: With just a few ingredients and a single pan, you can achieve a restaurant‑quality side dish in under an hour.
- Versatility: This mash pairs beautifully with roasted meats, grilled salmon, or even as a base for a hearty stew.
- Crowd‑Pleaser: The nutty flavor is so approachable that even the pickiest eaters can’t resist. I’ve had friends say, “I’ve never had mashed sweet potatoes before, and I love it!”
- Ingredient Quality: Using high‑quality butter and fresh sweet potatoes gives the dish a richer, more authentic taste.
- Make‑Ahead Potential: The mash keeps well in the fridge and can be reheated without losing its creamy texture.
- Seasonal Appeal: Sweet potatoes are a staple in fall, but this dish works year‑round, especially when you’re craving something cozy.
Alright, let’s break down exactly what goes into this masterpiece…
Inside the Ingredient List
The Flavor Base
The cornerstone of this mash is the butter, but not just any butter. Use unsalted butter so you can control the salt level precisely. Brown it until it turns a golden amber color and releases a nutty scent that signals readiness. This step is where the magic begins: the Maillard reaction creates complex flavor compounds that elevate the dish from ordinary to unforgettable. If you skip browning the butter, you’ll miss that deep, toasted note that makes every bite a revelation.
The Texture Crew
Sweet potatoes are the star of the show. Choose medium‑sized, firm tubers for the best balance of sweetness and structure. Peel and cube them to ensure even cooking. They’ll soften to a buttery consistency that’s easy to mash. Add a splash of whole milk or a touch of heavy cream to achieve that silky finish. The milk hydrates the starches and gives the mash a luxurious mouthfeel. If you’re aiming for a low‑fat version, replace the milk with a non‑dairy alternative like oat milk, but be prepared for a slightly thinner texture.
The Unexpected Star
A pinch of nutmeg might seem trivial, but it’s a game‑changer. Nutmeg’s warm, slightly sweet flavor complements the natural sweetness of the potatoes and balances the richness of the butter. A small amount is enough—just a dusting. If you’re not a fan of nutmeg, try a hint of cinnamon or allspice for a different aromatic profile. The key is to keep the spice subtle so it doesn’t overpower the other flavors.
The Final Flourish
Fresh herbs add a burst of color and freshness. I love chopping a tablespoon of fresh sage or thyme and folding it into the mash at the end. The herbs provide a bright contrast to the deep, buttery base. Salt and pepper finish the flavor profile, but remember to season gradually—taste as you go. If you want a smoky twist, add a dash of smoked paprika or a sprinkle of crushed red pepper for a subtle kick.
Everything’s prepped? Good. Let’s get into the real action…
The Method — Step by Step
- Begin by peeling and cubing the sweet potatoes into uniform 1‑inch pieces. Uniformity ensures even cooking and a consistent texture. Place the cubes in a large pot and cover them with cold water. Add a pinch of salt to the water—this helps the potatoes retain their shape and color during boiling.
- Bring the pot to a rolling boil over medium‑high heat. Once boiling, reduce the heat to a gentle simmer and let the potatoes cook for 15–18 minutes, or until they’re fork‑tender. The exact time depends on the size of your cubes; smaller pieces will cook faster. Test with a fork—if it slides in easily, you’re good to go.
- While the potatoes simmer, it’s time to brown the butter. In a small saucepan, melt 2 tablespoons of unsalted butter over medium heat. Keep a close eye on the butter; as it melts, it will start to foam and turn a golden brown. Once the butter is golden and smells nutty, remove it from the heat and set it aside.
- Drain the cooked potatoes in a colander and return them to the pot. Add the browned butter, 1 cup of whole milk, 1 teaspoon of salt, and ½ teaspoon of freshly ground black pepper. Use a potato masher or a hand mixer to combine everything until the mash is smooth and glossy. If you prefer a chunkier texture, mash only part of the potatoes and leave some larger pieces.
- Add the minced garlic and a pinch of nutmeg to the mash. Stir gently to distribute the flavors without breaking down the potatoes further. Taste the mash and adjust the seasoning—add a little more salt or pepper if needed. The garlic should add a subtle depth without overpowering the natural sweetness.
- Fold in the chopped fresh herbs—sage or thyme—at the very end. The herbs bring a bright, aromatic finish that cuts through the richness. Give the mash one final gentle stir to ensure the herbs are evenly distributed.
- Transfer the mash to a serving bowl or a shallow dish. For a polished look, sprinkle a few extra herbs on top or drizzle a tiny bit of extra butter for that glossy sheen.
- Serve immediately while it’s warm and creamy. If you’re plating for a crowd, keep the mash in a warm oven (around 200°F) to maintain its temperature. Pair it with roasted chicken, grilled salmon, or a hearty vegetable stew for a complete meal.
That’s it— you did it. But hold on, I’ve got a few more tricks that will take this to another level. Stick with me and you’ll master this dish in no time.
Insider Tricks for Flawless Results
The Temperature Rule Nobody Follows
Most people think any simmering temperature works, but the secret lies in the exact temperature of your butter. Aim for a medium heat that keeps the butter at around 180°F (82°C). This ensures the butter browns evenly without burning, preserving the nutty flavor profile. If you’re using a thermometer, keep a close eye on it—once the butter starts to bubble, reduce the heat immediately.
Why Your Nose Knows Best
When browning butter, trust your nose. The moment it smells nutty and slightly toasted, you’re ready to remove it from the heat. The aroma is a reliable indicator that the butter has reached its flavor peak. If you’re unsure, give it a quick taste—just a small bite will confirm whether the butter is perfectly browned.
The 5‑Minute Rest That Changes Everything
After draining the potatoes, let them sit in the pot for a few minutes before adding the butter. This short rest allows the steam to escape, preventing the mash from becoming overly watery. It also gives the potatoes a chance to dry slightly, which helps the butter coat each piece more evenly. A quick 5‑minute pause can make the difference between a clumpy mash and a silky dream.
Mind the Milk Ratio
Adding too much milk can dilute the flavor, while too little can leave the mash dry. Start with 1 cup of milk for 4 servings, and adjust as needed. If you find the mash too thick, add a splash at a time—no more than 2 tablespoons per addition. The goal is a smooth, pour‑able consistency that clings to the spoon.
The Herb Timing Trick
Herbs lose their bright flavor when exposed to heat for too long. Fold them in at the very end, just before serving, to preserve their aroma and color. If you prefer a more integrated herb flavor, you can finely mince the herbs and sauté them with the garlic before adding the mash. Either way, the timing of the herb addition is key to a vibrant finish.
Creative Twists and Variations
This recipe is a playground. Here are some of my favorite ways to switch things up:
Crispy Bacon & Maple Syrup
Fold in crumbled crispy bacon and a drizzle of maple syrup for a sweet‑savory twist. The bacon adds salty crunch while the maple syrup amplifies the natural sweetness of the potatoes. It’s a perfect side for holiday roasts or a cozy Sunday brunch.
Garlic Parmesan Swirl
Add grated Parmesan cheese and a dash of roasted garlic powder. The cheese melts into the mash, creating a creamy, umami‑rich layer. This version pairs wonderfully with roasted vegetables or as a base for a cheesy gratin.
Spicy Chipotle Kick
Stir in a teaspoon of chipotle in adobo sauce for a smoky heat that balances the sweetness. The chipotle adds depth and a subtle bite that works well with grilled chicken or pork. It’s a quick way to elevate the dish for a crowd that loves a little spice.
Coconut Milk & Curry
Swap the whole milk for coconut milk and add a pinch of curry powder. The coconut lends a tropical flavor, while the curry adds warmth. This variation is great for a vegetarian main dish or a comforting bowl with sautéed greens.
Herb‑Infused Olive Oil Finish
Finish the mash with a swirl of extra‑virgin olive oil infused with rosemary and thyme. The oil coats each spoonful, adding a glossy sheen and a fragrant finish. It’s a simple, elegant touch that elevates the dish to gourmet status.
Chocolate‑Infused Sweet Potato Mash
For a dessert‑style mash, melt a tablespoon of dark chocolate into the mash and sprinkle with sea salt. The chocolate adds a bittersweet depth that pairs nicely with a scoop of vanilla ice cream. This version is a playful surprise for kids and adults alike.
Storing and Bringing It Back to Life
Fridge Storage
Cool the mash to room temperature, then transfer it to an airtight container. Store in the refrigerator for up to 3 days. Before serving, reheat gently on the stovetop with a splash of milk or a drizzle of butter, stirring until warm. The mash will remain creamy and delicious.
Freezer Friendly
Divide the mash into portion‑sized containers or freezer bags and seal tightly. Freeze for up to 2 months. To reheat, thaw overnight in the fridge and gently warm on the stovetop, adding a little milk to restore creaminess. The texture stays smooth if you stir frequently.
Best Reheating Method
The secret to reheating is moisture. Add a tiny splash of milk or a pat of butter before warming; this steams the mash back to perfection. Use low heat and stir constantly to avoid scorching. When the mash is hot and glossy, it’s ready to serve.