I was standing in my kitchen, staring at a half‑baked cheesecake that had turned into a soggy, over‑run disaster. The sugar had crystallized into a hard shell, the cream cheese had lost its silky sheen, and the whole thing smelled like burnt sugar. I could feel the panic rising in my chest as I reached for the oven timer, realizing I had over‑mixed the batter and under‑baked the cupcakes. That moment of culinary horror was the spark that ignited the creation of Vanilla Bean Crème Brûlée Chee.
Picture this: the air is thick with the buttery scent of caramelized sugar, a faint citrus tang from the vanilla paste wafting through the room, and the gentle clink of a stainless steel spoon against a mixing bowl. As you stir, the batter glistens like a smooth, creamy lake, each swirl reflecting the soft glow of the kitchen lights. The sound of the oven door shutting echoes, and a faint hiss of steam escapes as the cupcakes begin their ascent. The anticipation is tangible, a sweet promise that each bite will deliver a symphony of textures—soft, custard‑like interiors wrapped in a crisp, caramelized crown.
What makes this version stand out? It’s the marriage of classic crème brûlée technique with the comforting familiarity of a cheesecake cupcake, all wrapped in a single, bite‑sized package. The use of vanilla bean paste and extract creates a depth of flavor that vanilla powder simply can’t match. The addition of sour cream keeps the batter moist without adding a noticeable tang, while the heavy cream topping offers a light, airy contrast to the dense custard base. Every element—from the precise leavening ratio to the meticulous caramelization—has been fine‑tuned to deliver a flawless, restaurant‑quality finish at home.
I dare you to taste this and not go back for seconds. Most people will say, “This is hands down the best version you'll ever make at home.” I’ll be honest—after I baked the first batch, I ate half of it before anyone else could even touch a cupcake. Picture yourself pulling this out of the oven, the whole kitchen smelling incredible, and the moment the sugar crust cracks with a satisfying snap. Let me walk you through every single step—by the end, you'll wonder how you ever made it any other way.
What Makes This Version Stand Out
- Flavor: The combination of vanilla bean paste and extract creates a layered vanilla experience that lingers on the palate, far beyond the single-note sweetness of standard vanilla.
- Texture: The custard base is silky and dense, yet the heavy cream topping gives a light, airy lift, and the caramelized sugar provides a satisfying crunch.
- Ease: No complicated equipment required—just a standard oven and a trusty kitchen torch for the final caramelization.
- Uniqueness: This cupcake is a hybrid of cheesecake and crème brûlée, offering a novel dessert experience that feels indulgent without being overbearing.
- Crowd‑pleaser: Whether you’re hosting a brunch or a midnight snack, guests will be wowed by the dramatic sugar crack and the melt‑in‑your‑mouth interior.
- Ingredient Quality: Using high‑quality cream cheese and fresh vanilla bean paste elevates the entire dish, making the difference between a good and a great cupcake.
- Make‑ahead Friendly: The cupcakes can be baked and chilled in advance; just wait to caramelize the sugar topping right before serving.
- Presentation: The golden caramelized crust looks like a mini dessert masterpiece, perfect for photo‑ready moments.
Alright, let's break down exactly what goes into this masterpiece…
Inside the Ingredient List
The Flavor Base
Cream cheese is the star of the show, providing that rich, creamy texture we all love in cheesecake. It melts into a silky custard when heated, creating the smooth interior that makes each bite a revelation. If you skip it, the cupcakes will lack body and depth, turning into a mere fluff rather than a decadent treat.
Granulated Sugar is the sweetener that balances the tanginess of the cream cheese and sour cream. It also assists in the caramelization process, forming the crisp sugar crust that’s the hallmark of crème brûlée. Replacing it with brown sugar will introduce a molasses note that could overpower the vanilla, so keep the white sugar for the best flavor.
Sour Cream adds a lovely tang and moisture, making the cupcakes extra luscious. It also helps keep the batter from drying out during baking, ensuring a moist crumb. If you’re lactose intolerant, Greek yogurt can be a suitable substitute, but be aware it will change the texture slightly.
The Texture Crew
Eggs are the binding agent that helps everything together and gives the cupcakes a beautiful rise. Each egg contributes to the custard structure, and their proteins coagulate to set the interior. If you omit eggs, the cupcakes will be flat and crumbly.
All-Purpose Flour provides structure and helps the cupcakes hold their shape. It’s the backbone of the batter, and its gluten network gives the cupcakes a slight chew. You can substitute with cake flour for a lighter crumb, but the result will be less dense and more cake‑like.
Baking Powder is the leavening agent that helps the cupcakes rise to fluffy perfection. It reacts with the acidic sour cream to produce carbon dioxide, which lifts the batter. Too much baking powder can create a soapy aftertaste, so measure carefully.
Salt is just a pinch! It enhances the sweetness and balances the flavors, bringing out the vanilla and the richness of the cream cheese. Skipping salt will leave the cupcakes tasting flat.
The Unexpected Star
Vanilla Bean Paste delivers that authentic vanilla flavor, it’s like a hug in a cupcake. The paste contains real vanilla bean seeds, which give a subtle speckled texture that is a visual treat. If you can’t find paste, pure vanilla extract is a close substitute, but the paste adds a depth that the extract can’t match.
Vanilla Extract is the little extra vanilla never hurts! It enhances the overall flavor profile and gives a warm, aromatic note that complements the paste. Using only paste can feel a bit thin; the extract adds a fragrant layer that rounds out the taste.
The Final Flourish
Heavy Cream is used for whipping, it creates a light and airy topping that’s simply irresistible. When whipped to soft peaks, it adds a fluffy, cloud‑like layer that contrasts with the dense custard. If you prefer a lighter topping, use half-and-half, but the richness of heavy cream is key to that classic crème brûlée feel.
Granulated Sugar for topping is what we’ll caramelize for that signature crème brûlée finish. The sugar must be fine enough to melt evenly and form a crisp, golden crust. Using superfine sugar will help prevent clumping and ensure a smooth caramelization.
Everything's prepped? Good. Let's get into the real action...
The Method — Step by Step
- Preheat your oven to 350°F (175°C). Line a 12‑cup muffin tin with paper liners, leaving a small gap between each cup for even baking. This simple step ensures that each cupcake has room to rise and a clean, even top. As the oven heats, you’ll notice the faint scent of vanilla and sugar already starting to mingle in the air, signaling that the adventure is about to begin.
- In a large mixing bowl, combine the cream cheese, granulated sugar, sour cream, eggs, vanilla bean paste, and vanilla extract. Use a hand mixer or stand mixer on low speed to blend until the mixture is smooth and glossy. The key here is to avoid over‑mixing; you want a silky batter without incorporating too much air, which could lead to a cakey texture. The batter should look like a thick, creamy custard that glistens in the light.
- Sift together the all‑purpose flour, baking powder, and salt in a separate bowl. Gradually fold this dry mixture into the wet batter using a spatula, employing a gentle “turn‑over” motion. This preserves the airy structure and prevents a dense crumb. The batter should be thick yet pourable; if it’s too thick, add a splash of heavy cream to loosen it slightly.
- Whisk the heavy cream to soft peaks in a small bowl. Gently fold the whipped cream into the batter, creating a light, airy layer that will rise slightly during baking. This step is crucial for the signature “cloud” effect that makes the cupcakes feel indulgent. Be careful not to over‑whip the cream, as it could separate and make the batter runny.
- Spoon the batter into the prepared muffin cups, filling each about two‑thirds full. This allows room for the cupcakes to rise without overflowing. As you fill, you’ll hear the gentle thud of the batter settling, a reassuring sound that signals the batter is behaving correctly.
- Bake for 25 to 27 minutes, or until the edges pull slightly away from the sides of the cups and the tops are set but still slightly jiggly. The batter will have risen beautifully, forming a golden crown. Avoid opening the oven door too early, as the sudden temperature drop can cause the cupcakes to sink. The aroma during this stage will be a sweet, buttery perfume that fills the kitchen.
- Remove the cupcakes from the oven and let them cool in the tin for 10 minutes. Then transfer them to a wire rack to cool completely. This cooling period allows the custard to set fully, ensuring a smooth texture when you bite in. The cupcakes will still be warm, so be careful not to touch them immediately.
- While the cupcakes cool, prepare the caramelized sugar topping. Place the granulated sugar in a small, heat‑proof dish and sprinkle it evenly over the cooled cupcakes. Use a kitchen torch or broiler to melt the sugar until it turns a deep amber color and cracks with a satisfying snap. Watch carefully—once the sugar starts to bubble, it’s a race against time to achieve that perfect brittle crust.
- Chill the cupcakes in the refrigerator for at least 30 minutes before serving. This step firms up the custard and ensures the caramelized sugar stays crisp. If you’re serving immediately after caramelizing, the cupcakes will be delightfully warm inside with a crisp, sweet exterior.
- Serve each cupcake with a spoonful of whipped cream on the side, if desired, and enjoy the contrast of textures and flavors. The first bite will reveal the creamy custard, followed by the crunchy caramelized sugar, and the lingering vanilla notes that dance on your palate. This is the moment of truth, and it’s worth savoring slowly.
That's it — you did it. But hold on, I've got a few more tricks that'll take this to another level...
Insider Tricks for Flawless Results
The Temperature Rule Nobody Follows
Many bakers bake cupcakes at a high temperature to get a quick rise, but for this custard‑rich batter, a steady 350°F (175°C) is essential. The lower heat allows the custard to set slowly, preventing a cracked top and ensuring a smooth interior. If you accidentally set the oven too high, you’ll end up with a dry, over‑baked cupcake that lacks the silky mouthfeel.
Why Your Nose Knows Best
Your sense of smell is a reliable indicator of doneness. As the cupcakes bake, a faint scent of caramel and vanilla will emerge. When you smell that sweet, buttery aroma, it means the sugar is caramelizing just right and the custard is setting perfectly. Trust your nose over the clock, especially if you’re using a different oven.
The 5-Minute Rest That Changes Everything
After removing the cupcakes from the oven, let them rest in the tin for 10 minutes before transferring them to a wire rack. This rest period allows the residual heat to finish the cooking process, ensuring the interior remains moist and the top doesn’t crack. Skipping this step can result in uneven texture and a less satisfying bite.
The Crust‑Crack Timing
When caramelizing the sugar, timing is everything. The sugar should melt into a deep amber hue and then crack immediately when it cools. If you wait too long, the sugar will burn and produce a bitter taste. Use a timer and keep a close eye on the color transition from golden to amber.
The Final Chill
Chilling the cupcakes for at least 30 minutes before serving is the secret to a firm, slice‑ready dessert. This step also allows the caramelized sugar to set into a crisp shell that won’t crumble under a spoon. If you’re in a hurry, you can serve them warm, but the texture won’t be as refined.
Creative Twists and Variations
This recipe is a playground. Here are some of my favorite ways to switch things up:
Chocolate Crème Brûlée Chee
Add 1/4 cup of cocoa powder to the dry mix and replace half the heavy cream with chocolate ganache. The result is a decadent chocolate version that still boasts the caramelized crust. This is perfect for chocolate lovers who want a richer dessert.
Lemon Zest Surprise
Grate a teaspoon of lemon zest into the batter and replace the vanilla extract with a splash of lemon juice. The citrus brightens the flavor profile, giving the cupcakes a fresh, tangy edge that pairs beautifully with the caramelized sugar.
Nutty Caramel Crunch
Fold in 1/2 cup of toasted pecans or walnuts into the batter for added crunch. The nuts provide a buttery, earthy counterpoint to the sweet custard, and they also add a delightful texture to each bite.
Espresso‑Infused Delight
Replace half the heavy cream with cold espresso or strong coffee. The coffee adds depth and a subtle bitterness that balances the sweetness. This variation is a great choice for coffee enthusiasts looking for a dessert with a kick.
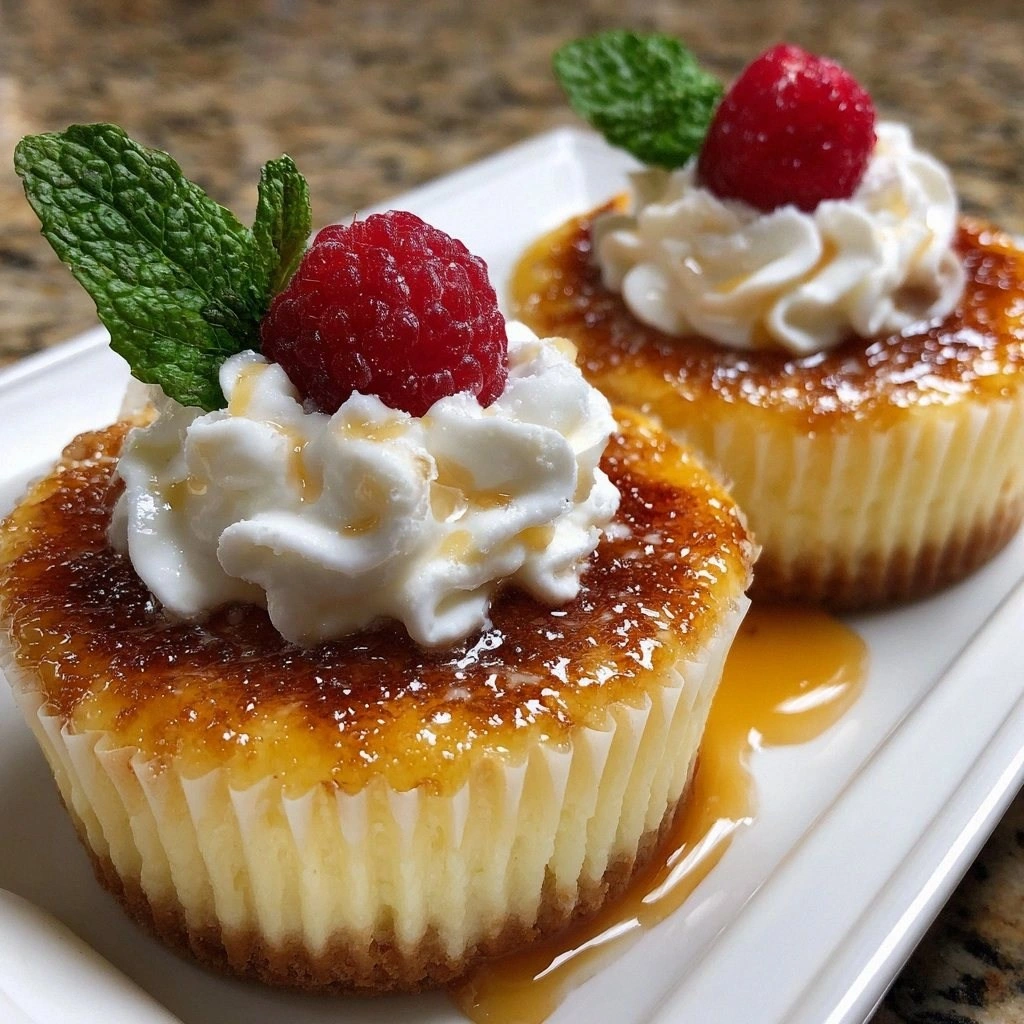
Berry‑Burst Edition
Top each cupcake with a dollop of fresh mixed berries before caramelizing the sugar. The berries burst with juicy sweetness and add a pop of color and freshness to the dessert, making it a vibrant and visually stunning treat.
Storing and Bringing It Back to Life
Fridge Storage
Store the cupcakes in an airtight container in the refrigerator for up to 3 days. Keep the caramelized sugar on top of the cupcakes to preserve its crispness. If the sugar softens, you can re‑crack it by briefly placing the cupcakes under a broiler for 30 seconds.
Freezer Friendly
For longer storage, freeze the cupcakes (without the sugar crust) in a freezer‑safe container for up to 2 months. Thaw in the refrigerator overnight and then re‑caramelize the sugar crust before serving. This method keeps the custard fresh and the texture intact.
Best Reheating Method
To bring the cupcakes back to life, place them on a baking sheet and warm in a preheated 300°F (150°C) oven for 5 minutes. Add a splash of water to the bottom of the pan to create steam, which will help the custard stay moist while the sugar crust crisps up again. This gentle reheating preserves the delicate balance of flavors.