I was standing in my kitchen, staring at a pile of bright red radishes that had just been harvested from the garden, when the phone rang. “You have to try this,” my friend texted, laughing. “It’s the best thing I’ve ever tasted.” The moment I opened the fridge, the sharp, peppery scent of radishes hit me like a wave, and my stomach grumbled in anticipation. I knew I was about to create something extraordinary, and I couldn't wait to share every sizzling detail with you.
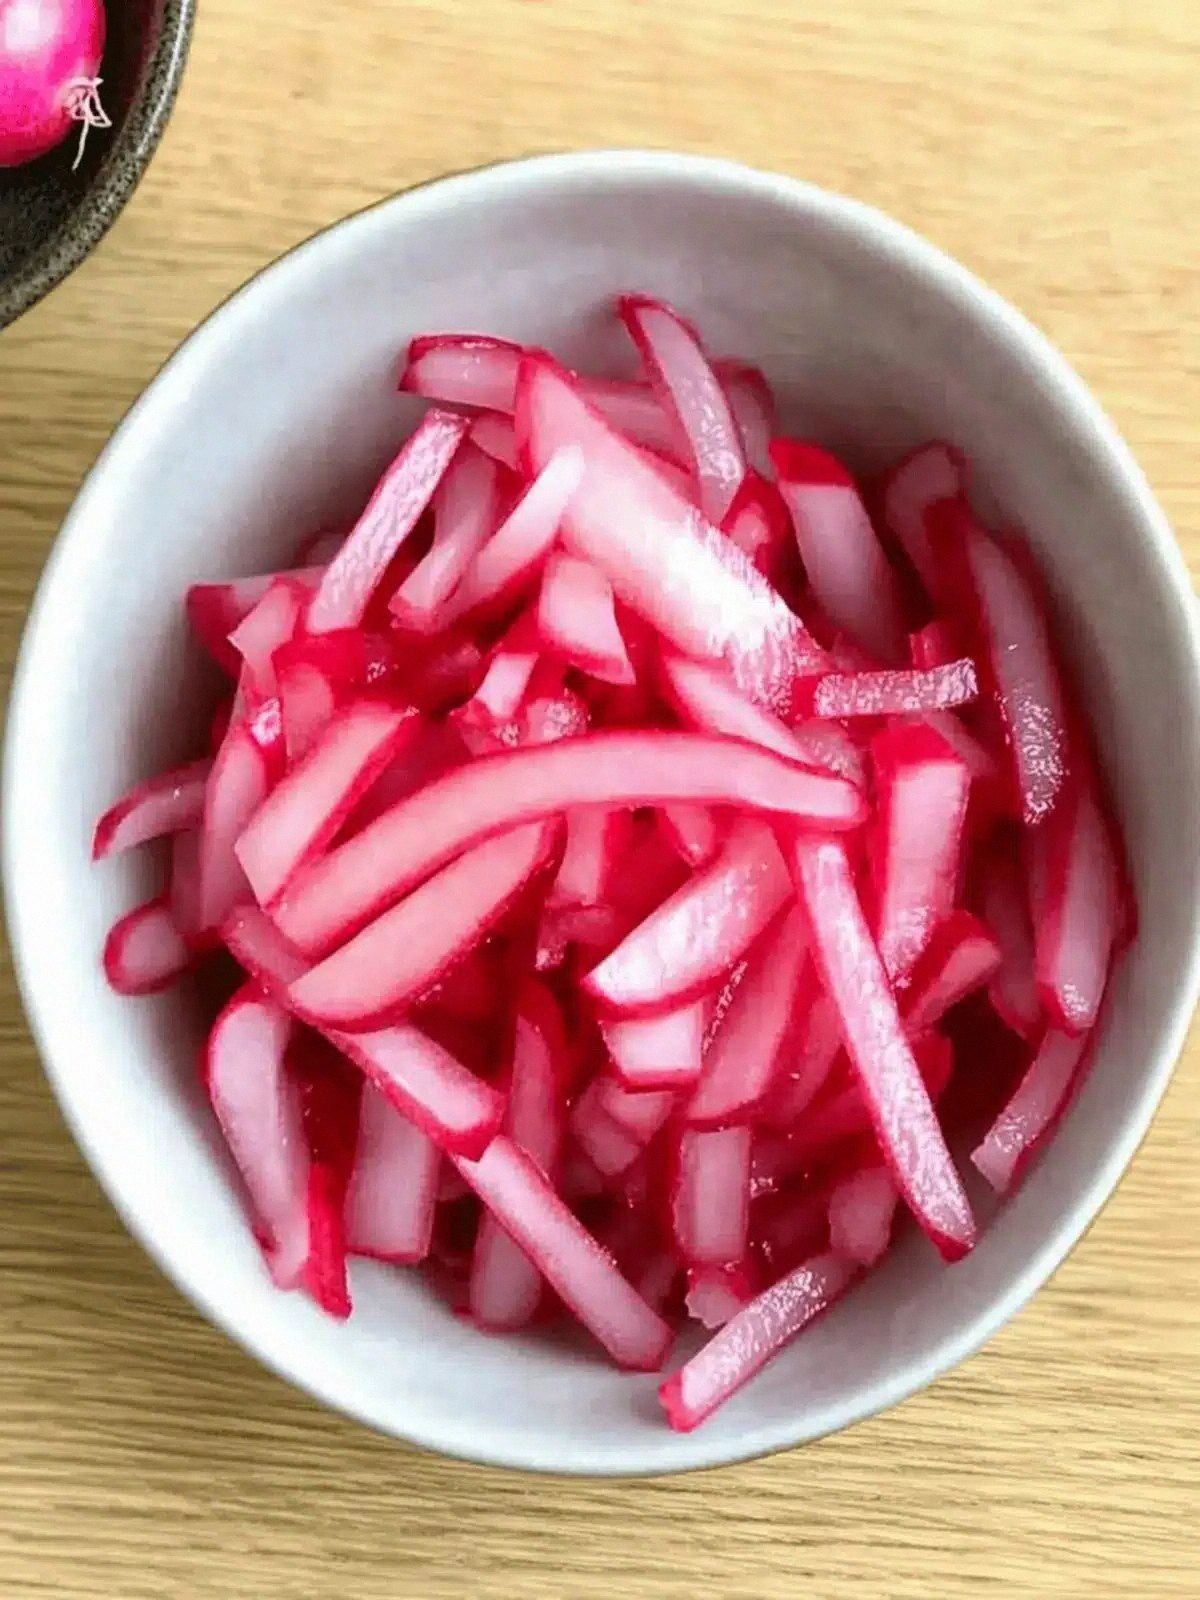
Picture this: a handful of crisp radishes, their skin a glossy crimson that glistens under the kitchen light. The air is filled with a tangy, acidic aroma as vinegar meets lemon juice, promising a burst of brightness with every bite. The sound of the chopping board rhythmically thudding against the knife echoes like a metronome, keeping time with my excitement. When you first bite, the crunch is unmistakable—crisp, juicy, and immediately followed by a zesty, citrusy kick that tingles your palate.
But this isn’t just a pickled radish recipe. It’s a game‑changing, crowd‑pleasing, make‑ahead marvel that turns an ordinary side dish into a showstopper. The secret? A carefully balanced blend of vinegar, salt, and lemon that cuts through the radish’s natural earthiness, leaving a bright, refreshing finish that feels like a spring breeze. I dare you to taste this and not go back for seconds; the flavor is so clean and vibrant that it will leave you craving more.
I’ve spent hours perfecting the technique, and the result is hands down the best version you’ll ever make at home. The radishes stay crisp, the pickling liquid coats each piece like velvet, and the zesty finish lingers on the tongue. And if you’ve ever struggled to get the right balance of tang and sweetness, you’re not alone—this is the fix you’ve been looking for. Stay with me here, and by the end, you’ll wonder how you ever made it any other way.
What Makes This Version Stand Out
- Taste: The bright acidity from vinegar and lemon juice cuts through the radish’s natural pepperiness, creating a clean, refreshing bite that feels like a palate cleanser. The salt enhances every flavor without overpowering.
- Texture: Unlike many pickles that become mushy, these radishes retain their crunch, thanks to the quick pickling process and the protective layer of lemon juice.
- Speed: The entire recipe takes under 45 minutes, from prep to the first bite, making it ideal for busy weeknights.
- Versatility: Serve as a side with grilled meats, toss into salads, or use as a topping for ramen and sushi rolls.
- Make‑ahead: The pickles can be stored in the fridge for up to two weeks, and the flavors deepen over time, giving you a ready‑to‑use condiment.
- Ingredient Quality: Fresh, organic radishes bring a subtle sweetness, while the vinegar’s sharpness adds depth. The lemon juice provides a natural preservative and a bright finish.
- Minimal Equipment: All you need is a cutting board, a saucepan, and a jar. No special tools or equipment required.
- Health‑Friendly: Low in calories, high in fiber, and packed with vitamin C, these pickles are a nutritious addition to any meal.
Inside the Ingredient List
The Flavor Base
Vinegar is the backbone of any pickle. In this recipe, a cup of rice or white vinegar provides a sharp, clean acidity that cuts through the radish’s natural sweetness. It also acts as a preservative, keeping the pickles crisp and safe for storage. If you prefer a milder taste, substitute with apple cider vinegar, but be prepared for a slightly sweeter profile.
The Crunch Crew
Radishes are the star ingredient, and their crispness is what makes this dish so delightful. Choose fresh, firm radishes with smooth skin; they’ll hold up better during pickling. If you can’t find radishes, daikon or cucumber can serve as a suitable alternative, though the flavor will differ slightly.
The Tangy Touch
Lemon juice is more than just a garnish; it adds a bright, citrusy note that balances the vinegar’s sharpness. The acidity of lemon also helps maintain the radishes’ firmness. For a more complex flavor, mix lemon juice with lime or yuzu for a unique twist.
The Final Flourish
Salt is the unsung hero that brings all flavors together. It enhances the radish’s natural sweetness and sharpens the overall taste. Use sea salt or kosher salt for a subtle mineral undertone. If you’re watching sodium intake, reduce the amount to one teaspoon, but note that the pickles may not preserve as well.
Everything’s prepped? Good. Let’s get into the real action and bring these crisp, zesty radishes to life.
The Method — Step by Step
-
Begin by washing the radishes under cold water, removing any dirt or blemishes. Pat them dry with a clean towel. Slice them into 1/4-inch thick rounds or half‑moon shapes—whatever feels most fun. The uniform size ensures even pickling and a consistent crunch.
-
In a medium saucepan, combine the cup of vinegar, two tablespoons of lemon juice, and one tablespoon of salt. Stir until the salt dissolves completely. The mixture should feel slightly viscous, which indicates the salt is fully integrated.
-
Place the saucepan over medium heat and bring the liquid to a gentle simmer. Keep a close eye on it; you want it hot enough to dissolve the salt but not so hot that it starts to bubble aggressively. A good rule of thumb: the liquid should be steaming but not boiling.
-
Add the sliced radishes to the simmering liquid. Let them sit for 2 minutes, just long enough for the flavors to start permeating. Stir gently to ensure each slice is coated. The radishes should begin to soften slightly but still retain their crispness.
-
Turn off the heat and allow the mixture to cool to room temperature. This step is crucial—if you rush it and pour hot liquid into the jar, you’ll create condensation that can dilute the pickling brine. The cooler the liquid, the better the radishes will maintain their texture.
-
Transfer the radish slices and their liquid into a sterilized jar. Press them gently to eliminate air pockets, but avoid over‑compacting, which can crush the radishes. If you like a bit of fizz, add a pinch of sugar to the liquid; it will caramelize slightly, adding depth.
-
Seal the jar with a lid and give it a gentle twist to ensure an airtight seal. Store the jar in the refrigerator immediately. The pickles will start to develop flavor within 24 hours, but they’re ready to eat after 2 hours for a quick snack.
-
After 24 hours, give the jar a gentle shake before opening. The radishes should be bright red, crisp, and coated in a glossy, tangy liquid. If you notice any off smells or sliminess, discard—this indicates spoilage.
-
Serve immediately or store for up to two weeks. The longer they sit, the more intense the flavor becomes, making them perfect for meal prep. When you’re ready to eat, simply scoop out a few slices and enjoy the burst of citrus and crunch.
That’s it—you did it. But hold on, I’ve got a few more tricks that will take this from good to unforgettable. These insider tips will help you master the art of pickling and ensure every batch is a triumph.
Insider Tricks for Flawless Results
The Temperature Rule Nobody Follows
Many pickling recipes suggest letting the brine cool completely before sealing the jar. In practice, this can delay flavor development. Instead, allow the liquid to cool to just above room temperature—around 70°F. This temperature range is optimal for preserving crispness while still promoting the infusion of flavors.
Why Your Nose Knows Best
When the pickles start to develop a slightly sour aroma, that’s your cue that they’re ready to eat. The scent is a natural indicator of acidity and fermentation. If the smell is weak, let them sit a bit longer; if it’s overpoweringly sour, they’ve over‑fermented and may need to be discarded.
The 5-Minute Rest That Changes Everything
After you’ve sealed the jar, let it rest on the counter for 5 minutes before refrigerating. This brief rest allows the brine to settle, reducing the risk of condensation and ensuring a cleaner seal. Condensation can dilute the pickling liquid and compromise the texture.
Use a Clean, Airtight Jar
The quality of your jar can make or break the pickling process. A glass jar with a rubber seal keeps air out and preserves crunch. Avoid plastic containers, which can absorb flavors and create a soggy texture over time.
Add a Splash of Water Before Reheating
If you need to reheat the pickles for a dish, add a tiny splash of water to the jar before microwaving. The water steams the radishes, restoring their crispness and preventing the brine from becoming overly thick.
Keep the Radishes Whole
Whole or large pieces retain more flavor and texture than thin slices. The larger surface area allows the brine to penetrate deeply, creating a more intense pickling experience.
Store in a Cool, Dark Place Until Refrigerated
If you need to store the pickles for a day or two before refrigeration, keep the jar in a cool, dark spot. Light and heat can accelerate the pickling process, leading to an overly sour flavor.
Creative Twists and Variations
This recipe is a playground. Here are some of my favorite ways to switch things up:
Spicy Sriracha Splash
Stir in a tablespoon of sriracha into the pickling liquid. The heat pairs wonderfully with the citrus, creating a fiery yet refreshing pickle that’s perfect for tacos.
Miso Infusion
Add a teaspoon of white miso paste to the brine. The umami depth transforms the pickle into a savory accompaniment for grilled fish or a ramen garnish.
Herb Garden Blend
Drop in a handful of fresh mint or basil leaves. The herbs release their oils into the brine, giving the pickles a fragrant, aromatic quality.
Citrus Swap
Replace lemon juice with grapefruit or orange juice for a sweeter, more complex citrus profile. The slight bitterness of grapefruit adds a sophisticated edge.
Smoky Char
Char the radish slices briefly on a hot grill before pickling. The smoky char adds depth and pairs beautifully with the bright acidity.
Salsa Verde Twist
Add a handful of chopped cilantro, a diced jalapeño, and a splash of lime juice to the jar. This green salsa‑inspired pickle is a hit on tacos and nachos.
Honey‑Glazed Finish
Drizzle a teaspoon of honey over the radishes after they’ve cooled. The honey caramelizes slightly, creating a sweet, glossy coating that balances the acidity.
Roasted Garlic Kick
Roast a clove of garlic and mash it into the pickling liquid. The roasted flavor adds a mellow sweetness that complements the sharpness of the radish.
Storing and Bringing It Back to Life
Fridge Storage
Store the pickles in the refrigerator in a sealed jar for up to 14 days. The cold temperature slows down the pickling process, preserving crispness and flavor. Keep the jar upright to prevent air from seeping in.
Freezer Friendly
For long‑term storage, transfer the pickles into a freezer‑safe container and freeze for up to 3 months. When ready to use, thaw in the refrigerator overnight. The texture may soften slightly, but the flavor remains vibrant.
Best Reheating Method
If you need to reheat the pickles for a recipe, place the jar in a pot of boiling water for 2 minutes. Add a splash of water before microwaving to keep the brine from thickening. This gentle heat restores the radishes’ crunch without compromising flavor.