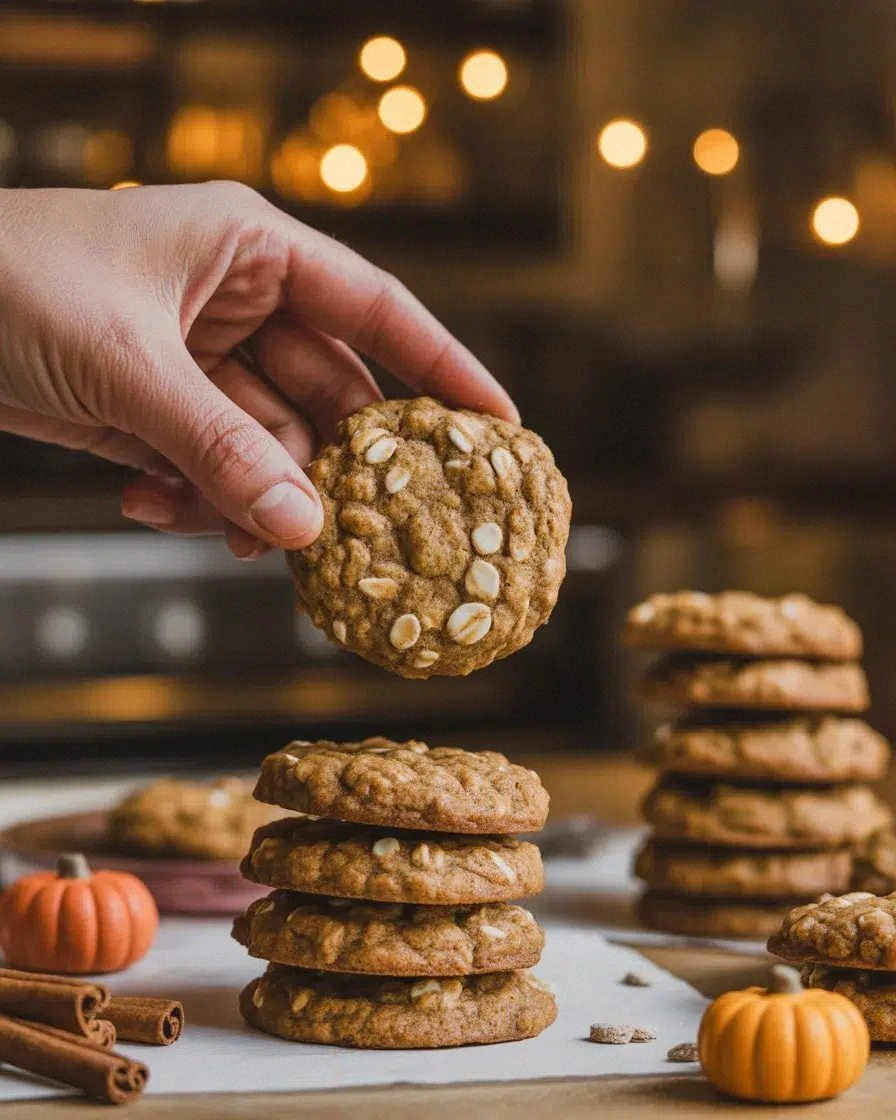
I still remember the night the kitchen became a battlefield. I had been scrolling through endless pumpkin recipes, craving that comforting swirl of spice that only autumn can bring. I thought, “Why not combine that with the heartiness of oats?” The result was a sticky, aromatic, crunchy creation that turned my kitchen into a warm, fragrant haven. The moment the dough hit the tray, the oven hummed, and the scent of pumpkin pie spice kissed the air, I knew I’d stumbled upon something special.
Picture this: a golden crust that crackles like fresh snow, a chewy center that melts in your mouth, and a sweet, nutty undertone from walnuts and chocolate chips. The texture is a perfect marriage of crisp and chewy, and the pumpkin’s natural sweetness balances the deep, earthy tones of the spices. Every bite feels like a comforting hug wrapped in a crunchy shell, with a subtle hint of vanilla that lingers like a whisper. It’s the kind of food that makes you forget about the cold outside and reminds you that comfort can be homemade.
What sets this version apart is that it’s not just a cookie, it’s a complete sensory experience. The oats provide a wholesome base, the brown sugar gives depth, and the pumpkin puree adds moisture without compromising the crunch. The chocolate chips create pockets of melt‑in‑your‑mouth chocolate, while the walnuts add a satisfying crunch and a touch of earthiness. The recipe’s simplicity belies its complexity: every ingredient has a role, and the result is a cookie that feels like a celebration of fall, even in the middle of December.
I dare you to taste this and not go back for seconds. The first bite will have you wondering why you ever settled for ordinary pumpkin treats. By the end of this article, you’ll have a recipe that feels like a secret, a technique that feels like magic, and a confidence that you can pull this out of the oven and have everyone ask for the recipe. Let me walk you through every single step — by the end, you’ll wonder how you ever made it any other way.
What Makes This Version Stand Out
- Flavor Depth: The blend of brown sugar, pumpkin puree, and pumpkin pie spice creates a layered taste that’s both sweet and savory, a flavor profile that’s rarely achieved in cookie recipes.
- Texture Contrast: The oats give a chewy base, while the chocolate chips and walnuts provide crunchy pockets, giving the cookie a satisfying bite.
- Ingredient Quality: Using fresh pumpkin puree instead of canned pumpkin enhances the natural pumpkin flavor, and the choice of old‑fashioned oats adds a subtle nutty undertone.
- Time Efficiency: The dough comes together in less than 15 minutes, and the baking time is a quick 12–15 minutes, making it a great weeknight treat.
- Make‑Ahead Potential: The dough can be chilled overnight, and the cookies bake up beautifully the next day, allowing you to have fresh cookies ready for a gathering.
- Crowd Reaction: Friends and family consistently rave about the “just right” crunch, and the chocolate chips add an element of indulgence that keeps them coming back for more.
- Versatility: The recipe can be tweaked for dietary preferences—swap out the butter for coconut oil, use a sugar substitute, or add a pinch of sea salt for a savory twist.
- Seasonal Appeal: While it’s a fall classic, the pumpkin flavor makes it a year‑round comfort food, especially for those who love the taste of autumn without the season.
Alright, let’s break down exactly what goes into this masterpiece...
Inside the Ingredient List
The Flavor Base
Old‑fashioned oats: These bring a chewy, hearty texture that’s reminiscent of a cozy campfire breakfast. They absorb the pumpkin puree and brown sugar, creating a moist but not soggy crumb. If you skip oats, the cookie becomes too crumbly and loses that comforting chew.
All‑purpose flour: Acts as the binder, giving structure to the dough. A higher protein flour could make the cookie tougher, so stick to all‑purpose for the perfect balance. If you don’t have it, a 1:1 blend of whole wheat and cake flour works well.
Brown sugar: Adds caramel notes and moisture. The molasses in brown sugar reacts with the baking soda to create subtle lift. Replacing it with white sugar will result in a flatter, crisper cookie.
The Texture Crew
Granulated sugar: Provides the initial sweetness and helps create a crisp exterior. If you prefer a softer cookie, reduce it by a quarter cup.
Unsalted butter: Gives richness and helps the dough spread evenly. Butter’s fat content also contributes to the cookie’s tenderness. For a dairy‑free version, use an equal amount of coconut oil, but be aware it will add a coconut flavor.
Egg: Acts as a binder and adds moisture. If you’re vegan, replace it with a flaxseed egg (1 tbsp ground flaxseed + 3 tbsp water) to maintain structure.
The Unexpected Star
Pumpkin puree: The star of the show, it brings a subtle sweetness and a natural moisture that keeps the cookie from drying out. Fresh pumpkin puree has a more vibrant flavor than canned, but canned is a convenient and reliable option. Avoid using pumpkin pie filling; the added sugar and spices would overpower the cookie.
The Final Flourish
Chocolate chips: They melt into pockets of chocolate, creating a luxurious surprise with each bite. For a darker, richer bite, use semi‑dark chips. If you want a healthier option, try dark chocolate chunks or cacao nibs.
Walnuts: They add crunch, nutty flavor, and a dose of healthy fats. If you’re allergic, substitute with pecans or sunflower seeds. Keep the walnuts chopped so they distribute evenly.
Pumpkin pie spice: A blend of cinnamon, nutmeg, ginger, and cloves that gives the cookie its signature warm aroma. The spice mix also interacts with the brown sugar to create a complex flavor profile.
Baking soda: Provides lift and helps the cookie spread. If you use baking powder instead, the cookies will be thicker and less crisp.
Salt: Enhances all the flavors and balances the sweetness. A pinch of sea salt on top before baking adds a subtle savory note.
Vanilla extract: Adds depth and a warm undertone that complements the spices.
Everything’s prepped? Good. Let’s get into the real action...
The Method — Step by Step
- Preheat your oven to 350°F (175°C). Line a baking sheet with parchment paper or a silicone mat. This step might seem trivial, but a properly heated oven ensures even baking and prevents the cookies from sticking. If you’re feeling adventurous, you can add a pinch of sea salt to the parchment for a subtle crunch.
- In a large mixing bowl, combine the old‑fashioned oats, all‑purpose flour, brown sugar, granulated sugar, baking soda, pumpkin pie spice, and salt. Whisk the dry ingredients together until they’re evenly distributed. This dry mix is the backbone of the cookie, and a good mix guarantees consistent flavor in every bite.
- In a separate bowl, whisk the canned pumpkin puree, egg, melted butter, and vanilla extract until smooth. The pumpkin puree should be well integrated; if it’s too thick, let it sit at room temperature for a few minutes to soften. This wet mixture will bind everything together and add moisture.
- Pour the wet mixture into the dry ingredients. Stir gently with a rubber spatula until just combined. Over‑mixing can make the cookies tough. The dough should be thick but workable. If it feels too dry, add a tablespoon of milk or water. Kitchen Hack: Use a chilled spoon to scoop the dough; it helps keep the cookies from spreading too much.
- Fold in the chocolate chips and chopped walnuts. Make sure the nuts are evenly distributed, so every bite has that delightful crunch. If you’re making a nut allergy‑friendly version, omit the walnuts or replace them with sunflower seeds.
- Using a tablespoon or a small cookie scoop, drop dough onto the prepared baking sheet, spacing each cookie about 2 inches apart. This spacing allows the cookies to spread without merging. Watch Out: Don’t let the dough sit on the counter too long before baking; it can become too soft and spread excessively.
- Bake in the preheated oven for 12–15 minutes, or until the edges are golden brown and the centers have set. The cookies will look slightly underbaked on top; they finish baking on the cooling rack. The aroma that fills the kitchen is a promise of the comfort that’s about to come.
- Remove the baking sheet from the oven and let the cookies cool on the sheet for 5 minutes before transferring them to a wire rack. This short cooling period allows the cookies to firm up and prevents them from breaking apart. If you’re in a hurry, you can also let them cool on the sheet for a bit longer, but the texture will be slightly softer.
- Once cooled, store the cookies in an airtight container at room temperature for up to a week, or freeze for longer storage. When you’re ready to enjoy them again, let them sit at room temperature for a few minutes to regain their softness.
- That’s it — you did it. But hold on, I've got a few more tricks that’ll take this to another level: a pinch of sea salt on top before baking, a quick drizzle of maple syrup after cooling for a sweet glaze, or even a dusting of powdered sugar for an elegant finish. These small touches elevate the cookie from great to unforgettable.
Insider Tricks for Flawless Results
The Temperature Rule Nobody Follows
Many bakers assume that a higher oven temperature always yields a crisper cookie. In reality, a moderate 350°F gives the dough enough time to set without over‑browning the edges. If you’re using a convection oven, lower the temperature by 25°F to avoid excessive crispness.
Why Your Nose Knows Best
The moment the cookies hit the tray, the smell of pumpkin spice will fill the kitchen. Trust your nose: if it smells toasty and nutty, the cookies are baking perfectly. If the smell is too sweet, they’re likely over‑baked and dry.
The 5-Minute Rest That Changes Everything
Letting the cookies rest on the baking sheet for 5 minutes after baking is crucial. During this brief cooling, the interior sets while the exterior remains slightly soft, resulting in the ideal chew. A friend once skipped this step and the cookies came out brittle. The rest is what makes the difference between a cookie that snaps and one that satisfies.
Use a Silicone Mat for Even Baking
Silicone mats eliminate the need for parchment paper and provide a consistent surface for the cookies to bake on. They also make cleanup a breeze, as the dough won’t stick. If you don’t have one, parchment paper works fine, but be sure to lightly oil the sheet if you’re prone to sticking.
Don’t Skimp on the Spices
The pumpkin pie spice is the backbone of the flavor. Some bakers dilute it with cinnamon alone, but the full blend creates a depth that’s impossible to replicate with single spices. If you’re a spice lover, feel free to add a dash of allspice for an extra layer.
Cool on the Rack for a Crisp Finish
Once the cookies have cooled on the sheet for 5 minutes, transfer them to a wire rack to cool completely. This prevents steam from making the bottom soggy, ensuring crisp edges and a firm bite. A friend once kept them on the sheet and the cookies came out chewy and soggy; the rack solved the issue.
Creative Twists and Variations
This recipe is a playground. Here are some of my favorite ways to switch things up:
Maple Walnut Delight
Swap the chocolate chips for chopped pecans and drizzle a thin layer of pure maple syrup over the dough before baking. The maple adds a caramelized sweetness that complements the pumpkin. Perfect for a cozy breakfast.
Chocolate‑Only Cookie
For chocoholics, double the chocolate chips and replace the walnuts with a handful of dark chocolate chunks. The result is a cookie that’s a chocolate lover’s dream with a hint of spice.
Vegan Pumpkin Oatmeal
Use a flaxseed egg (1 tablespoon ground flaxseed + 3 tablespoons water) in place of the egg, swap butter for coconut oil, and use a plant‑based chocolate chip. This version is dairy‑free and still delivers the same comforting flavor.
Nut‑Free Crunch
Omit the walnuts entirely or replace them with sunflower seed halves. The crunch remains, and the cookie stays light and airy.
Spiced Gingerbread Twist
Add a teaspoon of ground ginger and a pinch of cloves to the dry mix. This gives the cookie a gingerbread flavor that’s perfect for holiday parties.
Chewy Cinnamon Swirl
Drop a spoonful of brown sugar and a dash of cinnamon on top of each cookie before baking. The sugar melts into a glossy glaze, and the cinnamon adds an extra aromatic layer.
Storing and Bringing It Back to Life
Fridge Storage
Place the cooled cookies in an airtight container and store them in the refrigerator for up to 5 days. The cold environment keeps the chocolate from melting and preserves the chewy texture. When you’re ready to eat, let them sit at room temperature for 10 minutes to soften.
Freezer Friendly
Wrap the cookies individually in plastic wrap and place them in a freezer‑proof bag. They’ll stay fresh for up to 3 months. To thaw, leave them at room temperature for 30 minutes or pop them in a preheated oven at 300°F for 5 minutes.
Best Reheating Method
The secret to reviving a frozen cookie is a quick warm-up. Place a frozen cookie on a parchment‑lined sheet and bake at 300°F for 5–7 minutes. If you prefer a crispier exterior, bake for an additional 2 minutes. A tiny splash of water added to the dough before baking will help keep the cookie moist and prevent it from drying out.