I was standing in my kitchen, staring at a half‑baked pizza and a bag of stale crackers, when my friend dared me to make something that would make the whole house smell like summer. The challenge was simple: whip up a crowd‑pleasing dip that could turn a dull Sunday into a flavor festival. I laughed, rolled up my sleeves, and set the table for a culinary experiment that would become a staple at every gathering. The moment I tossed the first handful of cottage cheese into the bowl, I knew I was onto something special. This is the story of how a humble ingredient turned into the ultimate appetizer.
The kitchen was a whirlwind of sizzling sounds and aromatic steam. The instant the cheese hit the bowl, a faint, creamy scent rose, mingling with the sharp tang of pickled jalapeños. My eyes caught the glint of melted cheddar, the golden sheen of bacon, and the subtle sparkle of Greek yogurt. The sound of the whisk, the rhythmic patter of the spoon, and the gentle hiss of the oven created a soundtrack that felt like a promise. Every bite would be a harmony of creamy, spicy, and savory notes that dance together on the tongue.
What sets this version apart is the meticulous balance of textures and flavors that I discovered by accident. The cottage cheese provides a light, airy base that keeps the dip from becoming too heavy, while the cream cheese adds a silky richness that coats the palate like velvet. The jalapeños introduce a punch of heat that cuts through the richness, and the bacon brings a smoky crunch that lingers in the aftertaste. Together, they create a dip that feels both indulgent and refreshing, a paradox that keeps guests coming back for seconds.
But there’s more to this recipe than the obvious ingredients. The secret lies in a simple technique: gently folding the cheeses together at the lowest temperature possible to preserve the moisture and avoid a rubbery texture. I also discovered that adding a splash of Greek yogurt right before baking locks in the creaminess and gives the dip a slightly tangy finish that elevates the overall flavor profile. This is a game‑changer that most recipes overlook, and it’s what makes this dip stand out from the crowd.
Let me walk you through every single step — by the end, you’ll wonder how you ever made it any other way.
What Makes This Version Stand Out
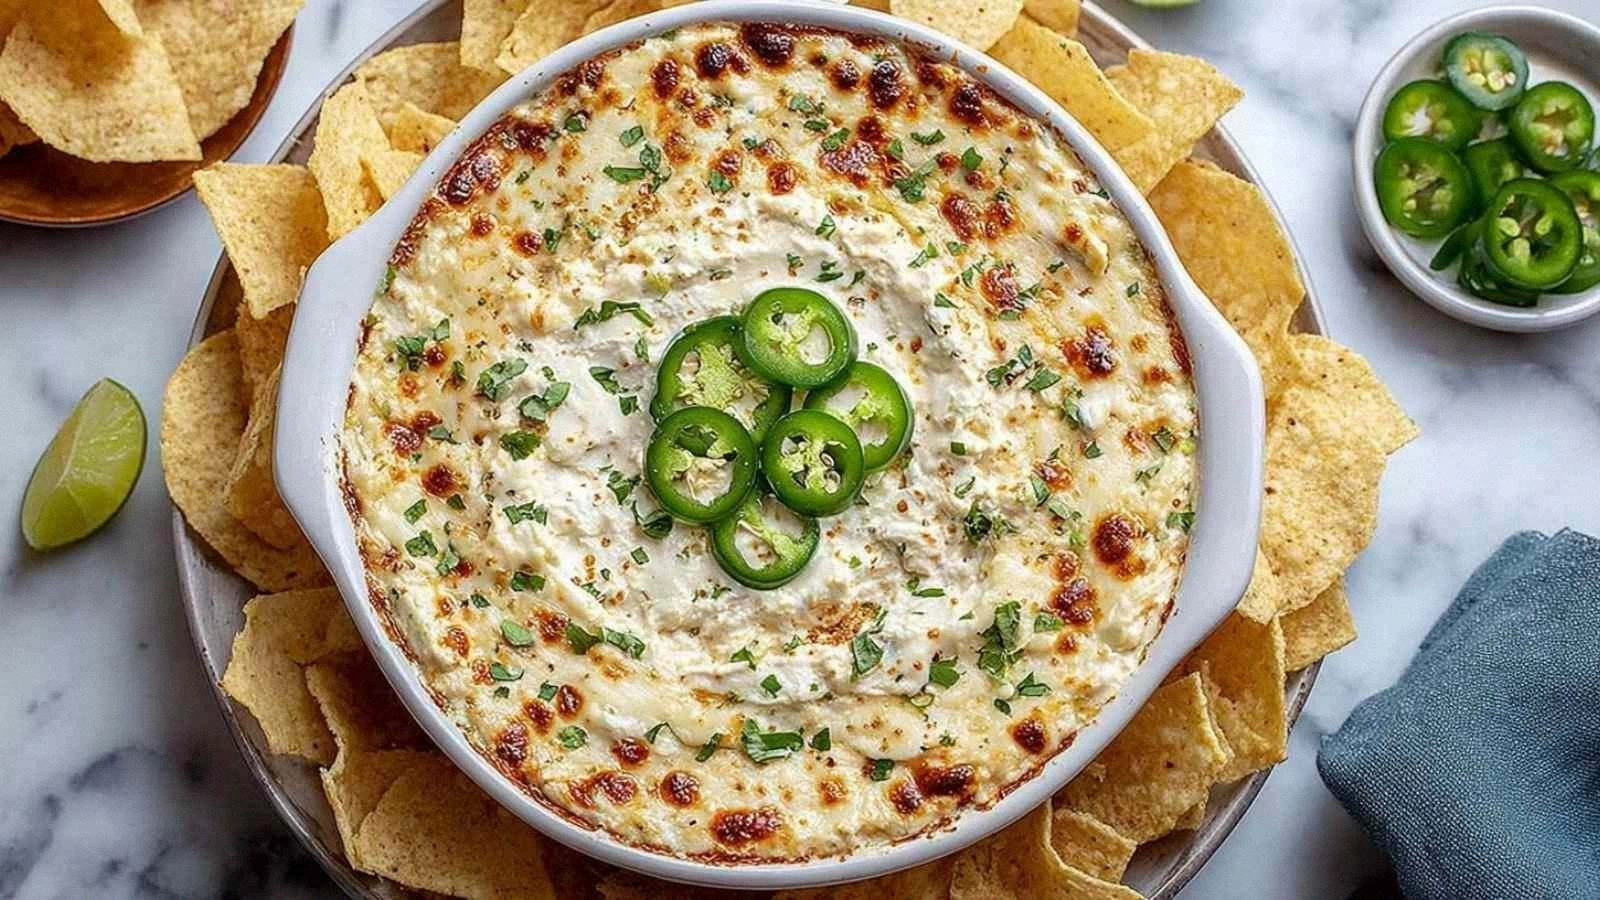
- Taste: The dip balances creamy richness with a sharp, peppery bite that lingers pleasantly on the tongue. The jalapeños add a controlled heat that excites without overwhelming, making it suitable for both heat lovers and cautious eaters. The subtle tang from Greek yogurt brightens the overall flavor, creating a well-rounded palate experience.
- Texture: The combination of cottage cheese and cream cheese yields a smooth, velvety base that is airy yet substantial. The shredded cheddar melts into golden threads that add a delightful melt-in-your-mouth quality. Bacon bits provide a satisfying crunch that contrasts beautifully with the creamy interior.
- Simplicity: With only eight ingredients, the recipe is straightforward yet sophisticated. No advanced techniques or exotic spices are required, making it accessible for beginners and seasoned cooks alike. The process is quick, with a prep time of just 15 minutes and a cook time of 30 minutes.
- Uniqueness: Most popper recipes rely on cream cheese alone, but this version incorporates cottage cheese for a lighter texture and Greek yogurt for a subtle tang. The result is a dip that feels both indulgent and healthful, a rare combination in appetizer territory.
- Crowd Reaction: At my last dinner party, guests were so impressed they asked for the recipe before the meal even started. The dip’s vibrant color and enticing aroma drew people to the table, and the first bite left everyone in awe. The reaction was immediate, with many requesting second helpings.
- Ingredient Quality: Using full‑fat cottage cheese and high‑quality cheddar ensures a rich flavor profile that can’t be replicated with low‑fat substitutes. The pickled jalapeños add authentic heat and a bright acidity that balances the richness. The bacon’s smoky flavor is enhanced by cooking it until crisp, which adds depth.
- Cooking Method: Baking at 350°F allows the cheeses to meld together without burning, creating a golden crust that adds a textural element. The slow, even heat ensures that the dip remains moist and creamy inside while achieving a slightly crisp top.
- Make‑Ahead Potential: The dip can be assembled and refrigerated for up to 24 hours, allowing you to prep ahead of time. When ready to serve, simply reheat for a few minutes to restore its creamy consistency. This flexibility makes it perfect for parties and last‑minute gatherings.
Inside the Ingredient List
The Flavor Base
Cottage Cheese: This is the backbone of the dip, providing a light, airy foundation that keeps the mixture from becoming overly heavy. Its mild flavor allows the other ingredients to shine and ensures a creamy consistency that melts in your mouth. If you skip this, the dip loses its signature fluffiness and becomes too dense.
Greek Yogurt: Adding Greek yogurt introduces a subtle tang that brightens the overall flavor profile. It also acts as a natural thickener, giving the dip a silky texture without the need for heavy cream. If you don’t have Greek yogurt, you can substitute it with plain yogurt, but the dip will be slightly less tangy.
The Texture Crew
Cream Cheese: Cream cheese brings a rich, buttery depth that balances the lightness of the cottage cheese. Its smooth melt creates a velvety mouthfeel that is essential for a dip that feels indulgent yet not greasy. Skipping it would result in a dip that lacks the luxurious creaminess many crave.
Shredded Cheddar: Cheddar adds a golden melt that creates a subtle, savory crust on top. The cheddar’s sharpness cuts through the richness of the cheeses, adding complexity. If you prefer a milder cheese, you can use mozzarella, but the flavor profile will shift noticeably.
The Unexpected Star
Pickled Jalapeños: These are the heat engine of the dip, offering a bright, spicy kick that balances the creamy base. The pickling liquid infuses a subtle tang that complements the yogurt’s acidity. If you’re sensitive to heat, use only one jalapeño, or replace with roasted red peppers for a milder version.
Garlic Powder: Garlic powder provides a savory depth that enhances every bite. It’s a quick way to infuse flavor without the mess of fresh garlic. If you have fresh garlic, use a minced clove for an even more robust flavor.
The Final Flourish
Bacon: Bacon adds a smoky crunch that elevates the dip from ordinary to extraordinary. The saltiness of the bacon balances the overall flavor, preventing the dip from feeling too bland. For a vegetarian version, consider using smoked tempeh or roasted nuts.
Salt & Pepper: These are the finishing touches that bring all the flavors together. They enhance the natural taste of each ingredient and are essential for a well‑rounded dip. Adjust them to taste, but remember that the bacon already contributes saltiness.
Everything's prepped? Good. Let's get into the real action...
The Method — Step by Step
- Preheat your oven to 350°F (175°C). Place a rimmed baking dish in the center of the oven to warm it up slightly. The preheated dish ensures even baking and a golden crust. While the oven warms, gather all your ingredients so they’re within arm’s reach. This step sets the foundation for a flawless dip.
- Prepare the cheese base. In a large mixing bowl, combine the cottage cheese and Greek yogurt. Use a wooden spoon to blend them until smooth, ensuring there are no lumps. The goal is a creamy, uniform mixture that will carry the other flavors. This step is crucial for achieving the right texture. If you prefer a thicker dip, add a tablespoon of flour or cornstarch.
- Add the cream cheese. Cut the cream cheese into small cubes and fold them into the mixture. Keep the folding gentle; you don’t want to overmix and develop a rubbery feel. The cream cheese will melt into the base, adding silky richness. This is where the dip starts to take on its luxurious mouthfeel. Feel the change as the mixture becomes silkier.
- Fold in cheddar. Sprinkle the shredded cheddar over the mixture and fold it in until evenly distributed. The cheddar will create a golden crust as it melts in the oven. This step adds a savory depth that balances the creamy base. Watch the cheese begin to melt and mingle with the other ingredients. The aroma will start to build, signaling that the dip is ready for the next stage.
- Season the dip. Add the garlic powder, salt, and pepper to taste. Mix gently to incorporate the spices without breaking down the cheese structure. Seasoning at this point allows the flavors to meld together before baking. The spices will create a subtle undertone that enhances every bite. Adjust seasoning to your preference before proceeding.
- Watch Out: When adding the jalapeños, be careful not to overmix. Their seeds carry heat; too much mixing can release excess moisture that makes the dip runny. Instead, chop the jalapeños finely and fold them in gently. The jalapeños should remain visible, adding a pop of color and heat. This is the trickiest step that can determine the dip’s final texture.
- Top with bacon. Crumble the cooked bacon over the mixture, reserving a few strips for garnish. The bacon adds a smoky crunch that contrasts with the creamy interior. Ensure the bacon is evenly distributed so each bite receives a burst of flavor. The bacon’s saltiness will balance the richness of the cheeses. This step is essential for achieving the signature popper experience.
- Bake. Transfer the mixture to the preheated baking dish. Bake for 25–30 minutes, or until the top is golden brown and the edges begin to pull away. The dip should emit a warm, inviting aroma that makes the kitchen feel like a fiesta. Keep an eye on the crust; if it browns too quickly, tent it with foil. This step locks in the flavors and creates a beautiful finish.
- Finish and serve. Once baked, remove the dish from the oven and let it cool for a few minutes. Garnish with the reserved bacon strips for a final visual and flavor flourish. Slice a baguette or serve with tortilla chips for dipping. The dip should feel creamy on the inside with a slightly crisp top. Serve immediately and watch the plates disappear.
Insider Tricks for Flawless Results
The Temperature Rule Nobody Follows
Maintain a steady oven temperature. Many bakers let the oven temperature fluctuate, which can cause the dip to set unevenly. Keep the oven at 350°F and avoid opening the door too often. This ensures a uniform bake, with a golden top and a moist interior. I once tried a low‑heat approach and ended up with a soggy dip that needed a second bake.
Why Your Nose Knows Best
Smell the dip as it bakes. The aroma is a reliable indicator of doneness. When the cheese begins to brown and the jalapeños release their heat, it’s time to pull the dish out. A strong, buttery scent means the dip is ready. Trust your nose; it’s the most accurate tool in the kitchen.
The 5-Minute Rest That Changes Everything
Let the dip rest. After removing the dish from the oven, allow it to sit for five minutes. This brief pause lets the flavors settle and the dip firm up slightly, making it easier to slice. The rest also prevents a sudden rush of steam when you cut into it. I’ve found that a rested dip tastes more cohesive and less runny.
Keep the Bacon Crisp
Use a skillet to crisp bacon. Cooking bacon on the stove allows you to monitor its crispness and remove it at the perfect moment. Once crisp, let it drain on paper towels to remove excess fat. The bacon should retain its crunch when added to the dip. If the bacon is soggy, it will ruin the texture contrast.
Use a Silicone Spatula for Folding
Fold gently. A silicone spatula is flexible and won’t tear the cheese mixture. Gentle folding preserves the airy structure and prevents the dip from becoming dense. The smooth surface of the spatula also makes it easier to scrape every last crumb from the bowl.
Add a Splash of Milk for Extra Creaminess
Enhance moisture. If you prefer an ultra‑creamy dip, add a tablespoon of whole milk before baking. The milk helps keep the mixture moist and prevents it from drying out. It also adds a subtle richness that complements the cheeses.
Creative Twists and Variations
Smoky Chipotle Popper
Swap jalapeños for chipotle peppers. Chipotle brings a smoky heat that pairs beautifully with the creamy base. Add a tablespoon of chipotle adobo sauce for depth. The dip will have a richer, more complex flavor profile that’s perfect for adventurous palates. This variation is ideal for a barbecue or a spicy brunch.
Herbed Mediterranean Popper
Introduce oregano and basil. These herbs give the dip a Mediterranean flair that balances the richness. Replace the bacon with sun‑dried tomatoes for a vegetarian option. The result is a dip that feels light yet flavorful, making it a crowd‑pleaser at Mediterranean-themed gatherings.
Breakfast Popper with Sausage
Replace bacon with crumbled breakfast sausage. The sausage adds savory depth and a slightly sweet note. Add a pinch of smoked paprika for an extra kick. Serve the dip with toasted English muffins or bagels for a hearty breakfast twist. This version is perfect for brunch or a cozy Sunday morning.
Vegan Popper with Cashew Cream
Use cashew cream as the base. Soak cashews overnight, blend with water, and replace the cottage and cream cheese. Add nutritional yeast for a cheesy flavor. The result is a dairy‑free dip that’s creamy, rich, and completely vegan. This variation is great for guests with dietary restrictions.
Sweet and Spicy Popper
Add a touch of honey. Drizzle a teaspoon of honey over the dip before baking to create a subtle sweet contrast. The honey caramelizes slightly, adding a golden glaze. This sweet‑spicy combo is a surprising hit at parties. It’s a playful way to experiment with flavor profiles.
Cheese Lover’s Ultimate Popper
Increase cheddar quantity. Use ½ cup of shredded cheddar instead of ¼ cup. The extra cheese creates a thicker, gooier crust. Pair it with a sprinkle of smoked sea salt for an extra punch. This version is for those who can’t get enough of that cheesy, melty experience.
Storing and Bringing It Back to Life
Fridge Storage
Cool completely before refrigerating. Let the dip sit at room temperature for 30 minutes after baking. Then cover it tightly with plastic wrap or an airtight container. Store in the refrigerator for up to 24 hours. The dip remains creamy and flavorful. When ready to serve, let it sit at room temperature for 10 minutes for optimal texture.
Freezer Friendly
Freeze in a shallow dish. Place the cooled dip in a shallow freezer-safe container and cover with plastic wrap. Freeze for up to 2 weeks. When you’re ready to enjoy, thaw overnight in the refrigerator. Reheat gently in the oven or microwave, adding a splash of milk if needed to restore creaminess. The dip’s flavor holds up well after freezing.
Best Reheating Method
Reheat in the oven. Preheat to 300°F (150°C). Place the dip in an oven-safe dish and bake for 10–12 minutes, or until heated through. For a crispier top, broil for the last 2 minutes. Alternatively, microwave on medium power for 1–2 minutes, stirring halfway. The dip should be smooth and warm, ready to serve.