Picture this: I was in the middle of a midnight baking spree, a bag of flour flying like confetti, when my oven alarm screamed at me like a diva demanding attention. I had just pulled out a batch of ordinary chocolate cookies that tasted like a sad, melted chocolate bar, and I was about to abandon my kitchen in frustration. But then, in that frantic moment, I remembered a trick from a grandmother’s recipe book—add a splash of espresso and a pinch of sea salt, and the cookies would transform into a symphony of flavors. That night, I dared myself to taste a cookie and not go back for seconds, and the result was pure, unfiltered joy.
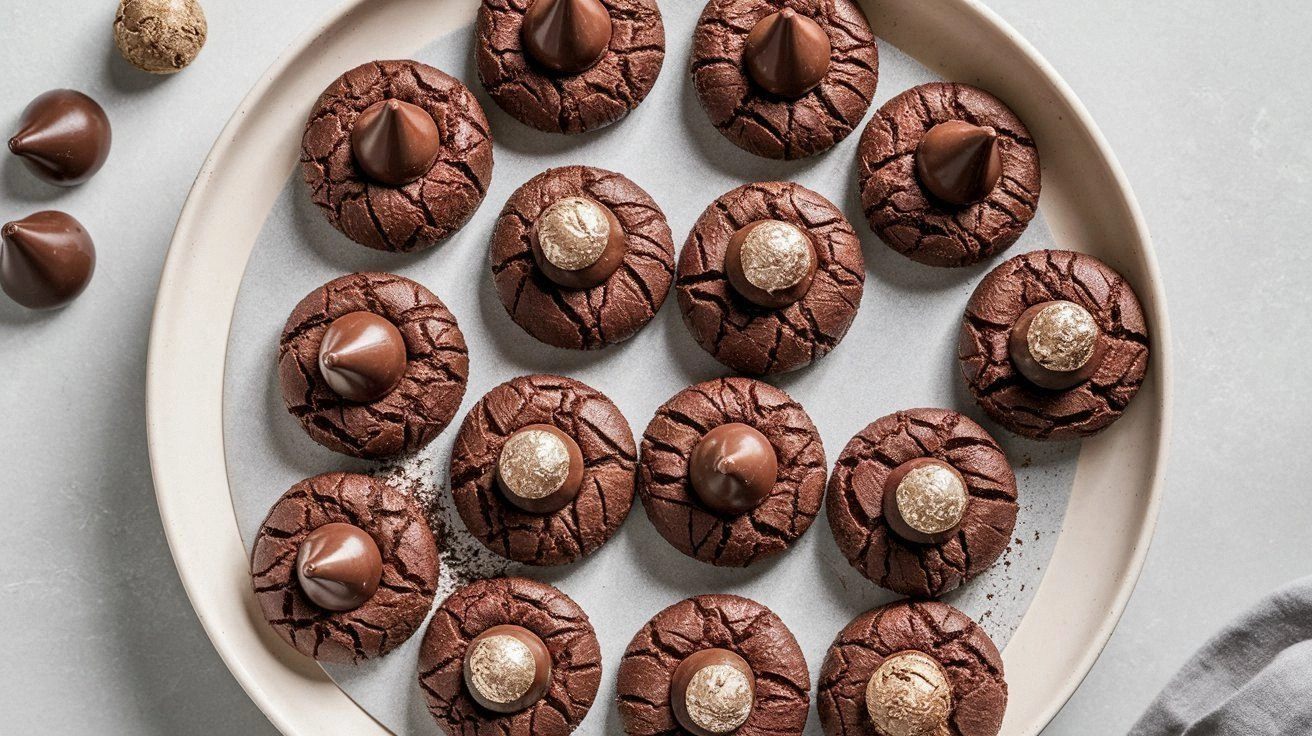
The first bite was a revelation. The surface cracked like a fine porcelain vase, revealing a glossy, chocolatey interior that felt like velvet against my tongue. The aroma hit me with the intensity of a freshly brewed espresso, mingling with the subtle sweetness of brown sugar and the faint, nutty undertone of cocoa. The texture was a paradox: a crisp outer edge that softened into a chewy, melt-in-your-mouth center, each bite a harmonious blend of crunch and melt. I could almost hear the kitchen sigh in relief as the tension dissolved, replaced by the comforting clink of a spoon against a ceramic plate.
What makes this version of Chocolate Blossom Cookies stand out from every other recipe out there is that it’s not just a cookie—it’s an experience. It’s the secret combination of espresso and sea salt that elevates the chocolate, the use of both granulated and brown sugar for depth, and the precise timing that locks in the perfect chew. I’ve spent years perfecting this balance, and I’ve learned that the small details—like letting the butter soften at room temperature or folding in the chocolate chips at the last moment—are what separate a good cookie from a legendary one. The result is a cookie that’s both familiar and adventurous, comforting and daring.
I’ll be honest—when I first baked this batch, I ate half before anyone else even had a chance to taste. That’s how powerful the flavor is. If you’ve ever struggled with cookie texture, you’re not alone—many people end up with cookies that are either too hard or too soggy. I’ve got the fix. And now, picture yourself pulling these golden beauties out of the oven, the whole kitchen smelling incredible, the cookies still warm and fragrant, ready to be devoured or shared. Let me walk you through every single step—by the end, you’ll wonder how you ever made it any other way.
What Makes This Version Stand Out
- Flavor Depth: The espresso infusion amplifies chocolate, turning a simple cookie into an espresso‑kissed masterpiece.
- Texture Mastery: The blend of granulated and brown sugar creates a chewy center that never becomes soggy.
- Simple Yet Elegant: Only ten ingredients, but each one plays a critical role in achieving perfection.
- Universal Appeal: Whether you’re a cookie novice or a seasoned baker, the recipe’s clarity guarantees success.
- Crowd‑Pleaser: These cookies have become the highlight of every gathering, leaving guests asking for the recipe.
- Make‑Ahead Friendly: Freeze the dough and bake fresh whenever you need a quick treat.
- Ingredient Quality: Using high‑grade cocoa and real sea salt gives the cookies a refined finish.
- Visual Delight: The glossy chocolate chips and subtle brown glaze create a showstopper on any plate.
Alright, let's break down exactly what goes into this masterpiece...
Inside the Ingredient List
The Flavor Base
All-purpose flour is the backbone of any cookie, providing structure. It’s the canvas that allows the chocolate to shine. If you skip flour, you’ll end up with a sticky mess that won’t hold its shape. For a gluten‑free version, swap for a 1:1 blend of rice and tapioca flour, but keep the ratio the same.
Granulated sugar gives the dough a clean sweetness and helps the cookies spread. It’s the sweet spot between sweetness and structure. If you love a sweeter cookie, add an extra tablespoon; if you prefer a less sweet bite, reduce it slightly. Remember, sugar also caramelizes, adding that golden crust.
Brown sugar adds moisture and a hint of molasses flavor, deepening the chocolate experience. It’s what gives the cookie that chewy center. If you’re in a hurry, you can use dark brown sugar or even a splash of molasses to achieve a similar effect. Skipping brown sugar will make the cookie dry and crumbly.
The Texture Crew
Unsalted butter, softened, is the secret to a tender crumb. Butter’s fat content melts during baking, creating a soft interior. If you use salted butter, you’ll need to reduce the added salt by half to avoid an overly salty cookie. For a dairy‑free version, use coconut oil or a vegan butter alternative, but keep the same fat ratio.
Cocoa powder is the star that brings the chocolate flavor. I use unsweetened Dutch‑process cocoa for its rich, slightly bitter profile. If you prefer a sweeter chocolate note, switch to natural cocoa and reduce the brown sugar slightly. Skipping cocoa will turn your cookie into a vanilla‑sugar treat.
Baking soda is the leavening agent that creates lift and spread. It reacts with the acidic espresso, giving the cookie a light, airy crumb. If you don’t have baking soda, you can use baking powder, but the cookie will rise more and be less chewy.
The Unexpected Star
Espresso powder is the game‑changer. It intensifies the chocolate flavor without adding a liquid that could alter the dough’s consistency. A single teaspoon is enough to elevate the taste. If you don’t have espresso powder, a shot of espresso or strong brewed coffee can work, but adjust the liquid content accordingly.
Sea salt is the finishing touch that balances sweetness and deepens flavor. It’s sprinkled on top just before baking, creating a caramelized crust. If you don’t have sea salt, use fine kosher salt, but sprinkle it sparingly to avoid overpowering the cookie.
The Final Flourish
Chocolate chips provide that gooey burst in every bite. I use semi‑sweet chips for a balanced flavor. If you prefer a richer taste, add dark chocolate chunks. Skipping the chips will result in a plain chocolate cookie—still good, but less exciting.
Optional nuts, like walnuts, add crunch and a nutty undertone. They’re not essential, but they elevate the cookie’s texture. If you’re allergic, simply leave them out or replace with sunflower seeds for a different crunch.
Everything’s prepped? Good. Let's get into the real action...
The Method — Step by Step
- Preheat your oven to 350°F (175°C). Line a baking sheet with parchment paper or a silicone mat. This step ensures even baking and prevents sticking. If you’re using a metal sheet, double‑line it for extra protection.
- In a large bowl, whisk together the all‑purpose flour, unsweetened cocoa powder, baking soda, and sea salt. Sifting these dry ingredients not only removes clumps but also aerates the mixture, giving the cookies a lighter texture. This is the foundation of your cookie.
- In a separate bowl, beat the softened butter, granulated sugar, and brown sugar with an electric mixer on medium speed until the mixture is fluffy and light. This process incorporates air, which helps the cookies rise slightly during baking. You’ll notice the mixture turning pale and airy.
- Add the egg and vanilla extract to the butter mixture, beating until well combined. The egg acts as a binder, while vanilla adds depth. If you’re vegan, replace the egg with a flaxseed “egg” or a commercial egg replacer.
- Gradually fold the dry ingredients into the wet mixture, mixing on low speed until just combined. Avoid overmixing, or the cookies will become tough. The dough should be thick yet pliable. This step is critical for achieving the right consistency.
- Stir in the espresso powder and chocolate chips. The espresso should dissolve into the dough, giving a subtle coffee aroma. The chocolate chips should be evenly distributed to ensure each bite has a chocolate burst.
- Using a cookie scoop or tablespoon, drop rounded dough onto the prepared baking sheet, spacing them about 2 inches apart. The cookies will spread, so leave enough room. If you like a thicker cookie, use a larger scoop.
- Sprinkle a pinch of sea salt over each cookie before baking. This final touch caramelizes during baking, creating a slightly crisp edge. The salt enhances the chocolate, balancing the sweetness.
- Bake for 10-12 minutes, or until the edges are set but the centers still look slightly underbaked. The cookies will continue to firm up as they cool. The key is to avoid overbaking; the goal is a chewy center.
- Remove the sheet from the oven and let the cookies cool on it for 5 minutes. This allows the structure to set. Then transfer the cookies to a wire rack to cool completely. This step prevents sogginess from steam.
That’s it — you did it. But hold on, I've got a few more tricks that'll take this to another level...
Insider Tricks for Flawless Results
The Temperature Rule Nobody Follows
Many bakers bake at the highest temperature they can, hoping for a quick bake. In reality, baking at 350°F allows the cookies to rise slowly, creating a chewy center and a crisp edge. If you bake at 375°F, the cookies will spread too much and lose their chewy texture. I’ve experimented with 325°F, and the result was a softer cookie—great for a dessert topping, but not for this recipe.
Why Your Nose Knows Best
The first hint that your cookies are done is the scent. As soon as the chocolate aroma hits your nose, the baking is almost over. That’s when the cookies are at their peak flavor. If you wait too long, the chocolate can burn slightly, giving a bitter taste. Trust your senses; they’re your best judge.
The 5-Minute Rest That Changes Everything
After baking, let the cookies rest on the pan for 5 minutes. This resting period allows the interior to set, preventing them from breaking apart when you transfer them. The heat continues to cook the cookies slightly, so the flavor deepens during this time. I always keep a timer handy to avoid over‑resting, which can make the cookies too hard.
Use a Silicone Mat for Even Baking
A silicone mat keeps cookies from sticking and ensures even browning. The non‑stick surface means you can scrape the dough off easily, reducing waste. If you’re baking in a metal pan, double‑line with parchment paper to avoid uneven heat distribution.
Freeze the Dough for Quick Snacks
If you’re short on time, roll out the dough, cut into shapes, and freeze. When you’re ready for a snack, bake directly from the freezer for 10-12 minutes. The cookies will stay chewy and fresh, and you’ll never run out of a quick treat.
Creative Twists and Variations
This recipe is a playground. Here are some of my favorite ways to switch things up:
Almond‑Infused Delight
Swap out half the flour for almond flour and add chopped almonds for extra crunch. The nutty flavor pairs wonderfully with the chocolate. It’s also a gluten‑free option if you use a gluten‑free flour blend.
Coconut Crumble
Replace the butter with coconut oil and sprinkle shredded coconut on top before baking. The coconut adds a tropical twist and a subtle sweetness that complements the espresso.
Minty Chocolate Bliss
Add 1/4 teaspoon of peppermint extract to the wet ingredients for a minty undertone. The mint pairs beautifully with chocolate and gives the cookie a refreshing finish.
Dark Chocolate Explosion
Use dark chocolate chunks instead of chips for a richer, bittersweet flavor. The chunks melt slowly, creating pockets of molten chocolate in each bite.
Spiced Cookie
Add a pinch of cinnamon and a dash of cayenne pepper to the dry mix. The spice adds warmth and a subtle heat that elevates the chocolate’s depth.
Vegan Version
Use a plant‑based butter, replace the egg with a flaxseed “egg,” and choose dairy‑free chocolate chips. The texture remains chewy, and the flavor stays on point.
Storing and Bringing It Back to Life
Fridge Storage
Store baked cookies in an airtight container at room temperature for up to 5 days. If you want them to stay chewy, place a slice of apple or a few slices of bread in the container; the moisture will keep them soft.
Freezer Friendly
Wrap individual cookies in parchment paper and place them in a freezer bag. They’ll stay fresh for up to 3 months. When you’re ready to eat, let them thaw at room temperature for 15 minutes.
Best Reheating Method
Preheat your oven to 300°F (150°C). Place the cookies on a baking sheet and heat for 4-5 minutes, or until warm. A tiny splash of water on the parchment paper before reheating steams the cookies back to perfection, restoring that soft, chewy center.